

This post may contain affiliate links. Please see my disclosure policy for details.
Creating a Cozy Studio Apartment: My Guide to Making Small Spaces Feel Like Home
Cozy studio apartment decorating starts with understanding that every square inch matters, and I’ve learned this the hard way through years of small-space living.
You’re staring at your tiny studio wondering how the hell you’re going to make this feel like home, aren’t you?
That cramped feeling when everything’s jumbled together – your bed, your kitchen, your entire life in one room.
I get it.
I’ve been there, standing in a 300-square-foot box thinking I’d made a terrible mistake.
But here’s what changed everything for me: small doesn’t have to mean uncomfortable.
Why Most People Get Studio Decorating Dead Wrong
Most folks approach studio decorating like they’re furnishing a regular apartment.
They shove in a full-size everything and wonder why it feels like a furniture showroom exploded.
The secret sauce isn’t about having less stuff – it’s about having the RIGHT stuff.
Every piece needs to work harder than a contestant on Hell’s Kitchen.
I learned this when I crammed a queen bed, full dining table, and oversized sofa into my first studio.
The result? I couldn’t walk without doing some weird furniture obstacle course.
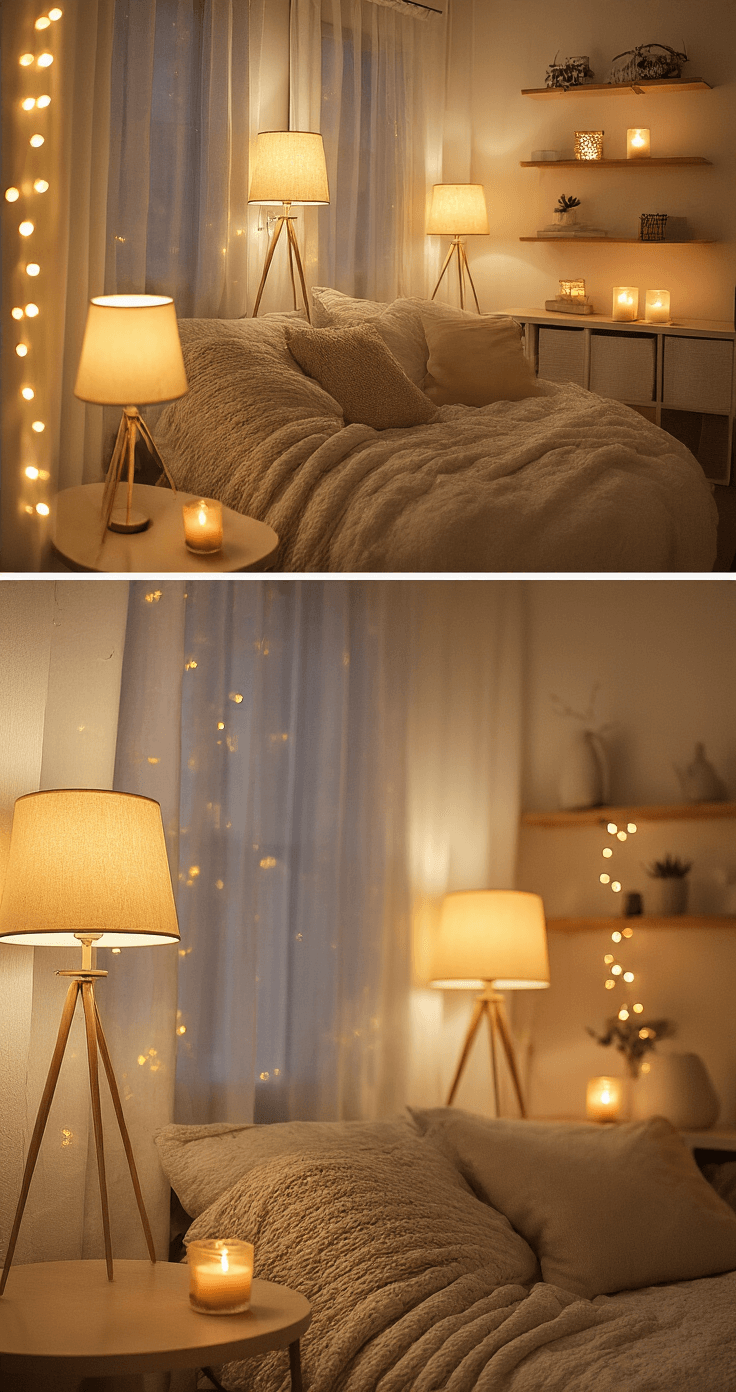
Master the Art of Warm, Layered Lighting
Forget that harsh overhead light bulb glaring down like an interrogation room.
Lighting is your secret weapon for creating cozy vibes.
Here’s my foolproof lighting recipe:
- Start with ambient lighting: Get yourself table lamps for soft, warm light
- Add task lighting: Reading lights, under-cabinet kitchen lights
- Layer in mood lighting: String lights aren’t just for college dorms
- Include accent lighting: Candles, salt lamps, whatever makes you smile
I use at least four different light sources in my studio.
Sounds excessive?
Walk into my place at night and you’ll feel like you’ve stepped into a warm hug.
The magic happens when you can control different zones with different lighting.
Bright task lighting for cooking, soft ambient light for Netflix time, dim accent lighting for winding down.
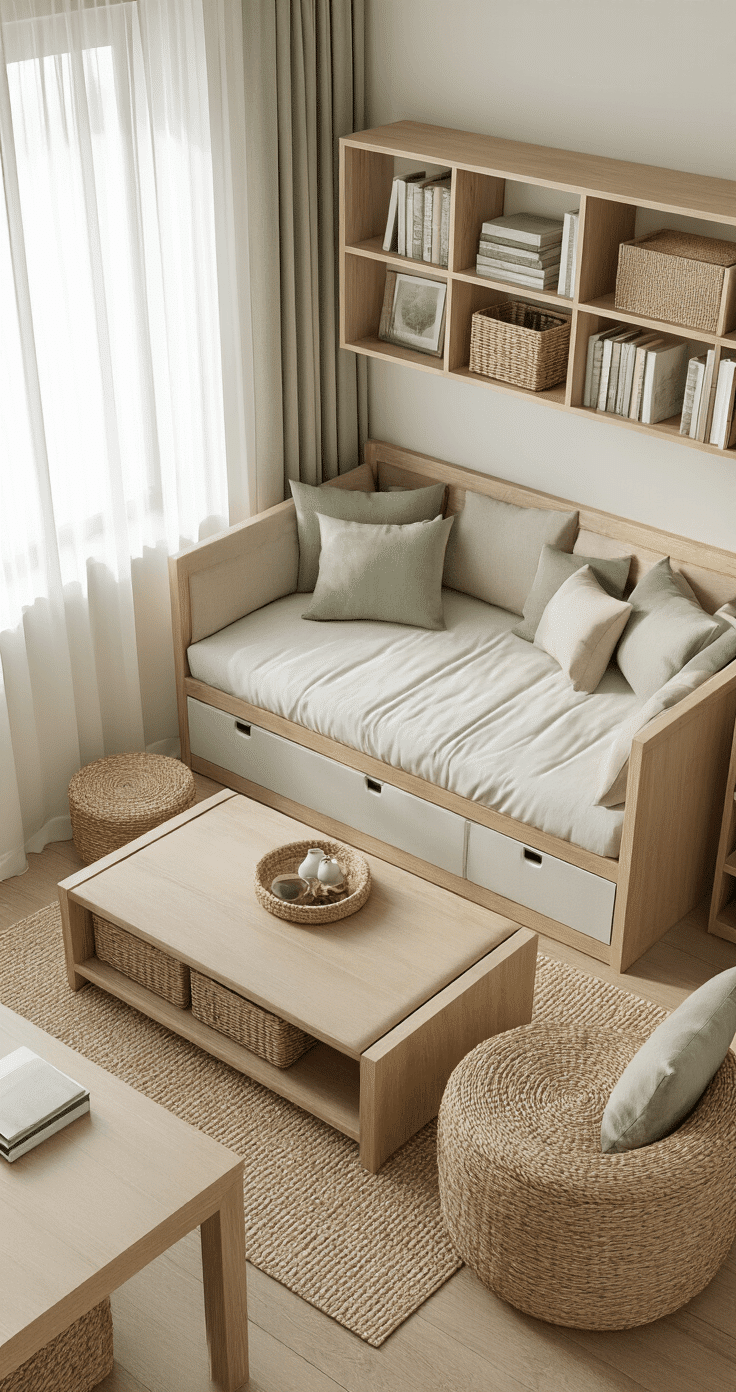
Choose Multi-Functional Furniture That Actually Works
This is where most people either nail it or fail spectacularly.
Every piece of furniture should do at least two jobs.
My current setup includes:
- Storage ottoman: Footrest, extra seating, and hiding spot for throw blankets
- Daybed with drawers: Sofa by day, bed by night, storage always
- Nesting tables: One table when you need it, two when friends visit
- Bookshelf room divider: Storage and visual separation
The game-changer was finding a daybed with built-in storage.
It eliminated my need for both a sofa AND a dresser.
Pro tip: Rounded furniture feels way cozier than sharp, angular pieces.
Your shins will thank you, and the space flows better.
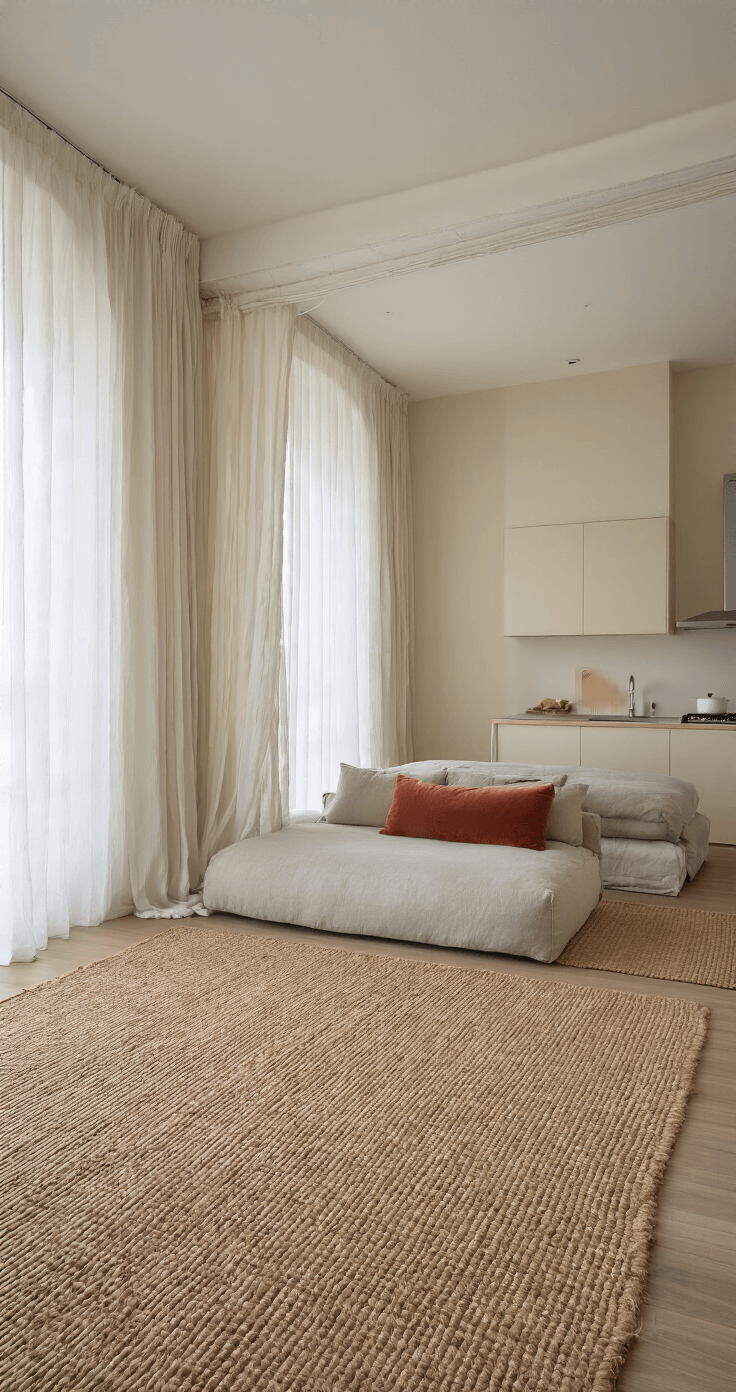
Create Distinct Zones Without Building Walls
Here’s where the magic really happens.
You can trick your brain into thinking you have separate rooms.
I use these zoning strategies:
- Area rugs: Each “room” gets its own rug to define the space
- Furniture placement: Float your sofa to separate sleeping and living areas
- Curtains or screens: Room divider curtains create privacy without blocking light
- Different lighting: Each zone has its own lighting personality
The biggest revelation was using rugs.
I have three different rugs – one under my bed, one in the living area, one by the kitchen.
Suddenly my studio felt like it had actual rooms.
Your brain processes these visual cues and creates the feeling of separate spaces.
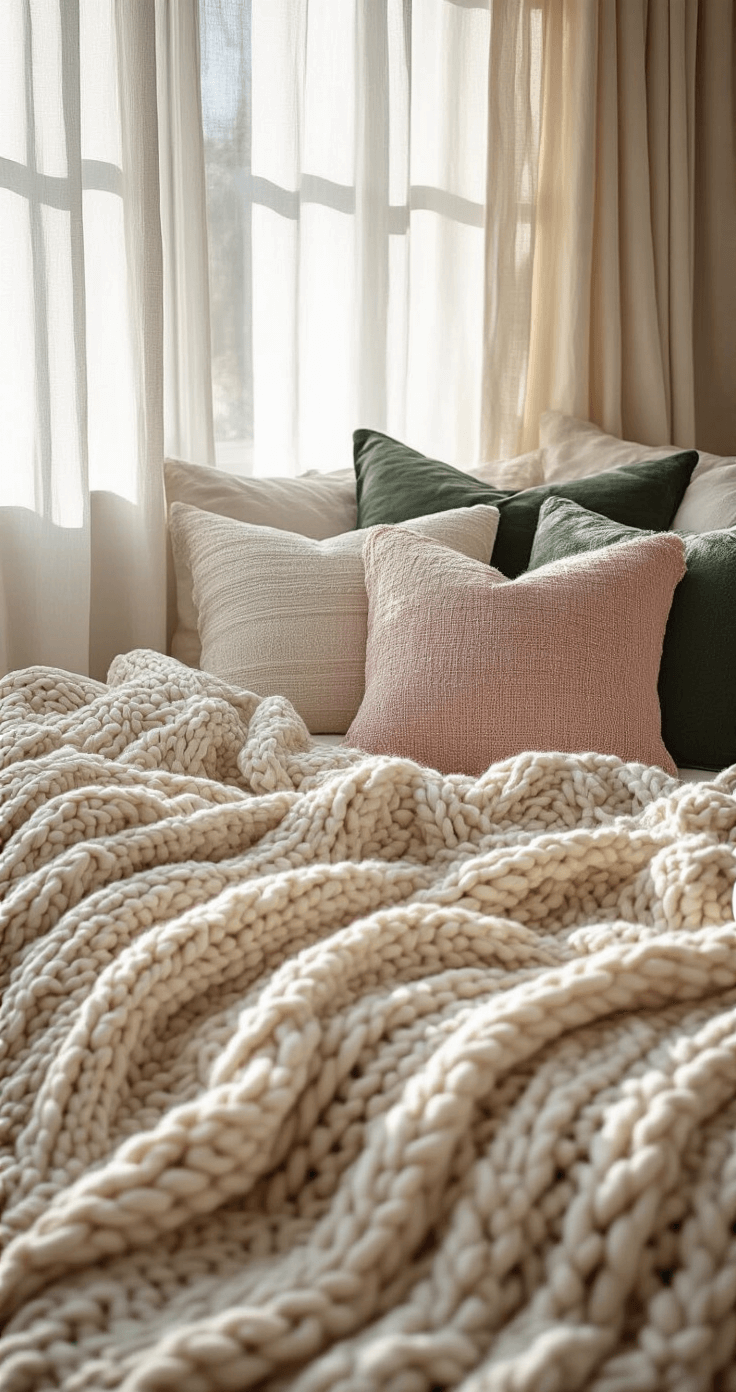
Layer Textiles Like Your Comfort Depends on It
Because honestly? It does.
Textiles are what transform a space from “place I sleep” to “home I love.”
My textile layering system:
- Base layer: Neutral sheets and curtains
- Comfort layer: Chunky knit throw blankets and soft pillows
- Personality layer: Patterned pillows or colorful throws
- Seasonal layer: Swap these out to keep things fresh
I keep at least five different throw blankets in rotation.
Sounds crazy until you realize each one serves a different purpose – the lightweight one for summer naps, the chunky one for movie nights, the fancy one for when people visit.
The key is sticking to a cohesive color palette so nothing looks chaotic.
Use Mirrors to Hack Your Space
Mirrors are basically magic for small spaces.
They double your visual space and bounce light around like nobody’s business.
I have three mirrors strategically placed:
- One large floor mirror opposite my window (hello, doubled natural light!)
- One medium mirror near my entryway (makes the space feel larger immediately)
- One small decorative mirror in my kitchen area (reflects my string lights beautifully)
The trick is placing them where they reflect something beautiful – a window, your lighting, your plants.
Don’t just slap them on random walls.
")
")
")


