

This post may contain affiliate links. Please see my disclosure policy for details.
Dollar Tree Christmas Tree Ideas That’ll Make Your Neighbors Think You Hired a Designer
Contents
- Dollar Tree Christmas Tree Ideas That’ll Make Your Neighbors Think You Hired a Designer
- Why Your Dollar Tree Christmas Tree Looks Sad (And How to Fix It)
- The Trees Worth Grabbing at Dollar Tree Right Now
- The $15 Designer-Look Christmas Tree Setup
- My Favorite Dollar Tree Tree Hack: The Wreath Transformation
- Lighting Your Dollar Tree Tree Without Looking Cheap
- The Centerpiece That’ll Blow Your Mind
Dollar Tree Christmas tree decorating doesn’t mean your home has to look cheap.
I’ll admit it—when I first walked into Dollar Tree for Christmas decorations, I felt a bit sheepish. But after five years of transforming my home with their $1.25 finds, I’ve learned something crucial: it’s not about how much you spend, it’s about how you style it.
🖼 Steal This Look
- Paint Color: Sherwin-Williams Pure White SW 7005
- Furniture: slim-profile pencil tree or corner tree form to maximize Dollar Tree ornament impact in tight spaces
- Lighting: warm white fairy lights with battery-operated timer function
- Materials: metallic spray-painted plastic ornaments, wired ribbon, floral wire, foam craft balls, jute twine
I’ve learned that the magic happens in the editing—stepping back, removing the ornament that fights the rest, and trusting that restraint reads as sophistication even when everything cost a dollar.
Why Your Dollar Tree Christmas Tree Looks Sad (And How to Fix It)
Listen, I’ve been there. You buy that little artificial Christmas tree from Dollar Tree, plop it on your mantel, and think “this looks… budget.”
The problem isn’t the tree. It’s what you’re not doing with it.
Most people make three massive mistakes:
- Leaving it bare or barely decorated (sparse equals cheap-looking, always)
- Using mismatched decorations that create visual chaos instead of cohesion
- Skipping the layering technique that professional decorators swear by
I’m going to show you exactly how to avoid these pitfalls.
✎ Steal This Look
- Paint Color: Benjamin Moore Chantilly Lace OC-65
- Furniture: floating mantel shelf in white oak or painted poplar, 48-60 inches wide
- Lighting: plug-in picture light or battery-operated LED mantel sconces with warm 2700K temperature
- Materials: faux fur tree skirt or mini plaid throw, velvet ribbon, mercury glass ornaments, pine garland filler
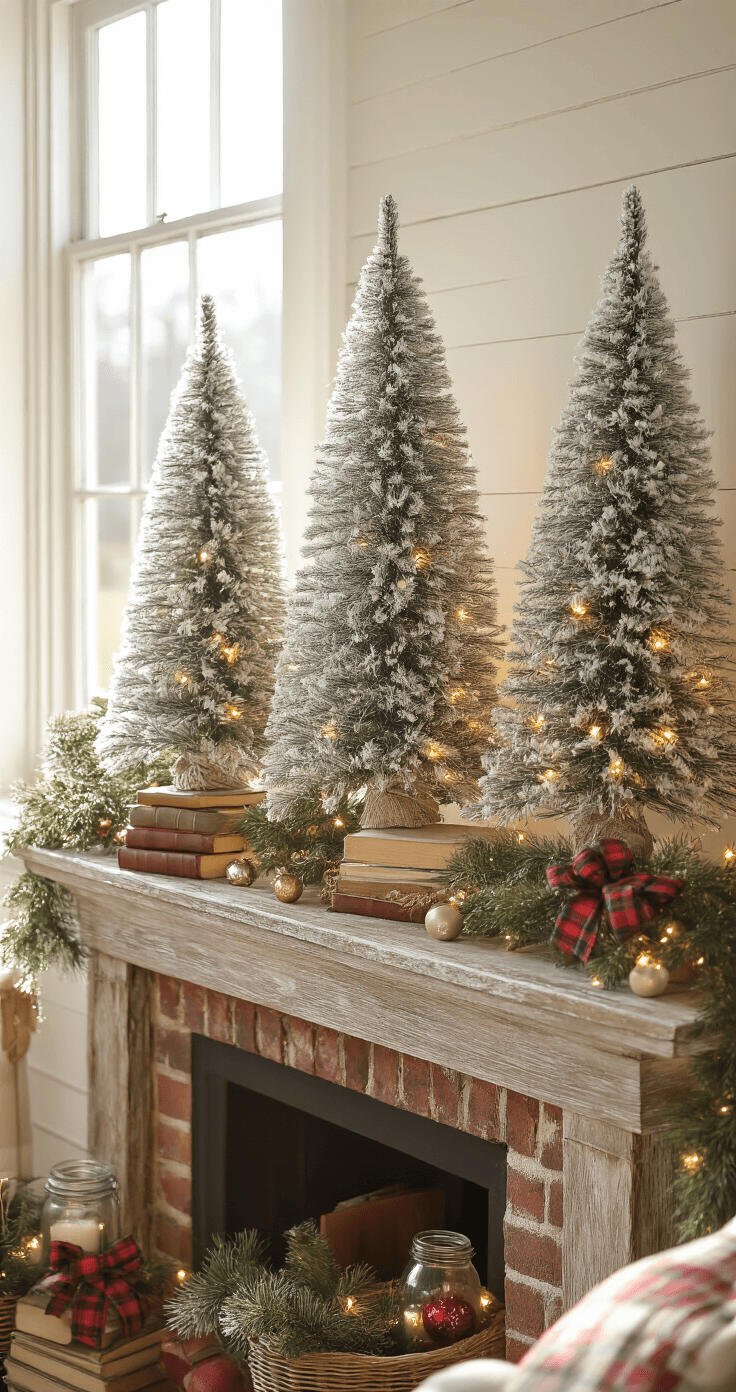
This is the project that converts skeptics—I’ve seen $5 trees look like they came from a boutique holiday market with just twenty minutes of strategic layering, and it’s the one guests always ask about.
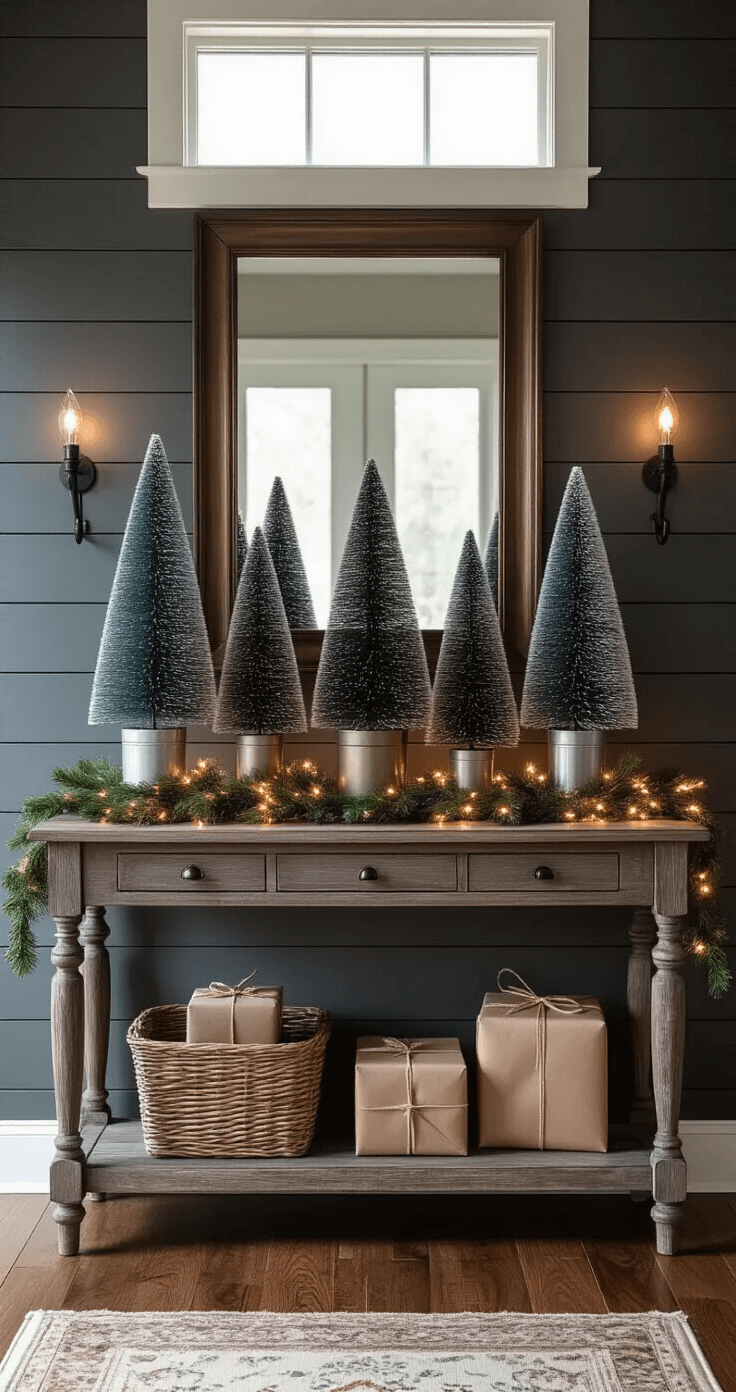
The Trees Worth Grabbing at Dollar Tree Right Now
Not all Dollar Tree Christmas trees are created equal. I’ve tested them all over the years, and here’s what actually works:
The Winners:
- 24-inch tabletop trees – Perfect for side tables and countertops
- Mini bottle brush trees – Comes in packs, ideal for mantels and vignettes
- Tinsel trees in multiple colors – Gold, silver, white, and traditional green
- Flat-backed trees – Designed to hang on walls or lean against surfaces
Skip These:
- Super thin trees with visible gaps (no amount of decorating saves these)
- Trees with wonky branches that don’t hold ornaments
Pro tip: Buy extras of the bottle brush trees. You’ll want them for projects I’m sharing below.
★ Steal This Look
- Paint Color: use Farrow & Ball brand. Match the ACTUAL wall color in the image. Format: Farrow & Ball ColorName CODE
- Furniture: specific furniture for this room
- Lighting: specific lighting fixture
- Materials: key textures and materials
I’ve learned the hard way that flat-backed trees are lifesavers in tight entryways where every square inch counts, and my own hallway tree has survived three moves.
The $15 Designer-Look Christmas Tree Setup
I created an entire mantel display last year that people thought came from Pottery Barn. Total cost? Fifteen bucks.
Here’s my exact formula:
Base Layer ($5):
- Three bottle brush trees in varying heights
- Position them in a triangle formation, not a straight line
Middle Layer ($5):
- White chalk paint for a flocked snow effect (one bottle does 20+ trees)
- Lightly brush the tips of branches only
- Let some green show through for dimension
Top Layer ($5):
- Mini ornaments from their 30-pack (that’s 23 cents per ornament)
- Battery-powered fairy lights woven through the branches
- Ribbon scraps tied into tiny bows
The secret? Layer, layer, layer. Each element builds on the previous one.

★ Steal This Look
- Paint Color: use Behr brand. Match the ACTUAL wall color in the image. Format: Behr Whisper White 75
- Furniture: narrow floating mantel shelf in white oak finish, slim profile to maximize visual space for tree display
- Lighting: warm white battery-operated fairy lights with copper wire, 20-count micro LED strand
- Materials: bristled bottle brush texture, matte chalk paint finish, sheer organza ribbon, frosted plastic mini ornaments
This setup proves you don’t need a towering spruce to capture holiday magic; there’s something deeply satisfying about crafting a scene that stops people mid-conversation to ask where you shopped.
🛒 Get The Look
My Favorite Dollar Tree Tree Hack: The Wreath Transformation
This changed everything for me. Instead of buying an overpriced wreath, I make my own using multiple Dollar Tree trees.
What You Need:
- 4-6 small Christmas trees (depending on wreath size)
- Wire wreath frame or a foam base
- Hot glue gun and plenty of glue sticks
- Floral wire
- Your choice of embellishments
The Process:
Disassemble the trees carefully, saving the best branches. Wrap each branch around the wreath form, securing with wire. Keep going until you achieve your desired fullness. Fill gaps with hot glue and additional sprigs. Add a statement bow using Dollar Tree’s $1.50 ribbon.
I made three wreaths last Christmas. One for my door, one for above the fireplace, one as a gift. People asked where I bought them.
The cost per wreath? About $7.

🏠 Steal This Look
- Paint Color: use Valspar brand. Match the ACTUAL wall color in the image. Format: Valspar ColorName CODE
- Furniture: specific furniture for this room
- Lighting: specific lighting fixture
- Materials: key textures and materials
This wreath hack speaks to anyone who’s stood in craft store aisles gasping at $45 wreaths—there’s genuine pride in watching neighbors do a double-take at your front door.
🌊 Get The Look
Lighting Your Dollar Tree Tree Without Looking Cheap
Here’s where most people blow it. They either skip lights entirely or use those harsh white LEDs that scream “afterthought.”
My lighting strategy:
Start with warm white battery-operated lights. Wrap them around the CENTER of your tree first, pushing them deep into the branches. This creates an inner glow that looks expensive.
Then add a second strand around the outer branches. Two battery packs give you enough light without overwhelming a small tree.
For icicle lights: These are my secret weapon. Their draping effect works beautifully on Dollar Tree trees. Wrap them intentionally around branches, letting them cascade naturally. It looks like you spent time on it (even though it takes three minutes).
🖼 Steal This Look
- Paint Color: use PPG brand. Match the ACTUAL wall color in the image. Format: PPG ColorName CODE
- Furniture: specific furniture for this room
- Lighting: specific lighting fixture
- Materials: key textures and materials
I’ve learned that lighting is where budget trees live or die—spend your energy here and guests will never guess your tree’s humble origins.
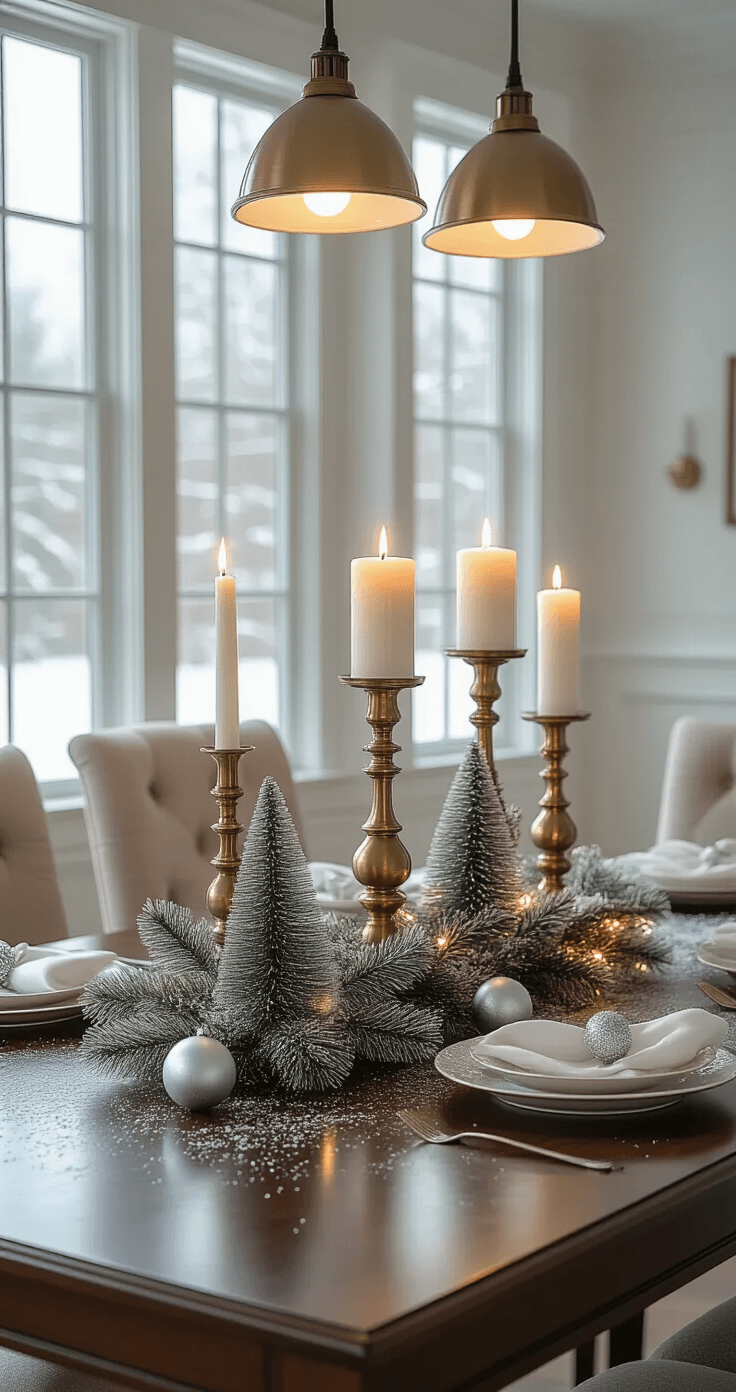
The Centerpiece That’ll Blow Your Mind
I stumbled onto this by accident when I had leftover trees and candlesticks.
The Setup:
Take three candlesticks in varying heights (Dollar Tree has these too). Wrap bottle brush tree sprigs around each candlestick. Secure with thin wire or fishing line (invisible = elegant). Add battery-operated tea lights on top.


[…] Think Christmas tree, not telephone pole […]