

This post may contain affiliate links. Please see my disclosure policy for details.
DIY Christmas Decor That’ll Make Your Neighbors Green with Envy (And Your Wallet Happy)
The DIY Christmas decor that looked best was a handmade wreath made from branches, dried oranges, and a burlap ribbon. DIY Christmas decor adds a personal touch to the holidays. The key is using natural materials and keeping the design simple.
You know that sinking feeling when December rolls around and your home looks about as festive as a hospital waiting room?
I’ve been there.
Staring at my bare walls while my credit card balance screamed bloody murder from last year’s holiday shopping spree.
But here’s the thing – I discovered something that changed my entire approach to holiday decorating.
You can create stunning, Instagram-worthy Christmas decor using nothing more than items from Dollar Tree and a few basic crafting supplies you probably already have stuffed in a drawer somewhere.
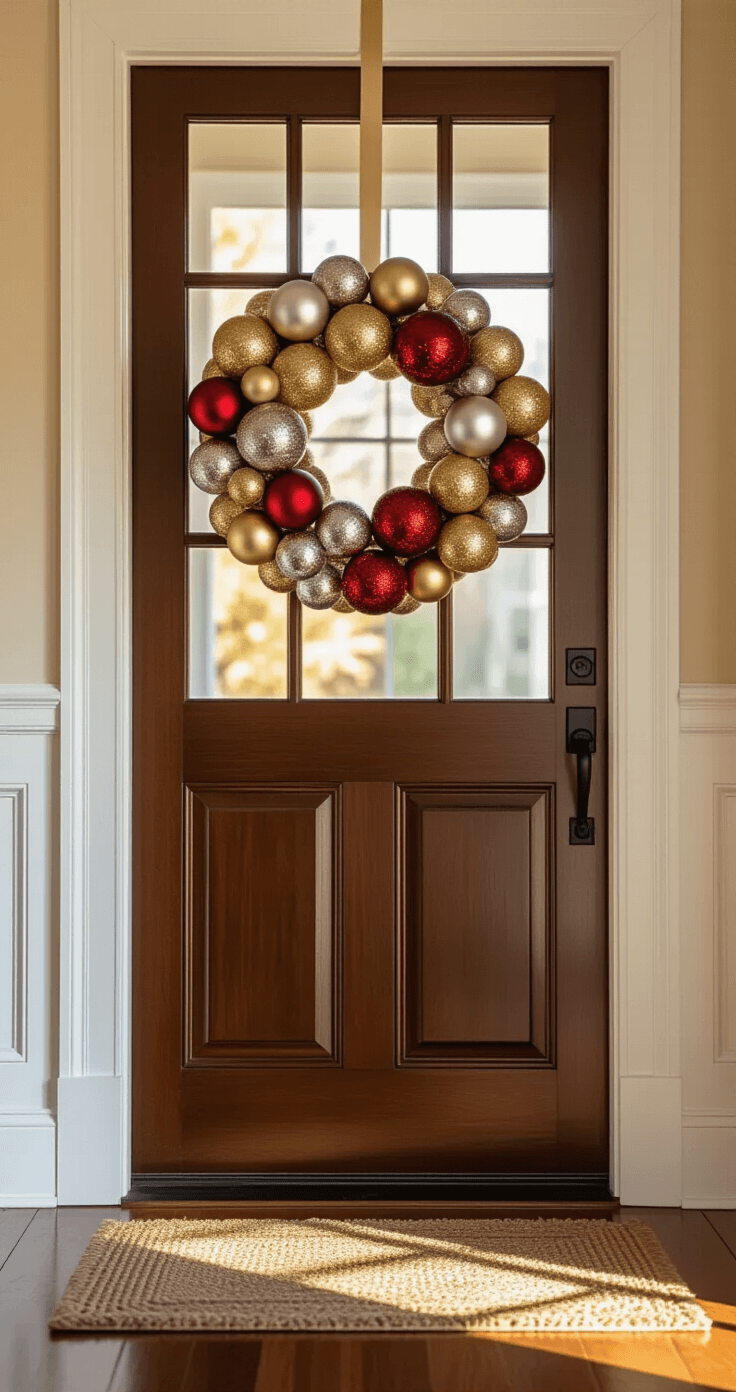
Why Your Christmas Decor Game Needs This Budget-Friendly Makeover
Let me paint you a picture.
Last year, I walked into a high-end home goods store and nearly choked on my peppermint latte when I saw a simple ornament wreath priced at $89.
Eighty-nine dollars!
For something I could make in my kitchen for less than ten bucks.
That’s when I realized the home decor industry has been pulling a fast one on us holiday enthusiasts.
Here’s what most people don’t know:
- Professional designers use the same basic techniques I’m about to share
- The “expensive” look comes from layering textures, not expensive materials
- Strategic color coordination beats costly store-bought pieces every time
The Essential Arsenal: What You Actually Need (Spoiler: It’s Less Than You Think)
Forget those intimidating craft supply lists that read like a hardware store inventory.
I’m talking about real-world DIY here.
Basic Tools (You Probably Own These):
- Scissors
- Hot glue gun (best $5 investment ever)
- Paintbrush
- Wire cutters (or sturdy kitchen shears)
Dollar Tree Shopping List:
- Foam wreaths
- Plastic ornaments
- Ribbon spools
- Battery-operated string lights
- Spray paint (grab gold, silver, and white)
- Plastic figurines
- Foam boards
Time Investment:
Most projects take 30 minutes to 2 hours. I’m not asking you to dedicate your entire weekend to crafting.
Project #1: The Ornament Wreath That Stops Traffic
This wreath literally made my mail carrier stop and compliment my front door.
True story.
What You Need:
- One foam wreath base ($1.25)
- 60-80 plastic ball ornaments ($3-4 total)
- Festive bow ($1)
- Hot glue
The Method:
- Start with your biggest ornaments – these become your foundation layer
- Hot glue them directly to the foam – don’t worry about perfection yet
- Fill gaps with medium-sized balls – this creates depth
- Tuck tiny ornaments into remaining spaces – like holiday Tetris
- Add your bow at the bottom – instant polish
Pro Tip: Mix matte and shiny ornaments for that expensive designer look.
Save this article
Enter your email and we'll send it straight to your inbox.
Total Cost: Under $7
Time: 45 minutes
Difficulty: Beginner (seriously, my 8-year-old nephew helped)
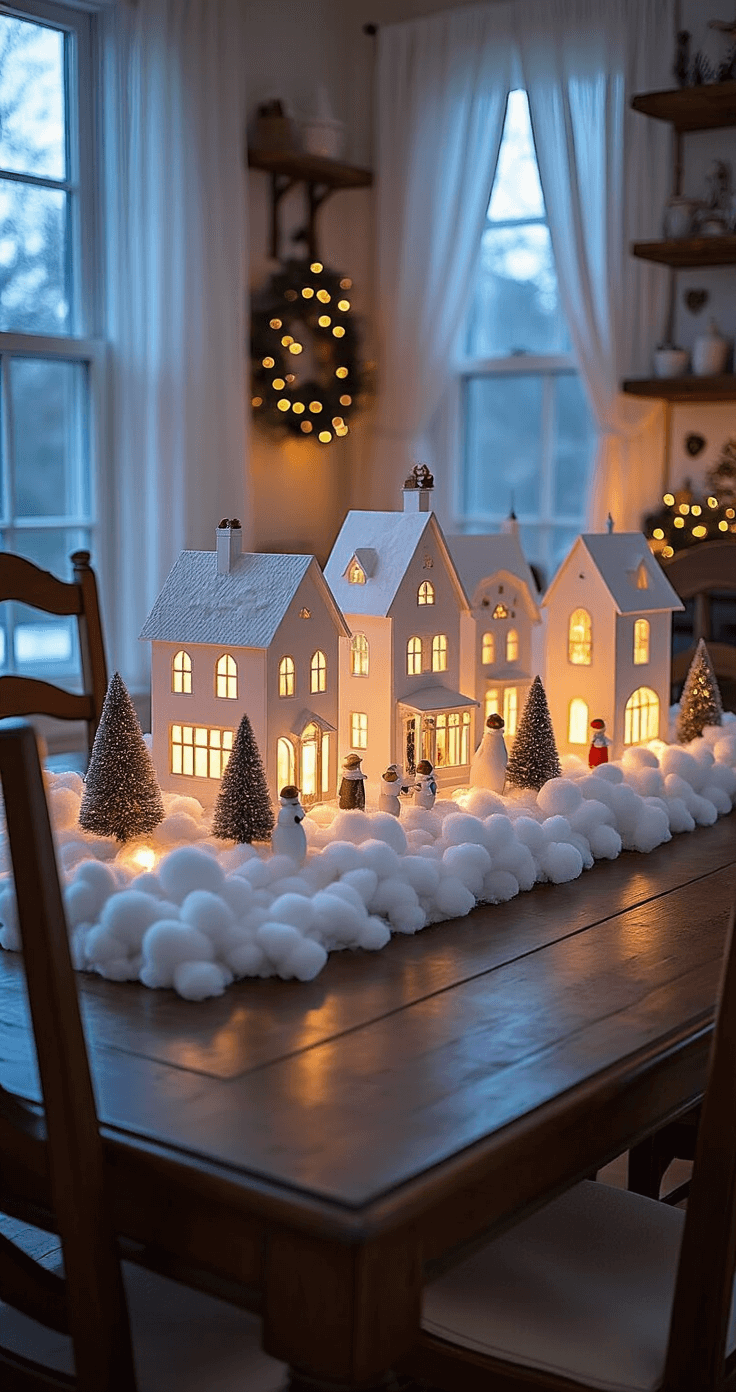
Project #2: Christmas Village Magic Using Cardboard and Dreams
Remember those charming Christmas villages that cost more than your monthly Netflix subscription?
We’re making our own.
Supplies Needed:
- Empty cereal boxes
- White spray paint
- Battery-operated LED lights
- Cotton batting (fake snow)
- Small figurines from Dollar Tree
The Game Plan:
Step 1: Create Your Buildings
- Cut cereal boxes into house shapes
- Don’t overthink the architecture – wonky is charming
Step 2: Paint Everything White
- Two light coats work better than one heavy coat
- Let each coat dry completely (patience, grasshopper)
Step 3: Add the Magic
- Poke holes for string lights before final assembly
- Thread lights through – this creates that cozy glow
- Layer cotton batting around the base for snow drifts
Step 4: Population Time
- Arrange your tiny figurines like they’re living their best Christmas life
- Create little scenes – kids building snowmen, families walking
Total Investment: $8-12
Time Commitment: 1.5 hours
Wow Factor: Off the charts
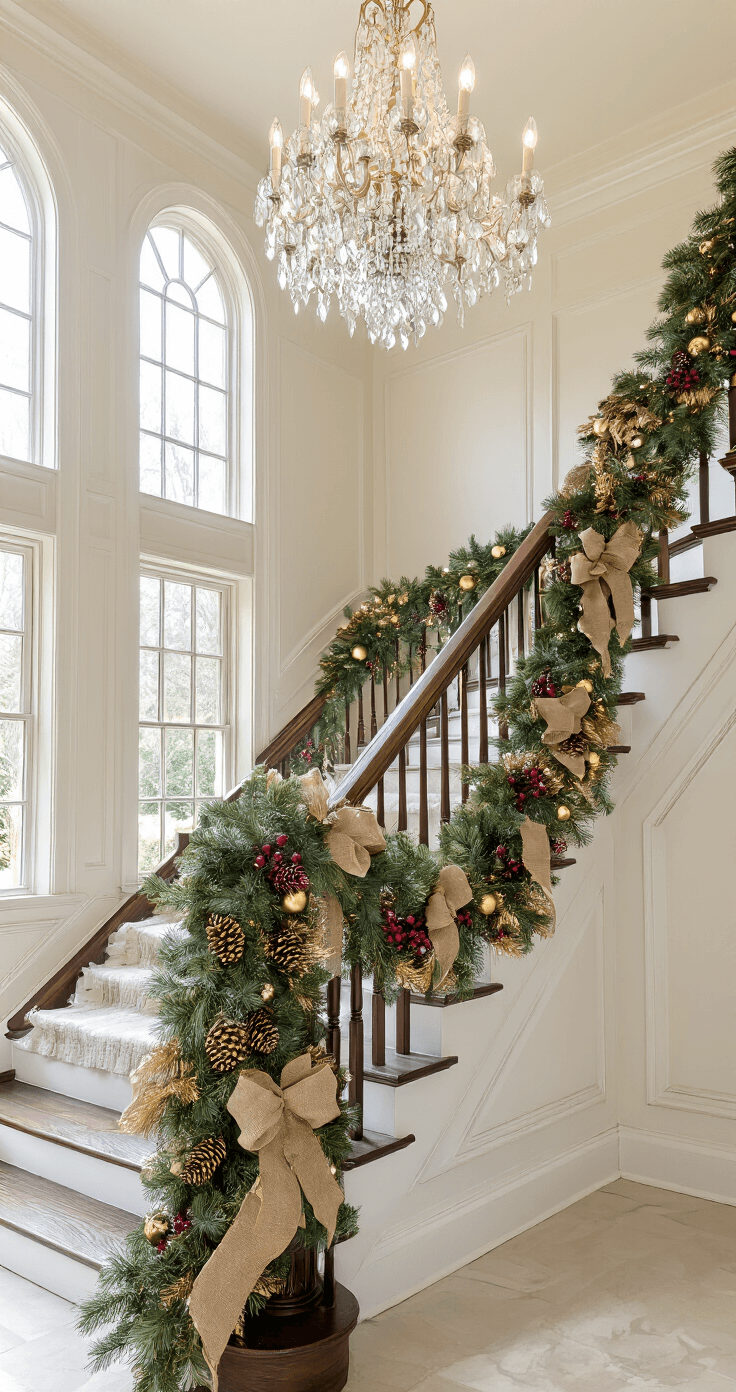
Project #3: Garland That Actually Looks Professional
Store-bought garland either looks cheap or costs a fortune.
This DIY version hits that sweet spot of gorgeous and affordable.
Shopping List:
- Dollar Tree artificial pine garland (usually $1.25 per 9-foot strand)
- Pinecones from your yard (or Dollar Tree)
- Red berries (artificial ones are fine)
- Burlap ribbon
- Gold spray paint
The Process:
Prep Work:
- Spray paint half your pinecones gold
- Let the others stay natural
- Cut burlap ribbon into 6-inch strips
DIY Christmas decor works when the materials are natural and the design is simple. Use branches, dried fruit, and fabric to create unique decorations. The home should feel warm and handmade.
- Fluff your base garland – this step is crucial for fullness
- <
Keep this one for later
We'll email you the link so you can come back to it.


[…] green for that “I hunt my own Christmas trees” […]