
This post may contain affiliate links. Please see my disclosure policy for details.
Hey there, design enthusiasts and kitchen styling mavens!
Why do some kitchen photos make you stop scrolling, while others blend into the background?
The secret sauce is in the details – specifically, how you capture your kitchen’s backsplash. This comprehensive guide will transform your kitchen photography from “meh” to “magical” in just a few strategic steps.
Time and Effort Breakdown
Contents
Photography Snapshot:
- Total time investment: 1.5–2.5 hours
- Photography session: 30–60 minutes
- Styling prep: 30–45 minutes
Essential Equipment You’ll Need
Camera Gear:
- High-resolution camera or smartphone (12MP+)
- Natural lighting setup
- Ring light or softbox (backup for cloudy days)
Styling Arsenal:
- Colorful utensils
- Fresh greenery or flowers
- Decorative small appliances
- Cutting boards
- Seasonal props

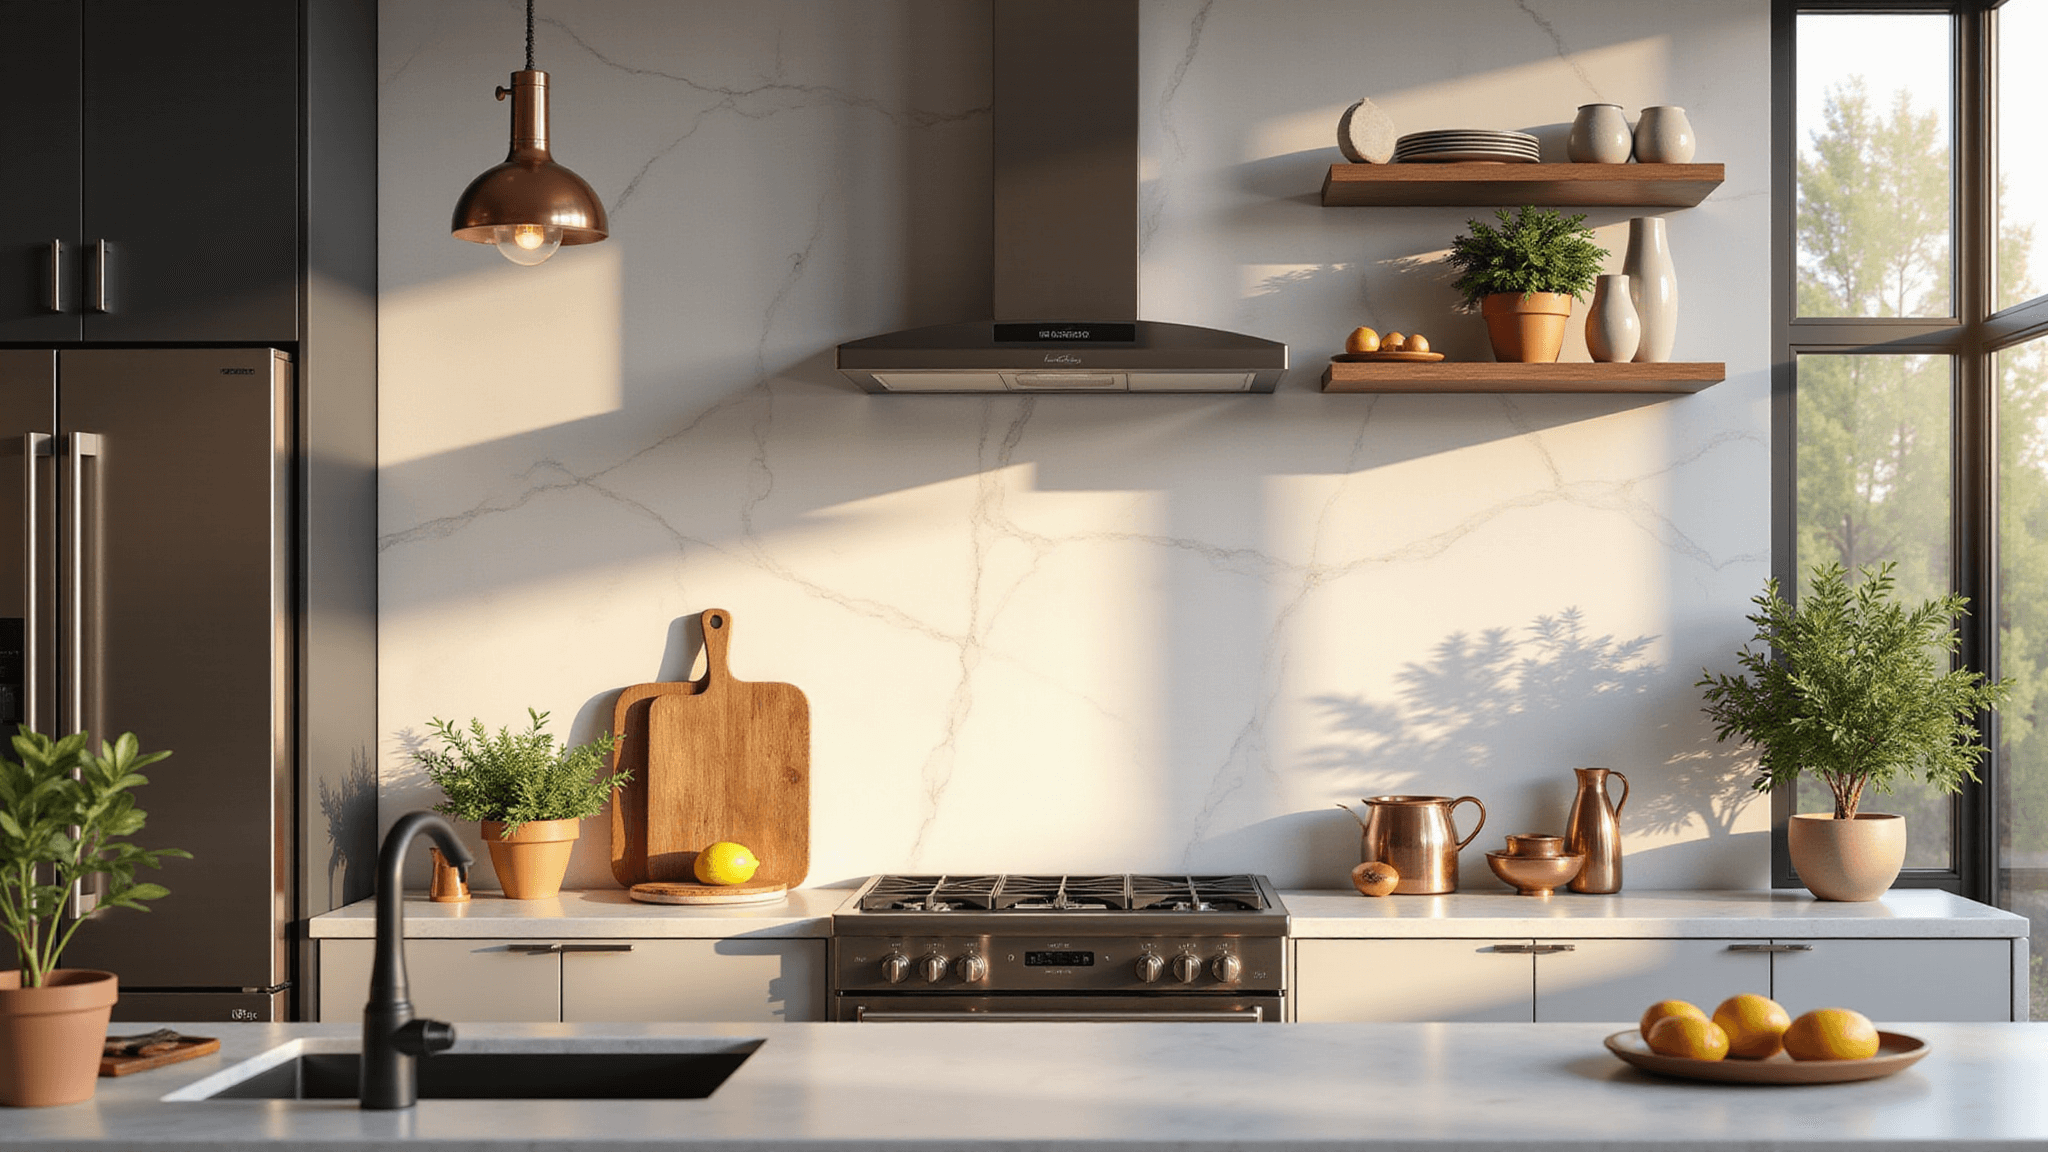
🏠 Steal This Look
- Paint Color: Benjamin Moore Chantilly Lace OC-65
- Furniture: open walnut floating shelves with brass brackets
- Lighting: Schoolhouse Electric Isaac Pendant in aged brass
- Materials: hand-glazed zellige tile, honed Carrara marble, brushed brass, live-edge walnut
Your backsplash is the jewelry of your kitchen; these shots often become the most-saved images in your portfolio because they capture that aspirational moment between cooking and living.
Pro Styling Techniques
1. Create Visual Interest
Focal Point Strategies:
- Choose a distinctive backsplash (marble, patterned tile, bold color)
- Use contrast in colors and textures
- Implement the rule of thirds for balanced composition
2. Lighting Magic
Capture Perfect Lighting:
- Shoot during late morning/early afternoon
- Use natural light near windows
- Avoid harsh shadows
- Adjust white balance for consistent warmth
3. Composition Secrets
Camera Angles That Wow:
- Shoot from eye-level for wide shots
- Use 45-degree angles for detail captures
- Keep camera settings at f/4–f/7 aperture
- Maintain low ISO (100–400)

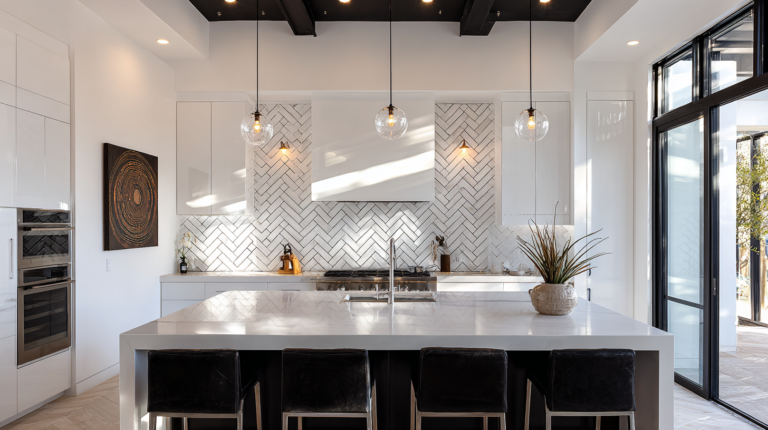
💡 Steal This Look
- Paint Color: Farrow & Ball Railings 31
- Furniture: open walnut floating shelves with brass brackets
- Lighting: Schoolhouse Electric Isaac Pendant in aged brass
- Materials: Carrara marble herringbone tile, unlacquered brass fixtures, white oak cabinetry, honed soapstone countertops
The kitchen backsplash is where daily life meets deliberate design—it’s the backdrop for morning coffee rituals and evening wine pours, so your photography should feel like a paused moment rather than a staged set.
Style Variations to Explore
Popular Backsplash Styles:
- Classic white subway tile
- Geometric patterns
- Marble slab
- Dark dramatic tiles (navy, black)
- Rustic shiplap

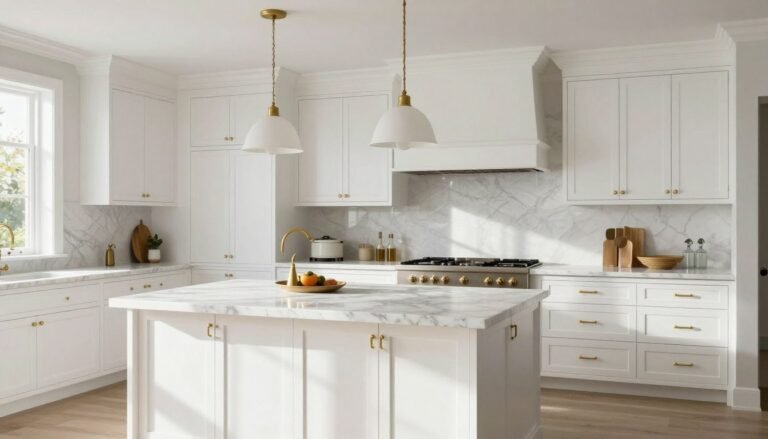
★ Steal This Look
- Paint Color: Behr Ultra Pure White PPU18-06
- Furniture: open shelving in natural white oak with black iron brackets, Carrara marble waterfall countertop island with integrated seating
- Lighting: Schoolhouse Electric Isaac Pendant in aged brass with 14-inch opal glass shade, hung in trio formation
- Materials: hand-glazed zellige tile with undulating surface, honed Calacatta Viola marble with dramatic veining, brushed brass grout, reclaimed barnwood shiplap with wire-brushed finish
The best kitchen photographers I know treat backsplash tile like jewelry for the room—they understand that catching that one glint of light across handmade glaze transforms a competent shot into an irresistible one.
Technical Optimization
Pinterest-Perfect Pins:
- Image size: 1000x1500px
- 2:3 aspect ratio
- High-resolution (1500px+ width)
- 2-4 sentence descriptive captions

✎ Steal This Look
- Paint Color: use Valspar brand. Match the ACTUAL wall color in the image. Format: Valspar Soft Wool 4003-1B
- Furniture: open shelving with brass brackets displaying white ceramic dishware
- Lighting: pendant lights with seeded glass shades over kitchen island
- Materials: subway tile with warm gray grout, honed marble countertops, brushed brass hardware
I spent three weekends reshooting my own kitchen backsplash before I realized the difference between a good photo and a Pinterest-worthy one came down to waiting for cloud-diffused morning light—your patience will be rewarded with images that genuinely stop the scroll.
Common Pitfalls to Avoid
Photography No-Nos:
- Use fresh produce as props
- Repurpose existing kitchen accessories
- Leverage natural lighting
- Rotate seasonal decor minimally
- Cluttered compositions
- Harsh, uneven lighting
- Generic descriptions
- Overcrowded styling

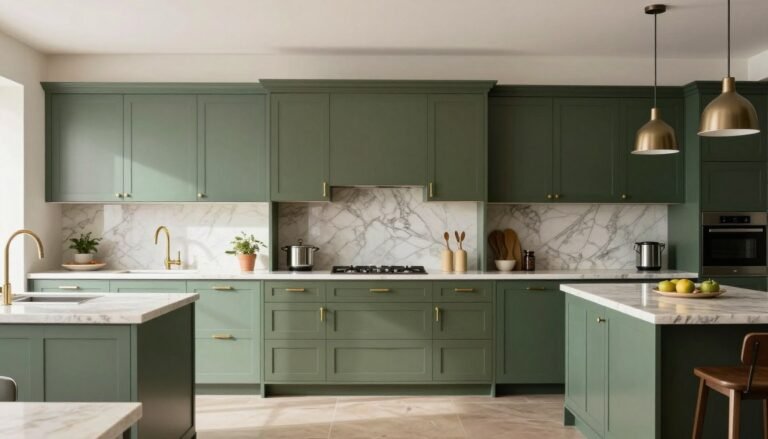
★ Steal This Look
- Paint Color: PPG Timeless White PPG14-05
- Furniture: open shelving with brass brackets
- Lighting: pendant lights with seeded glass shades
- Materials: handmade zellige tile, honed Carrara marble, aged brass
Kitchen backsplashes are the jewelry of your cooking space—I’ve seen too many beautiful installations disappear in photos because the photographer prioritized the appliances over the craftsmanship behind the range.
Budget-Friendly Tips
Cost-Effective Styling:
Final Touches
Post-Production Checklist:
- Color correction
- Vibrance adjustment
- Subtle sharpening
- Thoughtful cropping
Pro Tip: Create multiple pin variations to test engagement and keep your content fresh!

🎨 Steal This Look
- Paint Color: Clare Paint Fresh Kicks CL300
- Furniture: CB2 Drommen Acacia Wood Dining Table with live edge detail
- Lighting: Rejuvenation Haleigh Wire Dome Pendant in aged brass
- Materials: hand-glazed zellige tile, honed Calacatta Viola marble, unlacquered brass, raw white oak
I learned this the hard way after a client rejected an entire shoot because the zellige looked plastic-wrapped instead of artisanal—the camera sees what your eyes forgive, so restraint in post-production builds trust with discerning homeowners.
Your Next Steps
- Gather your equipment
- Clear your workspace
- Set up strategic lighting
- Style with intention
- Capture multiple angles
- Edit thoughtfully
- Share your masterpiece!
Remember, great kitchen photography isn’t about perfection—it’s about telling a story that makes viewers feel something.
Now go forth and create some visual magic! 🏠✨
Keywords: Kitchen backsplash, home decor photography, styling tips, Pinterest content creation, kitchen design inspiration

💡 Steal This Look
- Paint Color: Fine Paints of Europe Hollandlac Brilliant Oyster White W1002
- Furniture: open shelving with brass brackets displaying ceramic dishware
- Lighting: Schoolhouse Electric Isaac Pendant in aged brass
- Materials: hand-glazed zellige tile, honed Carrara marble, unlacquered brass, raw linen
Kitchen backsplashes carry the fingerprints of daily life—coffee splatters, wine rings, the ghost of last night’s dinner prep—and your photography should honor that beautiful imperfection rather than erase it.

[…] my years of kitchen design, I’ve learned that durability is […]
[…] Play with textures. Mix soft towels with sleek tiles for visual interest. […]