
This post may contain affiliate links. Please see my disclosure policy for details.
The Magic of Nightmare Before Christmas Tree Decorations
Contents
- The Magic of Nightmare Before Christmas Tree Decorations
- The Basics: What Makes a Nightmare Before Christmas Tree?
- DIY or Buy? That is the Question
- For the crafty creatures:
- For those who’d rather shop than craft:
- Styling Secrets: Making Your Tree a Showstopper
- Color Me Spooky: The Perfect Palette
- Lighting: Setting the Mood
- Budget-Friendly Tips for Broke Burton Fans
- Capturing the Magic: Photography Tips
Oh, darlings, gather ’round! It’s time we chat about the most delightfully spooky way to deck your halls this holiday season – Nightmare Before Christmas tree decorations.
I’ve been obsessed with this ghoulishly festive look ever since I first laid eyes on Jack Skellington’s captivating grin. Trust me, once you go Burton, you never go back!
Let’s dive into the wonderfully weird world of Halloween Town meets Christmas Town, shall we?

The Basics: What Makes a Nightmare Before Christmas Tree?
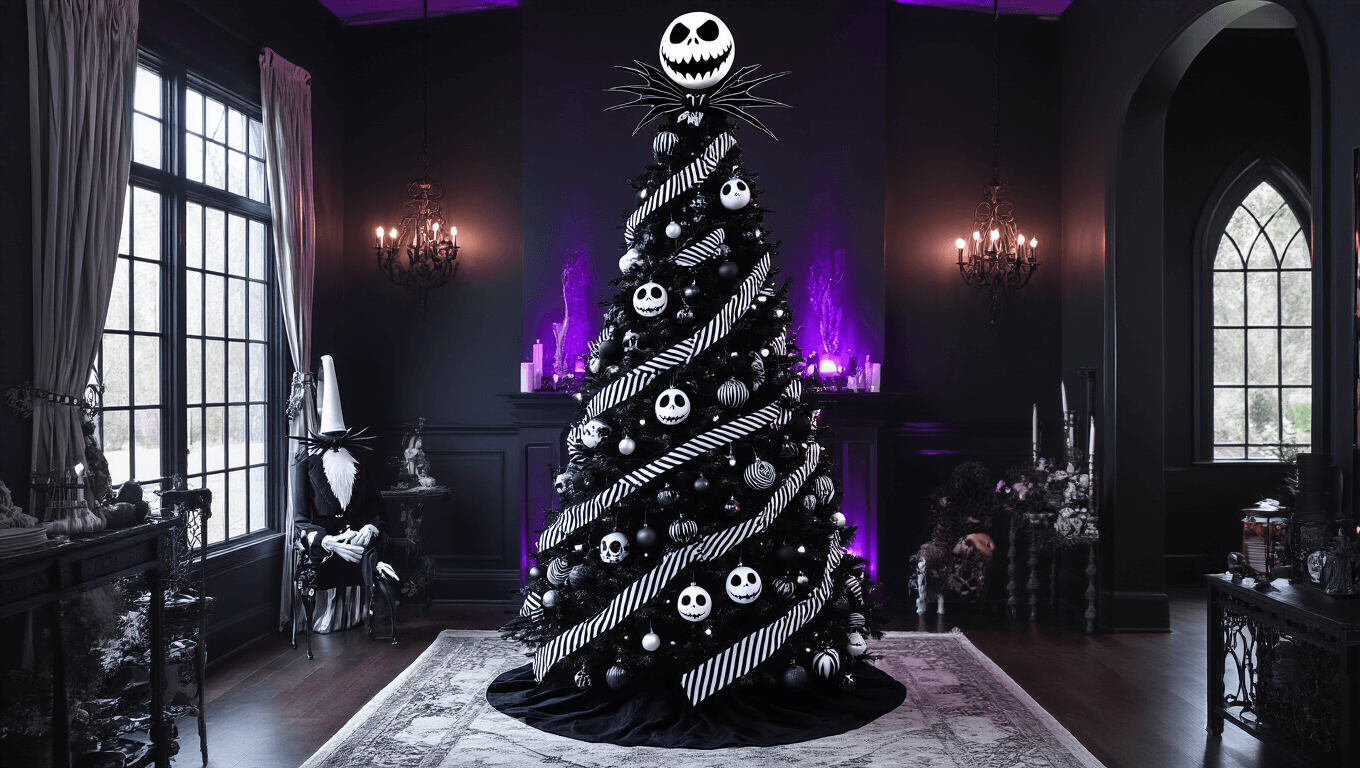
Picture this: A tree that’s equal parts eerie and merry, dripping with monochrome magic and pops of ghastly delight. Here’s what you need:
- A black or white tree (artificial, of course – we’re going for gothic chic, not forest decay)
- Lights in cool white or deep purple
- Black and white striped ribbon or garland
- Character ornaments featuring Jack, Sally, Zero, and the gang
- A showstopping tree topper (Jack’s head or Spiral Hill, anyone?)
Now, before you start thinking this is some complicated designer nonsense, let me assure you – it’s easier than convincing Oogie Boogie to play fair!

DIY or Buy? That is the Question
Look, I get it. We’re not all blessed with Tim Burton’s artistic prowess. But fear not! You’ve got options:
For the crafty creatures:
- Paint plain baubles with stripes or spiral eyes
- Create felt character cutouts
- Turn mini pumpkins into Jack-o’-lantern ornaments
For those who’d rather shop than craft:
- Hallmark and Disney offer gorgeous licensed ornaments
- Etsy is a treasure trove of handmade Nightmare goodies
- Even big box stores are getting in on the action these days
Personally, I love a mix of both. It adds that personal touch without driving you batty trying to DIY everything.

Styling Secrets: Making Your Tree a Showstopper
Right, let’s get down to the nitty-gritty of making this tree Instagram-worthy:
- Start with your lights. Wrap them from the inside out for a truly illuminating effect.
- Add your ribbon or garland. Think of it as Jack’s pinstriped suit for your tree!
- Place your largest ornaments first. This creates focal points and balance.
- Fill in with smaller ornaments and DIY creations.
- Don’t forget texture! Add some “snow” with white tinsel or faux cobwebs for that spooky touch.
- Crown your creation with an epic topper. Jack’s head is classic, but Spiral Hill gives major wow factor.
The key is balance, darlings. You want eerie elegance, not cluttered chaos.

Color Me Spooky: The Perfect Palette
Now, let’s talk color. The magic of this theme is in its striking simplicity:
- Black and white as your base (just like Jack’s dapper ensemble)
- Silver for some ghostly shimmer
- Pops of purple for that royal Halloween feel
- Hints of green (think: Oogie Boogie) or orange (hello, pumpkins!) for accent
Remember, less is more. We’re aiming for “tastefully terrifying,” not “my Christmas tree ate a Halloween store.

Lighting: Setting the Mood
Lighting can make or break your Nightmare tree. Here’s how to nail it:
- Cool white lights give an ethereal glow
- Purple lights add mystical ambiance
- Consider LED spotlights to highlight your star ornaments
- For photos, natural light is your best friend. Position near a window!
Budget-Friendly Tips for Broke Burton Fans
Listen, I know we can’t all splurge on official merch. Here are some wallet-friendly hacks:
- Use regular black and white ornaments as your base
- Create silhouette ornaments with black cardstock
- Paint pinecones black and add googly eyes for instant creatures
- Wrap small boxes in black and white striped paper for mini presents
The spirit of Halloween Town is in the creativity, not the price tag!

Capturing the Magic: Photography Tips
Once you’ve created your masterpiece, you’ll want to show it off. Here’s how to get those double-tap-worthy shots:
- Shoot in the evening to showcase your lighting
- Use portrait mode on your phone for dreamy, focused shots
- Play with angles – get low for a towering effect
- Don’t forget the details! Close-ups of ornaments tell the story
And there you have it, my spooky darlings! Your guide to creating a Nightmare Before Christmas tree that would make Jack Skellington himself green with envy (well, if he weren’t already a skeleton).
Remember, the most important thing is to have fun with it. After all, isn’t that what Jack discovered Christmas was all about?
Now, if you’ll excuse me, I have a sudden urge to watch a certain stop-motion masterpiece. Happy decorating, and may your days be merry and bright… and just a little bit frightful!


")
")
")
