

This post may contain affiliate links. Please see my disclosure policy for details.
Transform Your Christmas Tree Into 2025’s Most Stunning Holiday Centerpiece
Contents
- Transform Your Christmas Tree Into 2025’s Most Stunning Holiday Centerpiece
- Navy and Gold: The Sophisticated Showstopper
- Elevated Red and Green: Not Your Grandmother’s Tree
- Velvet-Wrapped Ball Magic
- Dried Orange Slice Animals
- Cardboard Gnome Sophistication
- The Zigzag Method That Works
- Vertical Loop Drama
- The Three-Layer System
Christmas tree decor in 2025 is all about making a statement that’ll have your guests asking where you learned to style like a pro.
I get it – you’re staring at your bare tree wondering how those Instagram-perfect setups actually happen. Last year, I threw ornaments on my tree like confetti and wondered why it looked like a craft store exploded. This year changed everything for me, and I’m sharing exactly what works.
Why 2025’s Christmas Tree Trends Are Pure Magic
This year’s trends aren’t just pretty – they’re designed to make your life easier. Gold and navy combinations create instant sophistication without looking stuffy. Classic red and green combinations are getting modern makeovers that feel fresh again.
Here’s what’s driving the biggest changes:
- Rich color palettes that photograph beautifully
- Layered textures that add depth and interest
- DIY elements that feel personal, not homemade
- Luxury touches that don’t require luxury budgets
I’ve tested every trend myself, and some are absolute game-changers while others need tweaking for real homes.
Master the Color Combinations That Actually Work
★ Steal This Look
- Paint Color: Sherwin-Williams Pure White SW 7005
- Furniture: slipcovered linen sofa in natural ivory, reclaimed wood coffee table with turned legs, vintage brass étagère for ornament display
- Lighting: oversized aged brass sputnik chandelier with dimmable candle-style bulbs
- Materials: matte velvet ribbon, hand-blown glass ornaments in varying finishes, raw Belgian linen tree skirt, aged brass hooks, preserved cedar garland
I learned this the hard way after my first ‘professional’ tree looked stunning in person but fell completely flat in family photos—the depth trick changed everything.
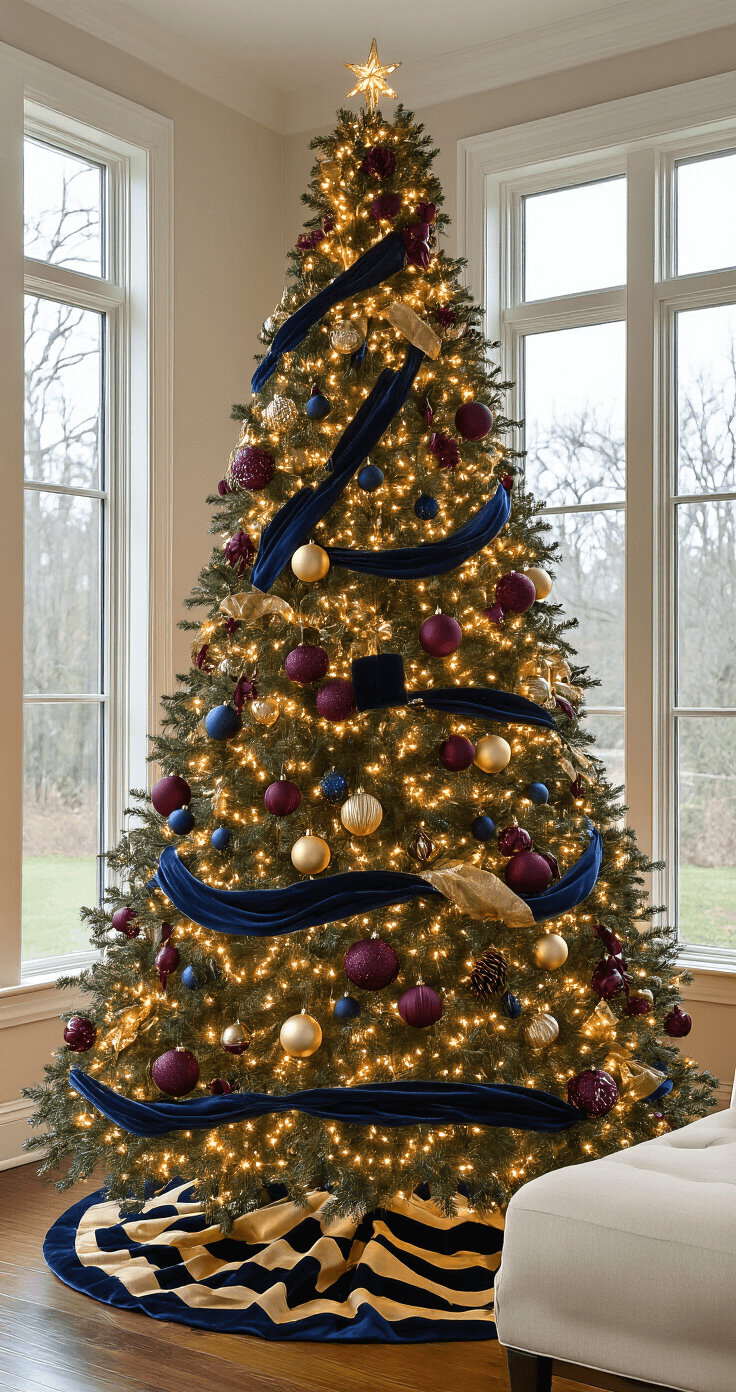
This pairing creates an elegant, almost regal atmosphere that works in any home style. Navy provides unexpected depth while gold adds the sparkle we crave during holidays.
My winning formula:
- 60% navy elements (ribbons, larger ornaments)
- 30% gold accents (metallic ornament sets)
- 10% white or cream for breathing room
I learned this ratio the hard way after my first attempt looked like I’d dunked my tree in blue paint.
✎ Steal This Look
- Paint Color: Benjamin Moore Hale Navy HC-154
- Furniture: velvet navy Chesterfield sofa with brass nailhead trim, walnut coffee table with gold legs
- Lighting: brass sputnik chandelier with dimmable bulbs
- Materials: matte navy velvet, brushed brass, antique mercury glass, raw silk ribbon, white marble
I still wince remembering that first tree—solid navy from top to bottom, no variation, no mercy—until my mother-in-law gently suggested I ‘might want to let some air in.’ That 60-30-10 rule saved my holiday dignity and now I swear by it.
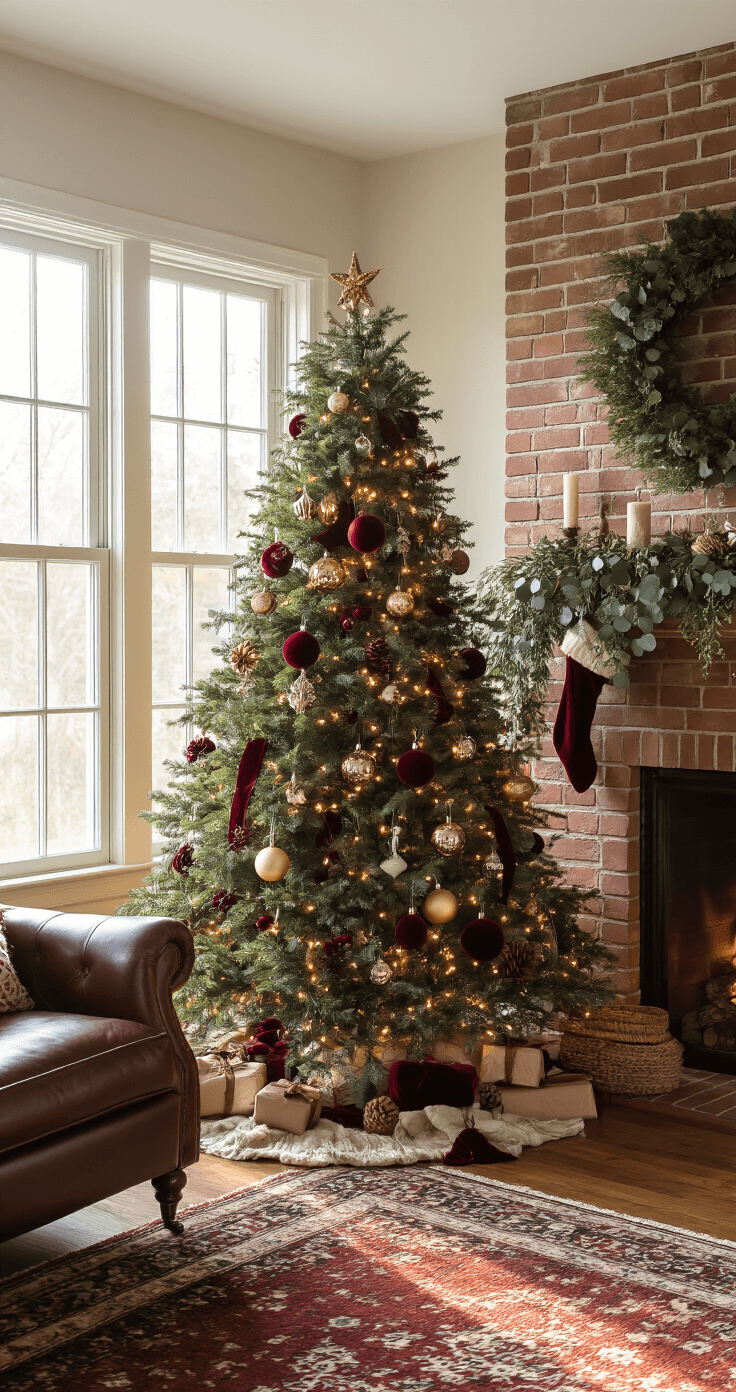
Elevated Red and Green: Not Your Grandmother’s Tree
Traditional doesn’t mean boring when you add modern touches. The secret is choosing deeper, richer tones and mixing in unexpected textures.
Upgrade your classics with:
- Deep burgundy instead of bright red
- Forest green rather than kelly green
- Velvet ribbon instead of basic satin
- Matte finishes mixed with high gloss
DIY Ornaments That Look Store-Bought (But Cost Way Less)
🌟 Steal This Look
- Paint Color: Farrow & Ball Studio Green 93
- Furniture: tufted velvet Chesterfield sofa in deep forest green
- Lighting: antique brass sputnik chandelier with dimmable candle-style bulbs
- Materials: burgundy velvet ribbon, matte black ceramic ornaments, high-gloss lacquered picture frames, aged brass accents
This is the room where you finally prove that inherited holiday traditions can evolve with you—richer, moodier, and completely your own.
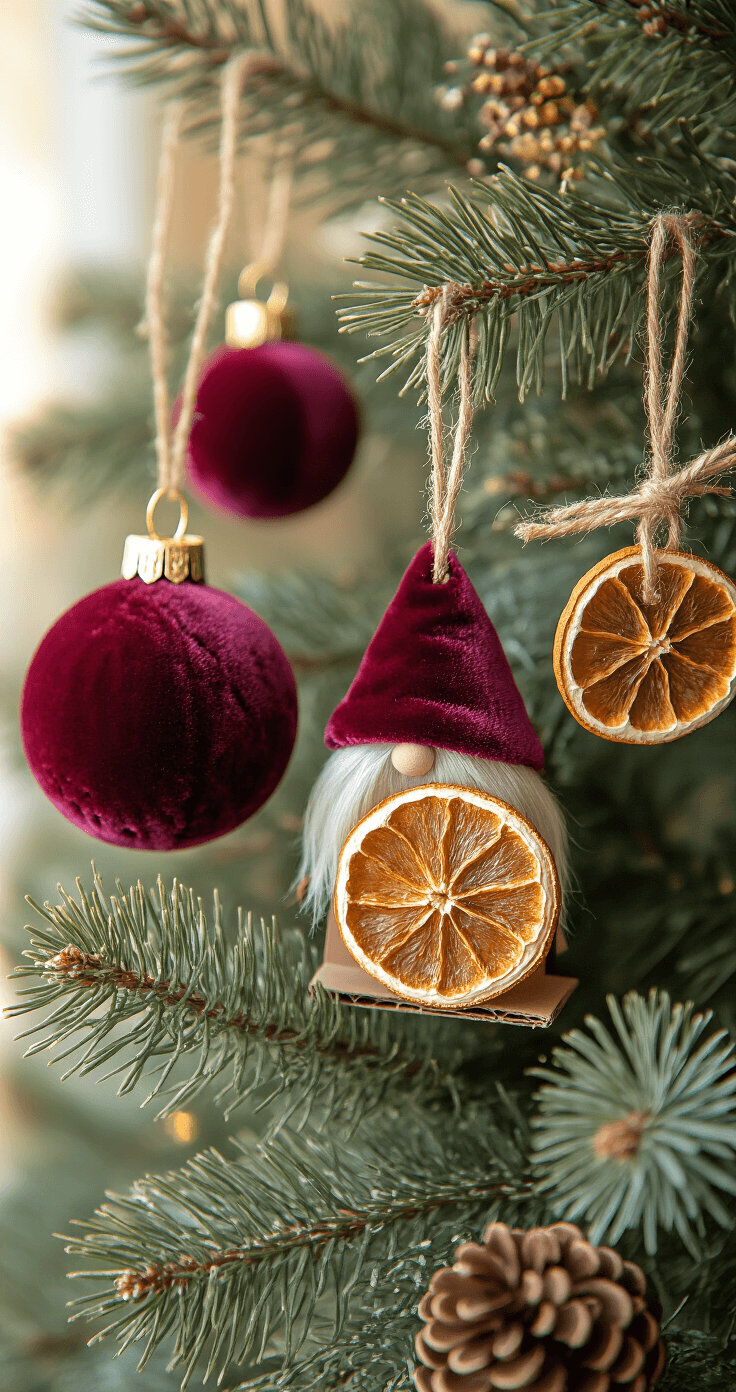
Velvet-Wrapped Ball Magic
This technique transforms cheap plastic ornaments into luxury pieces. I discovered this trick when I couldn’t afford the $8-per-ornament price tags at boutique stores.
What you need:
- Basic ball ornaments
- Velvet fabric scraps
- Fabric glue
- Ribbon for hanging
The process:
- Cut velvet into strips slightly wider than the ornament
- Apply thin layer of fabric glue
- Wrap carefully, overlapping edges
- Secure with ribbon at the top
The texture difference is incredible, and guests always assume they’re expensive designer pieces.
Dried Orange Slice Animals
These add whimsy without looking childish. My kids love helping with these, making them perfect family project ornaments.
Simple steps:
- Slice oranges ¼ inch thick
- Dehydrate in oven at 200°F for 2-3 hours
- Use brown marker to add animal features
- Attach twine for hanging
Pro tip: Make extras – they smell amazing and last for years.
🎨 Steal This Look
- Paint Color: Valspar Cream in My Coffee 3003-10C
- Furniture: rustic farmhouse dining table with turned legs
- Lighting: wrought iron chandelier with candle-style bulbs
- Materials: raw linen, weathered wood, terracotta, jute twine
There’s something deeply satisfying about creating ornaments that engage multiple senses—these fill your kitchen with citrus warmth while crafting, then your living room with subtle fragrance all season.
Cardboard Gnome Sophistication
Gnomes are having a moment, but most look too cutesy for elegant trees. My version uses neutral colors and refined materials.
Materials needed:
- Heavy cardboard for base
- Natural twine for beards
- Felt in muted tones
- Small wooden beads
The key is restraint – these should complement your tree, not overwhelm it.
Ribbon Techniques That Create Professional Results
Ribbon separates amateur decorators from pros faster than anything else. I used to just drape it randomly and wonder why my tree looked unfinished.
The Zigzag Method That Works
Step-by-step process:
- Start at the top, securing ribbon to strongest branch
- Drape diagonally down and around, creating loose zigzags
- Maintain consistent spacing – about 12 inches between passes
- Tuck end deep into branches at the bottom
Ribbon amounts I actually use:
- 6-foot tree: 15-20 feet of wire-edge ribbon
- 8-foot tree: 25-30 feet
- 10-foot tree: 35-40 feet
Vertical Loop Drama
This technique adds incredible fullness and catches light beautifully. Create loops every 8-10 inches as you work around each layer. The loops should vary in size for natural movement.

Ornament Placement Strategy That Never Fails
✎ Steal This Look
- Paint Color: Clare Paint Whipped 01
- Furniture: slim-profile console table in warm walnut for displaying wrapped gifts beneath the tree
- Lighting: adjustable arc floor lamp with brass finish to uplight the tree and emphasize vertical loop shadows
- Materials: velvet ribbon in varying widths, matte glass ornaments, aged brass hooks, natural linen tree skirt
There’s something almost meditative about working loops layer by layer—it’s where the tree stops feeling like a task and starts feeling like sculpture, and guests always notice the difference without knowing exactly why.
The Three-Layer System
Layer 1: Foundation (Deep placement)
- Large, solid-colored ornaments


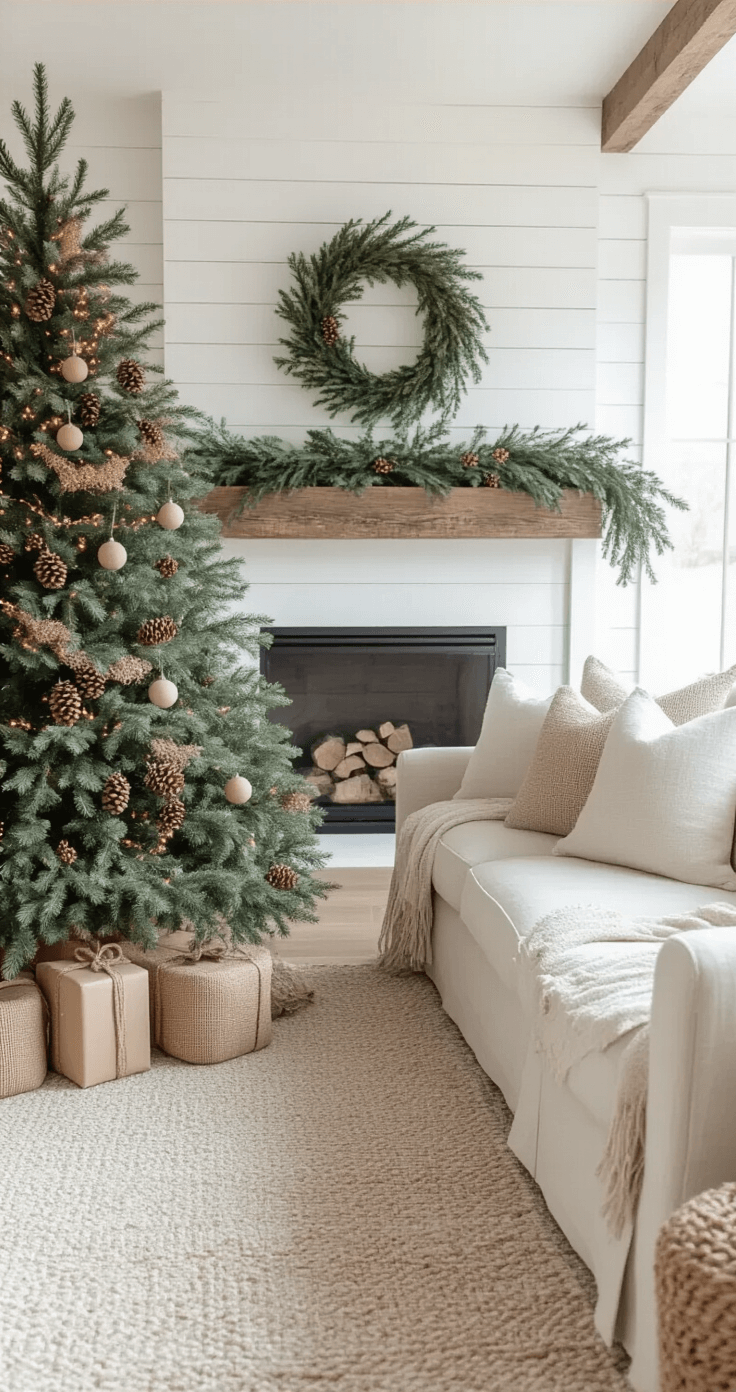
[…] Lighting can elevate your minimalist Christmas tree from nice to absolutely stunning. […]