

This post may contain affiliate links. Please see my disclosure policy for details.
The Winter Wonderland My Living Room Desperately Needed (And How I Made It Happen for Less Than $50)
Contents
- The Winter Wonderland My Living Room Desperately Needed (And How I Made It Happen for Less Than $50)
- Why I Almost Gave Up on Winter Decorating Entirely
- The Projects That Actually Worked (And Didn’t Make Me Want to Quit)
- The Natural Elements That Made Everything Look Expensive
- Where I Put Everything (Because Placement Actually Matters)
Winter wonderland decorations transformed my boring beige living room into something that actually makes me smile when I come home from work.
I’m not talking about those perfectly styled magazine spreads that look like a stylist spent three days arranging pinecones.
I needed something I could actually pull off on a Tuesday evening after work, without a degree in interior design or a trust fund.
Why I Almost Gave Up on Winter Decorating Entirely
Last year, I walked through one of those expensive home décor stores and nearly had a panic attack at the checkout.
A single sparkly branch? Forty-eight dollars.
A “rustic” wooden snowflake that looked like something I could make with sticks from my backyard? Seventy-two dollars.
I left empty-handed and annoyed.
But here’s what I figured out: creating that cozy, magical winter atmosphere doesn’t require expensive purchases or advanced crafting skills.
It requires knowing which projects actually work and which ones will leave you with a hot glue burn and a pile of wasted materials.
The Projects That Actually Worked (And Didn’t Make Me Want to Quit)
Paper Snowflakes That Don’t Look Like Elementary School Art Projects
I started with something I remembered from childhood but elevated it.
Here’s what made the difference:
- I used metallic silver and champagne-colored cardstock instead of plain white printer paper
- I cut them in dramatically different sizes (some as small as 3 inches, others nearly 12 inches across)
- I hung them at varying heights using clear fishing line instead of clumping them all together
The metallic cardstock cost me less than ten bucks for a pack that made about thirty snowflakes.
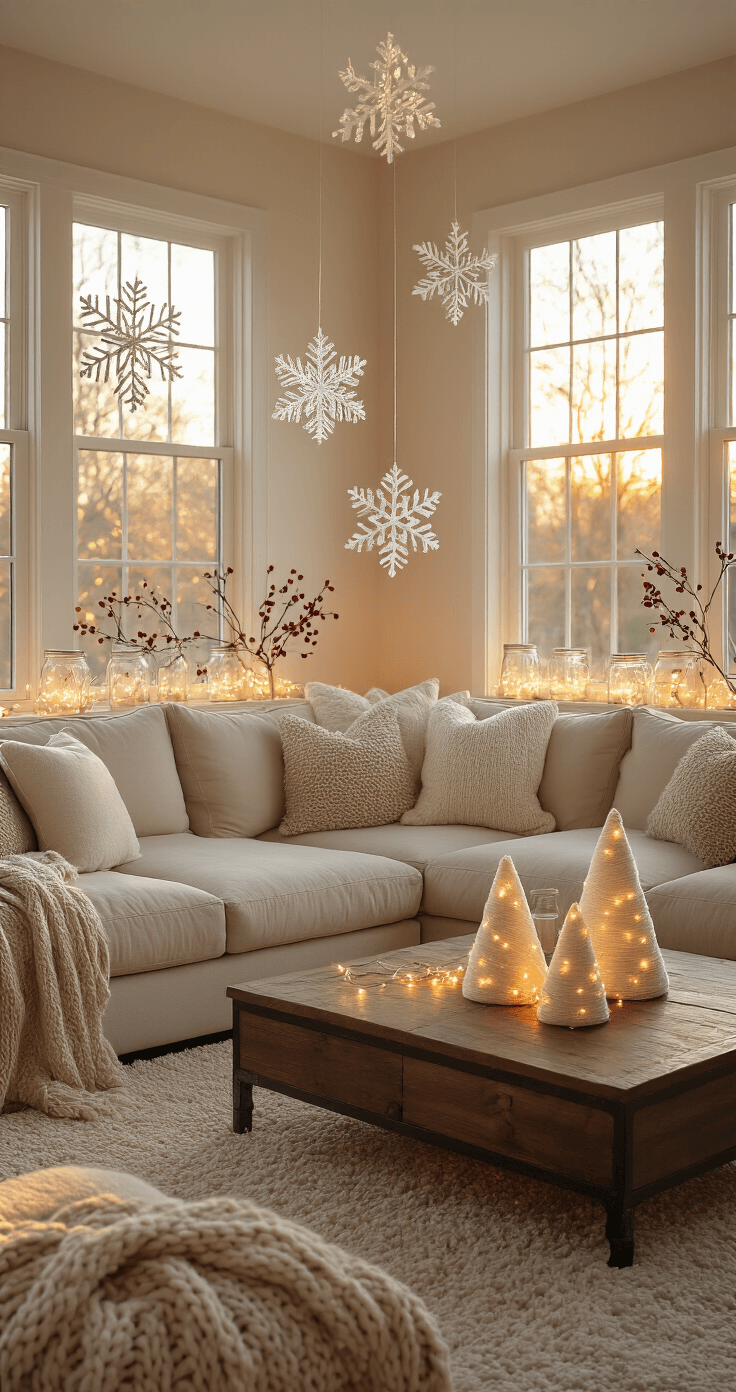
I put them in front of my window so they catch the light.
Now they look intentional instead of like I raided a kindergarten classroom.
Pro tip: Add a tiny dab of glue and biodegradable glitter to the centers if you want them to sparkle without looking like a craft store exploded.
The Dollar Tree Finds That Punched Way Above Their Weight
I’ll be honest—I was skeptical about Dollar Tree décor.
But desperation makes you creative.
Block snowmen that actually look cute:
- I grabbed white-painted wooden blocks (they come in sets of three).
- Added simple black dots for eyes using a permanent marker.
- Painted an orange triangle for the nose.
- Wrapped a scrap of plaid fabric around the middle block as a scarf.
Total time: maybe twenty minutes while watching TV.
Total cost: three dollars plus materials I already had.
Foam cone trees that don’t look cheap:
Those styrofoam cones everyone uses? I covered mine with white yarn in a spiral pattern, securing it with a hot glue gun.
The texture looks intentionally textured and modern, not like I was trying to save money (even though I absolutely was).
I made five in different heights and clustered them on my coffee table.
Guests genuinely ask where I bought them.
The Natural Elements That Made Everything Look Expensive
This is where the magic actually happened.
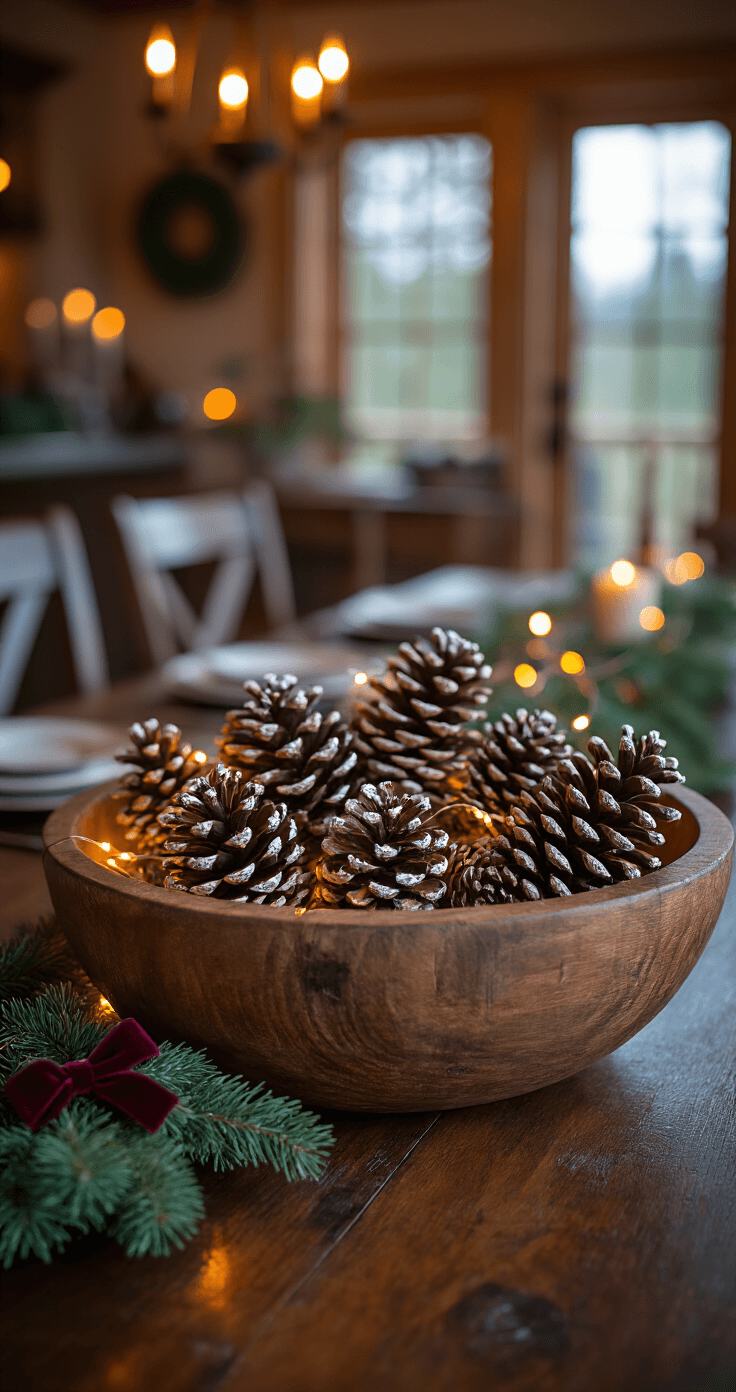
I took a walk through my neighborhood and collected pinecones.
Free. Zero dollars.
What I did with them:
- Baked them at 200°F for about an hour to kill any bugs (crucial step—don’t skip this unless you want surprise wildlife)
- Lightly brushed the tips with white acrylic paint for a snow-dusted look
- Arranged them in a wooden dough bowl with some battery-operated fairy lights tucked underneath
That centerpiece gets more compliments than anything else in my house.
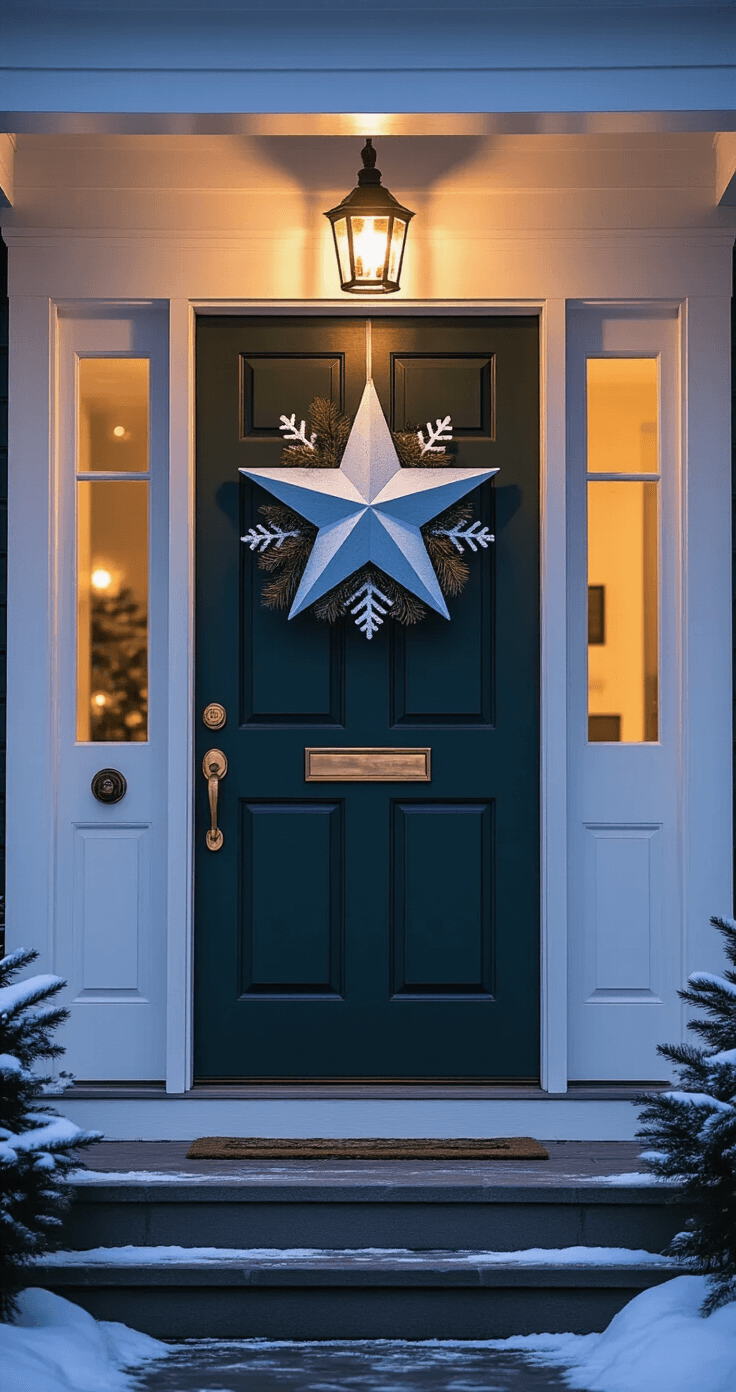
The winter star that started it all:
I bought a wooden star shape from the craft store for about four dollars.
Painted it with light blue chalk paint I had left over from another project.
Added some dollar store vinyl snowflakes with hot glue.
Tucked in a few sprigs of fake pine branches around the edges.
Hung it on my front door.
It looks like something from a boutique winter market, not something I slapped together while listening to a podcast.
Where I Put Everything (Because Placement Actually Matters)
I learned this the hard way after my first attempt looked like I’d just randomly scattered winter items around my house.
Window displays:
I filled mason jars with battery-operated string lights and added a few fake berry branches on top.
Lined them up on my windowsill.
At night, they glow like little lanterns and make the whole room feel warmer.
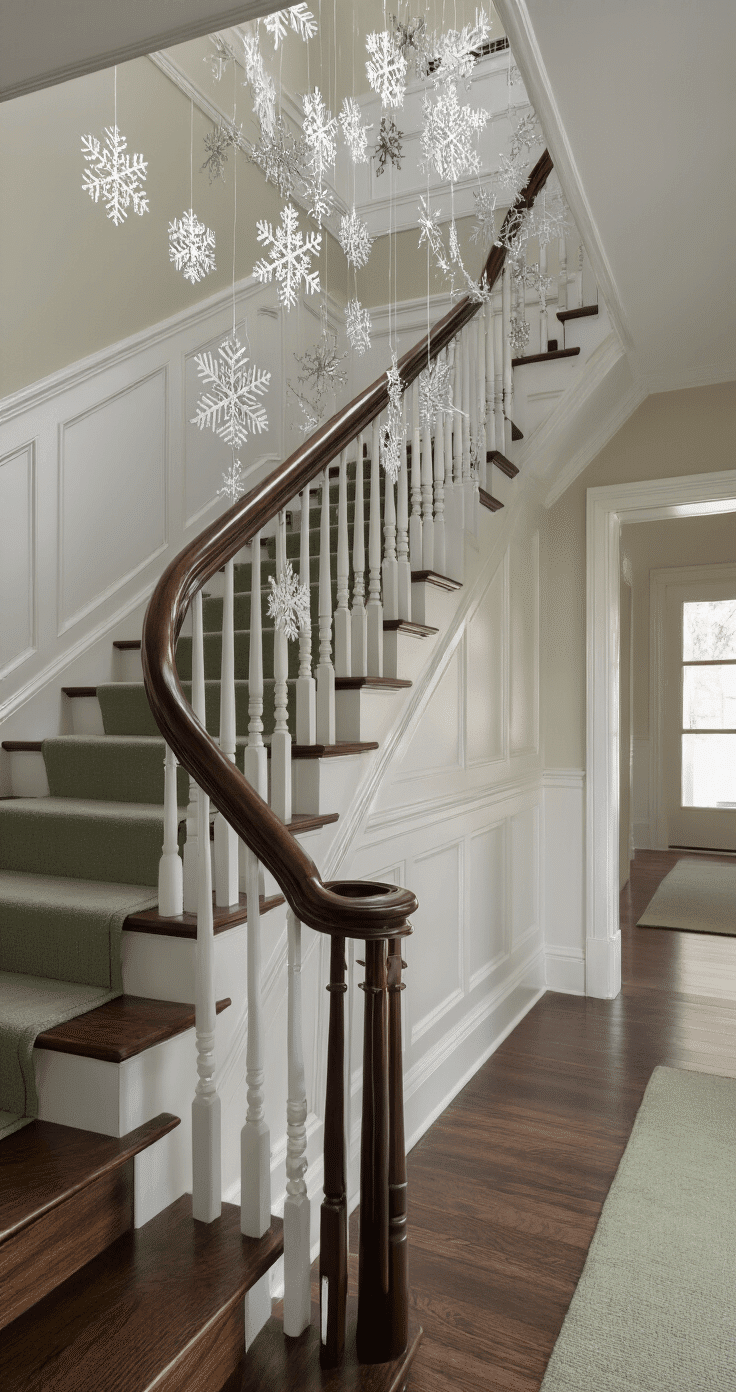
Staircase transformation:
I hung those metallic snowflakes at different heights along the railing using fishing line.
Took maybe fifteen minutes.
Changed the entire feel of the space.
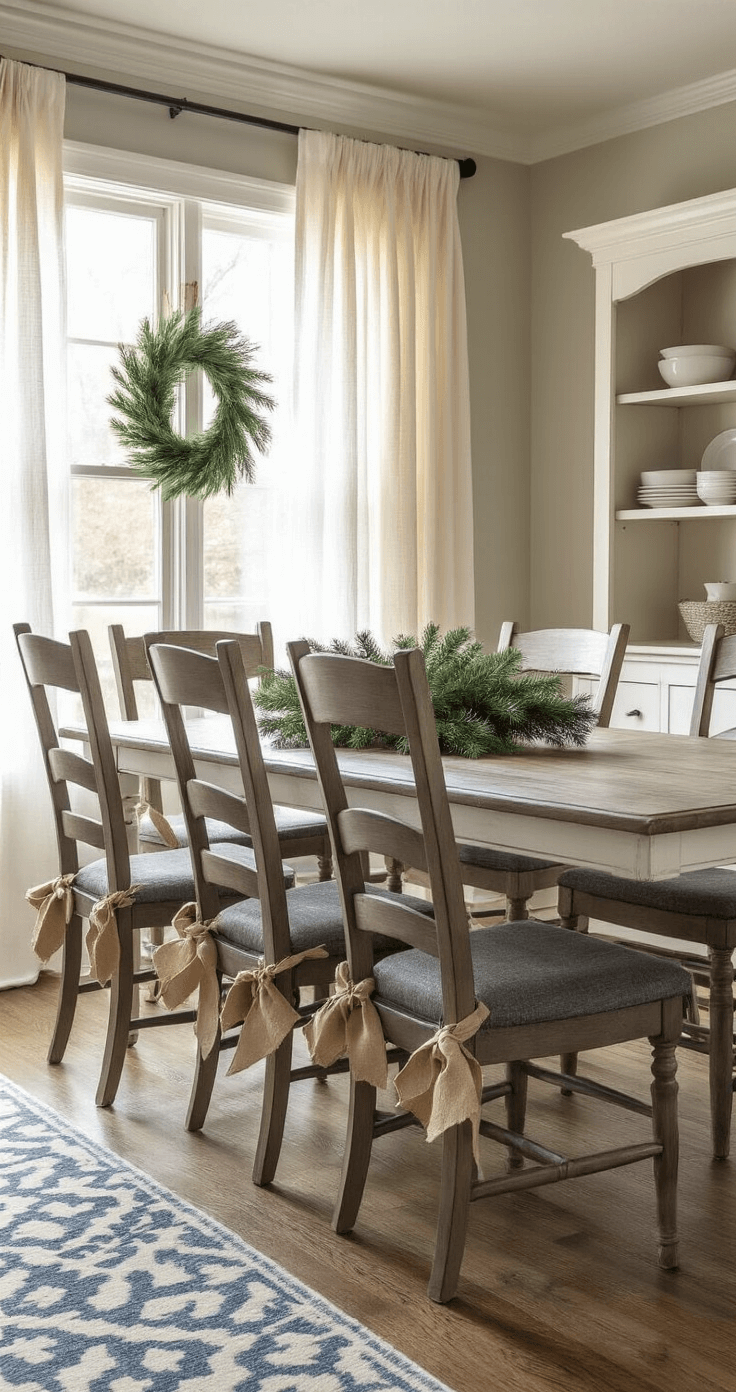
Dining chair upgrade:
I attached small wreaths to the back of each dining chair with wide ribbon.
Super simple, surprisingly impactful.
Makes every dinner feel a little more special, even when I’m just eating takeout by myself.
")
")
")


