
This post may contain affiliate links. Please see my disclosure policy for details.
Hey there, fellow decor enthusiasts! It’s that time of year again when we swap out our breezy summer vibes for something a little more… pumpkin spiced. That’s right, we’re diving into fall mantel decor, and trust me, it’s easier than you think to create a stunning autumn focal point that’ll have your guests oohing and aahing.
First things first, let’s break down what we’re working with:
- Styling time: 30-90 minutes (depending on how particular you are)
- Total setup time: 2-4 hours (including primping and photographing)
- Budget: Anywhere from $25 to $150+ (because sometimes you just can’t resist that artisanal gourd)
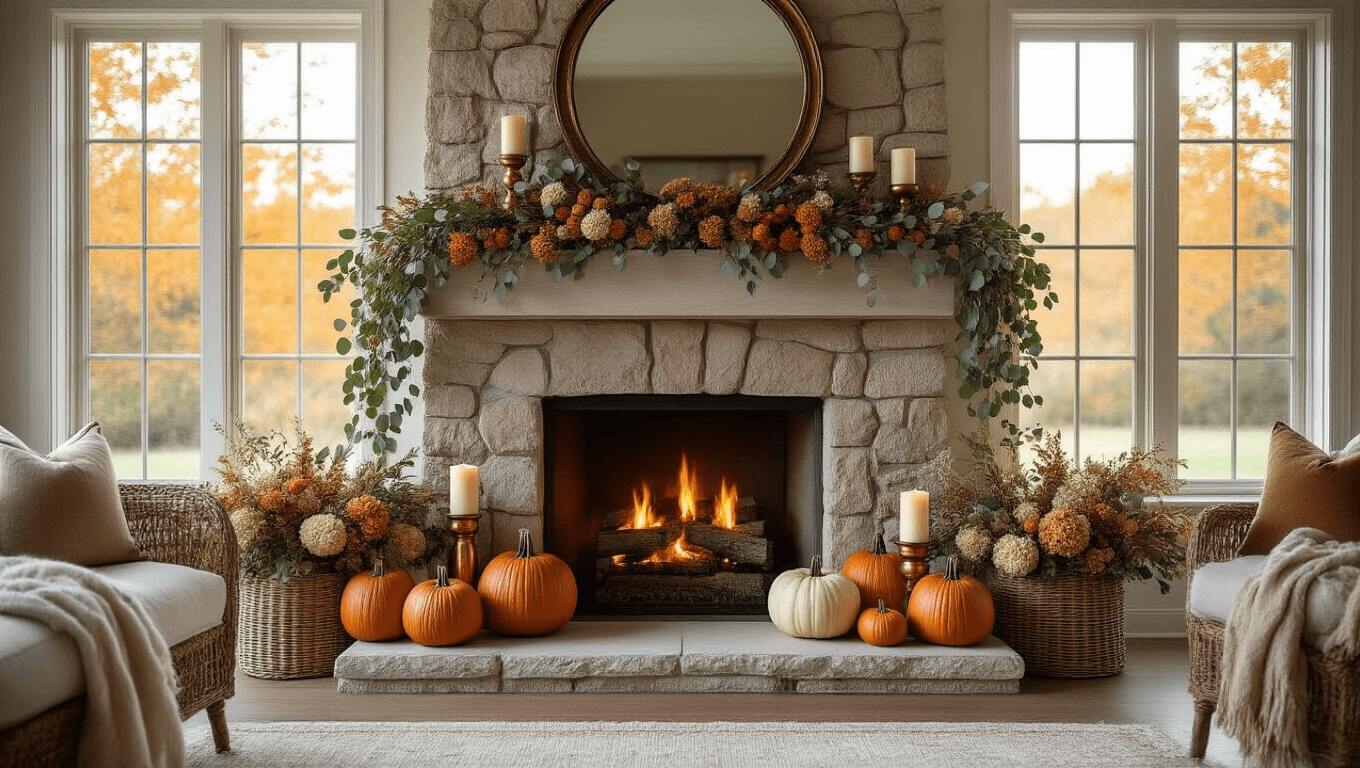
Now, before you start panicking about your design skills (or lack thereof), remember that fall mantel decor is all about embracing warm tones, natural textures, and seasonal elements. Think pumpkins, colorful leaves, and lighting that makes you want to curl up with a good book.

1. Clear the Canvas
Contents
Start by channeling your inner Marie Kondo and clearing off that mantel. Dust it off and say goodbye to any lingering summer decor. A clean slate is crucial for your autumn masterpiece.

|

|

|

|

|

|

|

|

|

|

|

|

|

|
|
Our Rating:
3.5
|
Our Rating:
3.5
|
Our Rating:
3.5
|
Our Rating:
3.5
|
Our Rating:
3.5
|
Our Rating:
3.5
|
Our Rating:
3.5
|
Our Rating:
3.5
|
Our Rating:
3.5
|
Our Rating:
3.5
|
Our Rating:
3.5
|
Our Rating:
3.5
|
Our Rating:
3.5
|
Our Rating:
3.5
|
|
$36.99
|
$32.99
|
$29.98
|
$19.99
|
$27.99
|
$20.99
|
$50.99
|
$59.99
|
$34.99
|
$25.99
|
$56.99
|
$27.98
|
$39.99
|
$22.79
|
2. Choose Your Style for you Fall Mantel Decor
Are you feeling rustic farmhouse or modern minimalist? Traditional or eclectic? Your style will guide your color palette and prop choices. For a foolproof fall look, stick to warm earth tones like burnt orange, ochre, and muted greens.
3. Gather Your Props
Here’s where the fun begins! Raid your local craft store (or backyard) for:
- Pumpkins (real or faux)
- Autumn leaves and foliage
- Candles or lanterns
- Vintage books
- Vases or mason jars
- Acorns and pinecones
Pro tip: Mix and match textures for visual interest. Think smooth glass, rough burlap, and shiny metallics.

4. Create Your Focal Point
Every great mantel needs a star of the show. This could be:
- A statement wreath
- An oversized mirror
- A bold piece of artwork
- A large, eye-catching pumpkin
Place this central piece first and build around it.
5. Layer, Layer, Layer
Now comes the styling magic. Start with your largest items and work your way down to the smallest:
- Add height with candlesticks or tall vases
- Fill in with medium-sized pumpkins and gourds
- Drape a leafy garland along the mantel
- Nestle in smaller items like acorns or mini pumpkins
Remember the rule of odd numbers – groupings of 3 or 5 items tend to look more visually pleasing.

6. Light It Up
Don’t forget the importance of lighting! Add some warmth with:
- Pillar candles (real or battery-operated)
- Fairy lights tucked into garlands
- A cozy table lamp nearby
-
 $29.98Buy Now
Sunflower is like a young girl standing in a pavilion, golden petals in the lights seems to be very delicate, the piece of delicate petals like carved with gold, exudes a charming light.This golden, never-fading sunflower will make the Unique gift when combined with a crystal glass lamp!
We earn a commission if you make a purchase, at no additional cost to you.
02/09/2026 02:09 pm GMT -
$36.99Buy Now
100% Handmade Chunky Knit Blanket: Our knit blanket throw is made from 100% hand-woven fabric with premium Chenille yarn, excellent handcrafted knitting improves yarn density to create a warm and soft touch, full body hug to immerse you in tenderness.
We earn a commission if you make a purchase, at no additional cost to you.
02/09/2026 02:08 pm GMT -
$19.99Buy Now
🎃Fall Scented Candle Set: Our Fall Candle Set featuring 4 premium scented candles with delightful autumn fragrances of Apple Pie, Cinnamon, Harvest, and Wreath. Each candle is crafted with care, perfect for creating a cozy holiday atmosphere.Light up your days with our scented candles that evoke the essence of fall.
We earn a commission if you make a purchase, at no additional cost to you.
02/08/2026 02:04 pm GMT -
$27.99Buy Now
Make your kitchen more stylish and comfortable with these durable, unique, seasonal kitchen mats. Add a pop of color in the entryway and protect your floors too. Perfect for any kitchen, deck, patio, porch, veranda and entryway.
We earn a commission if you make a purchase, at no additional cost to you.
02/09/2026 02:03 pm GMT -
$20.99Buy Now
You will receive 2 pieces of decorative stuffed pillows in white and brown colors, lovely and vivid, the exquisite and generous appearance and abundant quantity can meet your daily use needs, you can use them to decorate your sofa.
We earn a commission if you make a purchase, at no additional cost to you.
02/09/2026 02:08 pm GMT -
$50.99Buy Now
These adorable witch brooms are made of real wood bristles and each is styled differently.
We earn a commission if you make a purchase, at no additional cost to you.
02/09/2026 02:10 pm GMT -
$32.99Buy Now
This Fall wreath can be used indoor or outdoor .Hang it above your fireplace, on your front door, on a living room wall, or as table decoration to celebrate the season and festivals, especially on Halloween and Thanksgiving.
We earn a commission if you make a purchase, at no additional cost to you.
02/09/2026 02:11 pm GMT
7. Step Back and Assess
Take a moment to view your creation from across the room. Is it balanced? Does it feel cozy and inviting? Make small adjustments until it feels just right.

8. Capture the Magic
Once you’re happy with your fall mantel masterpiece, it’s time to immortalize it! Here are some quick photography tips:
- Use natural light if possible
- Shoot in the morning or late afternoon for that golden hour glow
- Try different angles – straight on, from the side, or close-up details
And there you have it – a fall mantel that’s practically begging to be pinned on Pinterest! Remember, there’s no one “right” way to decorate. The best fall mantel is one that makes you smile every time you walk into the room.

So go forth, embrace the pumpkin spice, and create a cozy autumn oasis that’ll make you the envy of the neighborhood. Happy decorating!

")
")
")


[…] Create a cozy seating area with weather-resistant pillows and throws […]
[…] functional too, providing storage while adding to the decor. For more inspiration, check out this great resource on fall mantel […]
[…] the days get shorter, lighting becomes your secret weapon. Here’s how to create that cozy […]