

This post may contain affiliate links. Please see my disclosure policy for details.
Why Your Front Door Needs This Right Now
Contents
Your front door is having an identity crisis every spring. It’s stuck between winter’s leftover bleakness and summer’s vibrant energy, desperately needing something that screams “renewal” without actually screaming.
An Easter egg wreath solves this problem in 30 minutes to an hour. That’s less time than it takes to scroll through social media pretending you’re being productive.
💡 Steal This Look
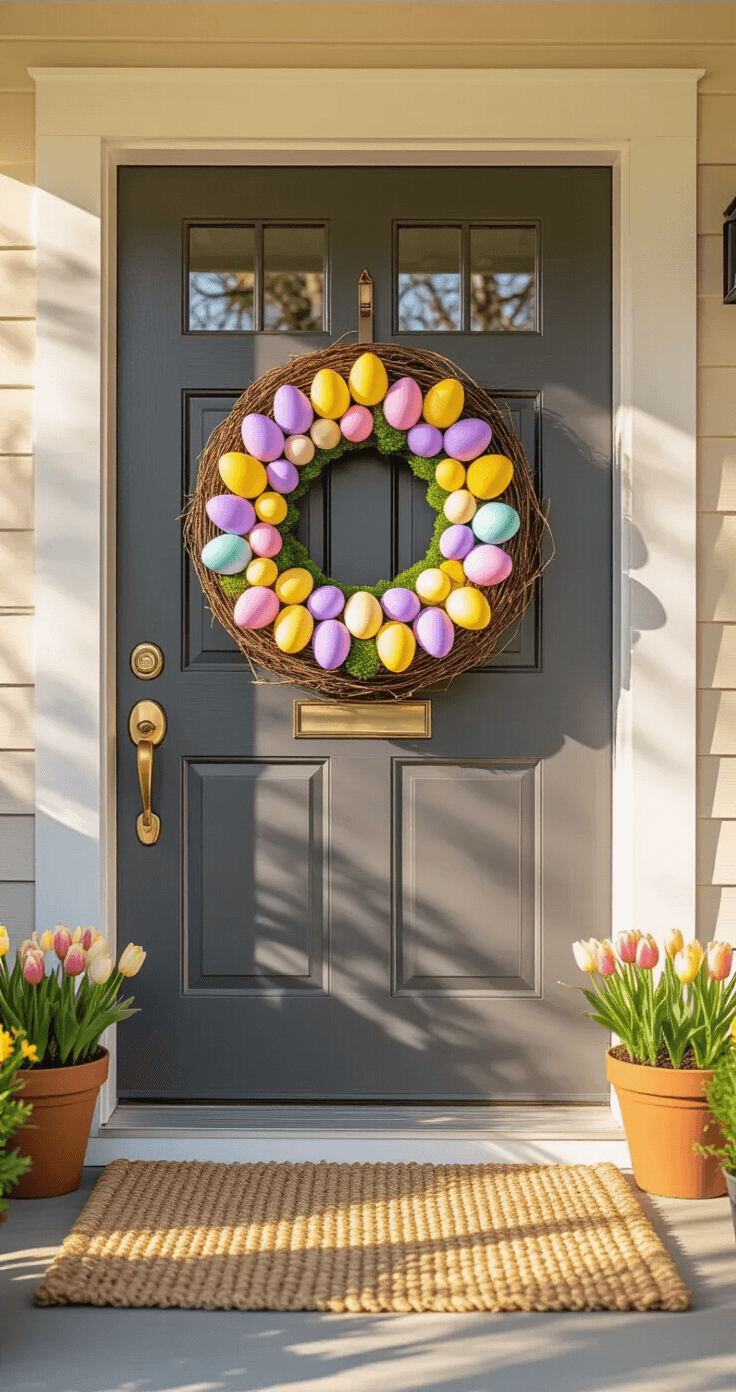
- Paint Color: Sherwin-Williams Tricorn Black SW 6258
- Furniture: weathered teak bench with storage for packages
- Lighting: oversized matte black lantern sconce with frosted glass
- Materials: faux boxwood, hand-painted foam eggs in muted sage and blush, grapevine base, wired burlap ribbon
There’s something quietly satisfying about being the house on the block that signals spring arrived before the daffodils even broke ground—it’s the domestic equivalent of showing up early and dressed for the occasion.
Everything You Actually Need (No Fluff)
Here’s what I learned after my first attempt ended up looking like a craft store explosion:
The Base
- Styrofoam wreath form for beginners
- Grapevine wreath base for a rustic vibe
- Foam rings work too if that’s what’s on sale
The Eggs
- 55 eggs for a full, lush look
- 11 eggs minimum if you’re going minimalist (which can look surprisingly chic)
- Plastic or real—your choice, your sanity level
The Tools
- Hot glue gun (non-negotiable)
- Floral wire as backup
The Pretty Stuff
- Pastel ribbon in lilac, pink, or yellow
- Moss for filling gaps
- Faux flowers if you’re feeling fancy
- Greenery sprigs
🌟 Steal This Look
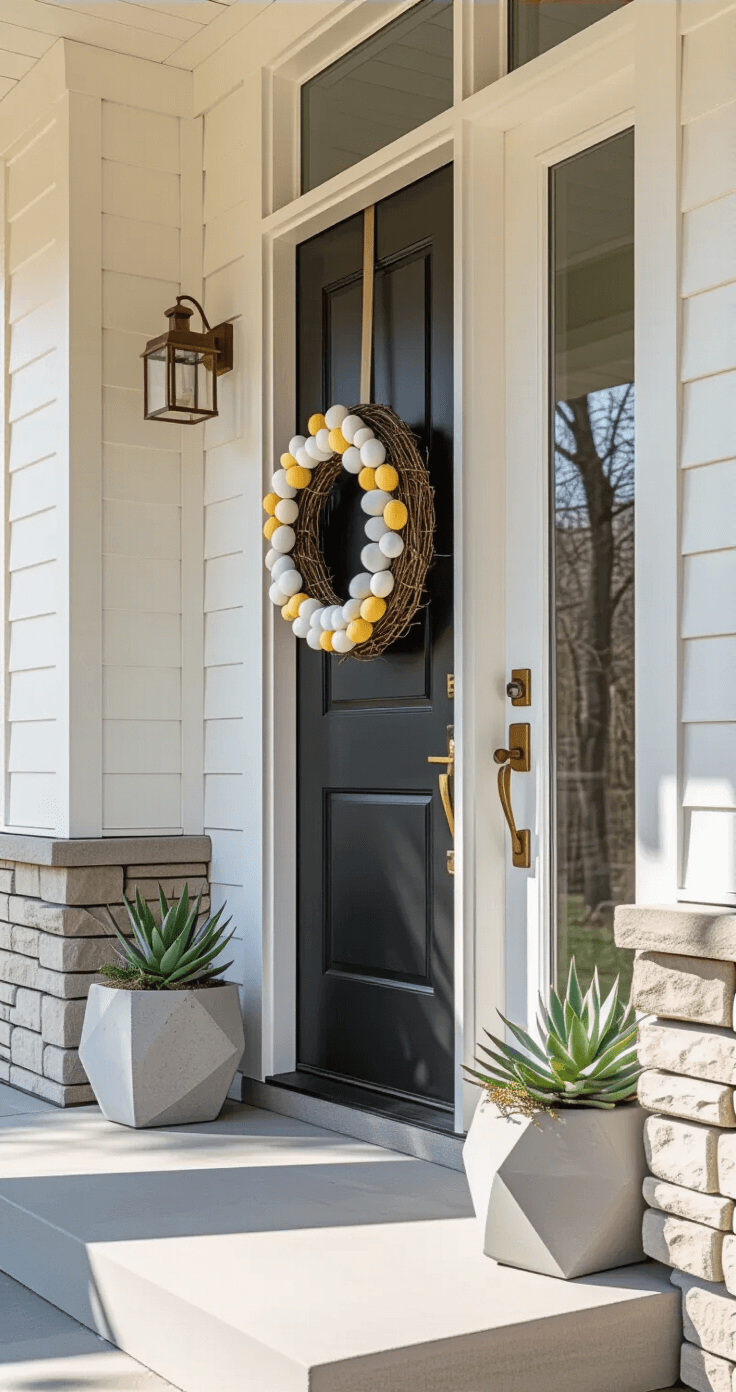
- Paint Color: Benjamin Moore Chantilly Lace OC-65
- Furniture: a slim console table just inside the entry for dropping keys and mail
- Lighting: a seeded glass pendant or lantern-style sconce flanking the door
- Materials: weathered wood, matte ceramic planters, brushed nickel hardware, natural fiber doormat
There’s something quietly satisfying about a front door that feels intentional before guests even ring the bell—this is the room that greets you home every single day.
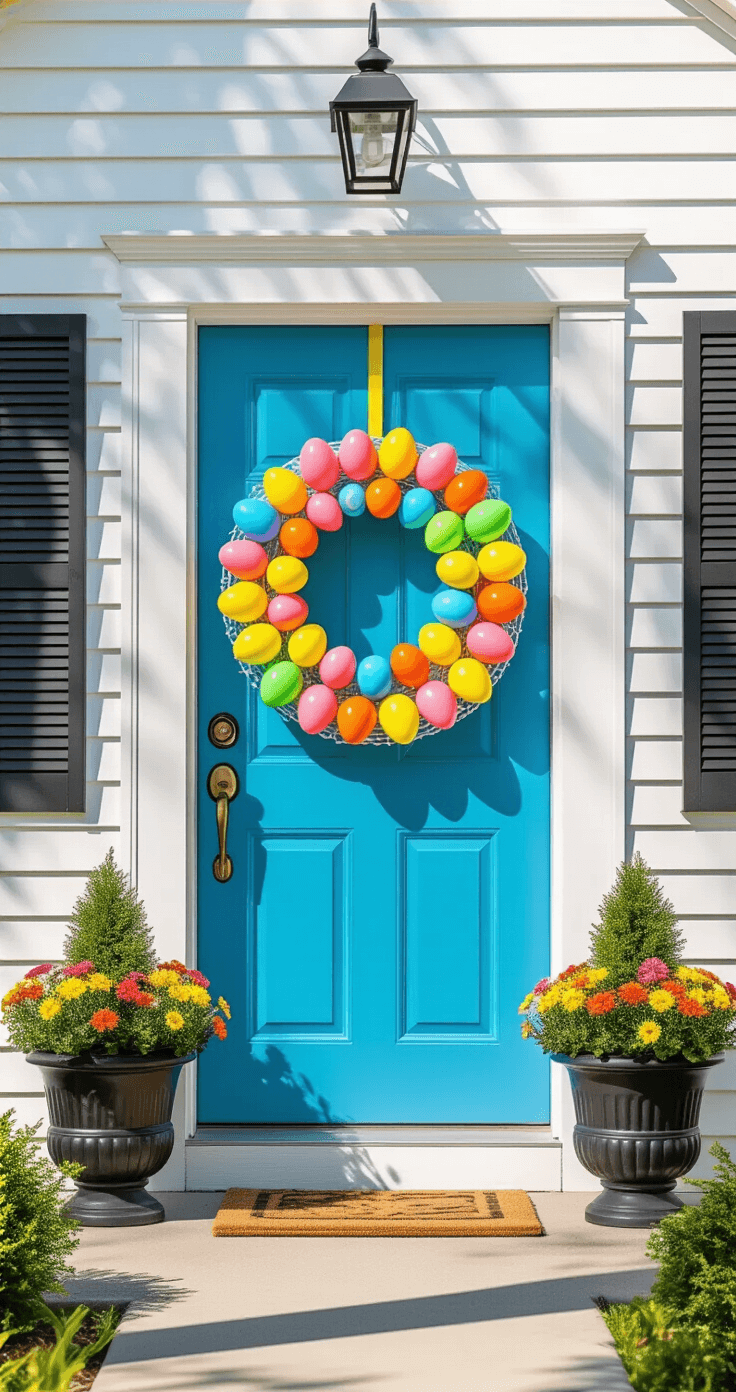
The Plastic Egg Route (For People Who Have Lives)
This is where I started, and honestly, where you should too. Grab a Styrofoam form and some plastic Easter eggs.
Step-by-step without the nonsense:
- Heat up that glue gun while you separate your eggs by color
- Start gluing eggs around the wreath in a circle
- Work your way around once completely
- Go back and fill the gaps on the outer bottom edge
- Layer eggs until you can’t see the base anymore
Why this method wins:
- Takes 30 minutes max
- Your kids can help without disaster striking
- Costs under $18 if you catch craft store sales
- No mess beyond a few glue strings
I made my first one while watching a cooking show. That’s how brain-dead simple it is.
🌟 Steal This Look
- Paint Color: Farrow & Ball Hague Blue No.30
- Furniture: weathered teak Adirondack chair for porch seating
- Lighting: black iron carriage-style outdoor wall sconce
- Materials: matte plastic eggs, Styrofoam wreath form, natural grapevine base layer
This is the wreath you make at 10 PM on a Tuesday because you forgot Easter is Sunday—no shame, no stress, just a front door that doesn’t look abandoned.
The Real Egg Method (For the Overachievers)
Look, I respect the commitment, but let’s be honest about what you’re signing up for.
The hollowing-out process:
- Poke holes in both ends of each egg
- Blow out the contents (yes, really)
- Rinse and dry thoroughly
- Try not to break half of them
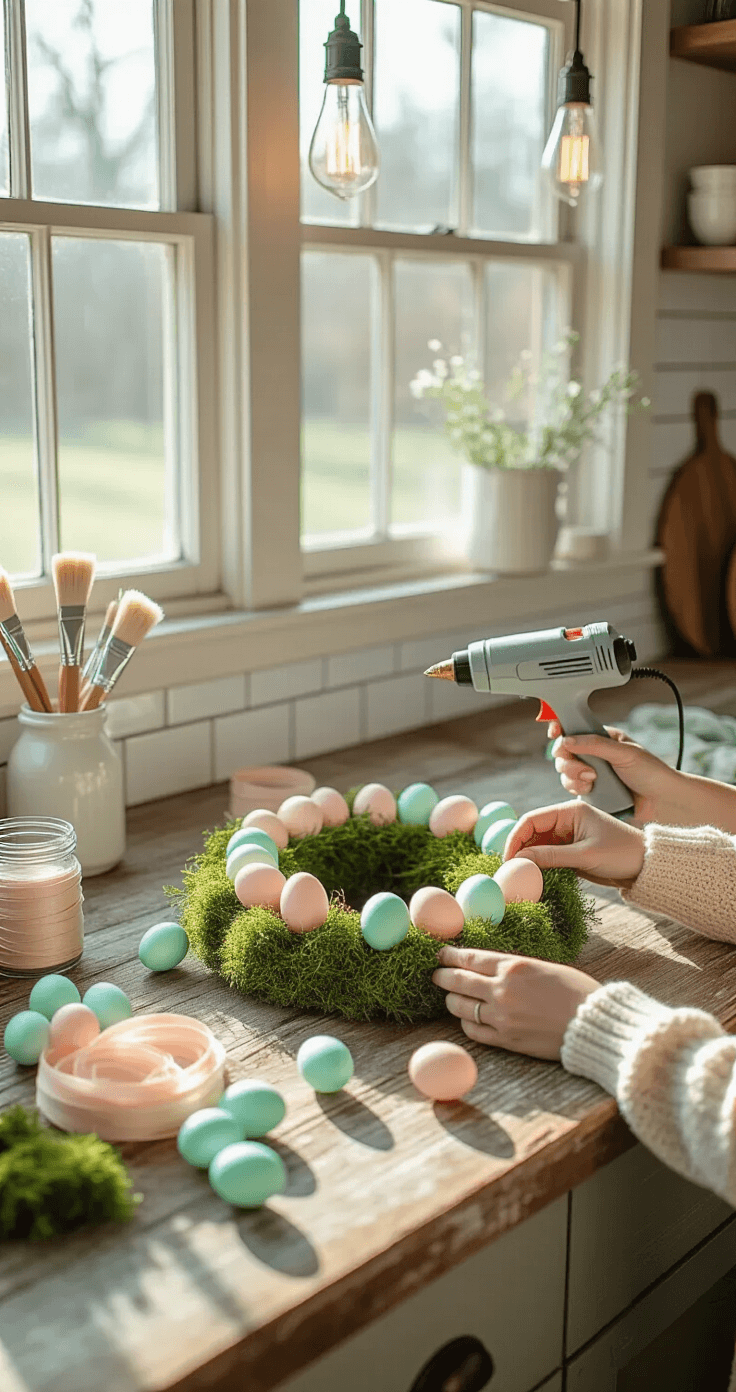
Painting party:
- Use a toothpick stuck in a peg to hold eggs while painting
- Apply pastel colors in thin coats
- Wait for them to dry without touching them every five seconds
- Realize why plastic eggs exist
Assembly tricks I wish someone told me:
If you’re using a grapevine base, don’t glue eggs directly to the wood. Glue them to small moss pieces first, then attach the moss to the wreath. This saves you from eggs popping off and rolling down your driveway three days later. Hot glue is still your friend here, though floral wire works if you’re into that extra security.
✎ Steal This Look
- Paint Color: Behr Soft Focus MQ3-51
- Furniture: a narrow console table for the entry to display the finished wreath before hanging
- Lighting: a brass flush-mount ceiling fixture with seeded glass
- Materials: dried grapevine wreath base, reindeer moss, blown chicken eggs, matte acrylic craft paint in blush and sage
There’s something quietly satisfying about this method that plastic can’t replicate—the slight translucency of real eggshell when the morning light hits your front door feels like a small seasonal secret you’re keeping from the neighborhood.
Making It Look Like You Tried (In a Good Way)
The difference between “I made a wreath” and “wow, where did you buy that?” comes down to the finishing touches.
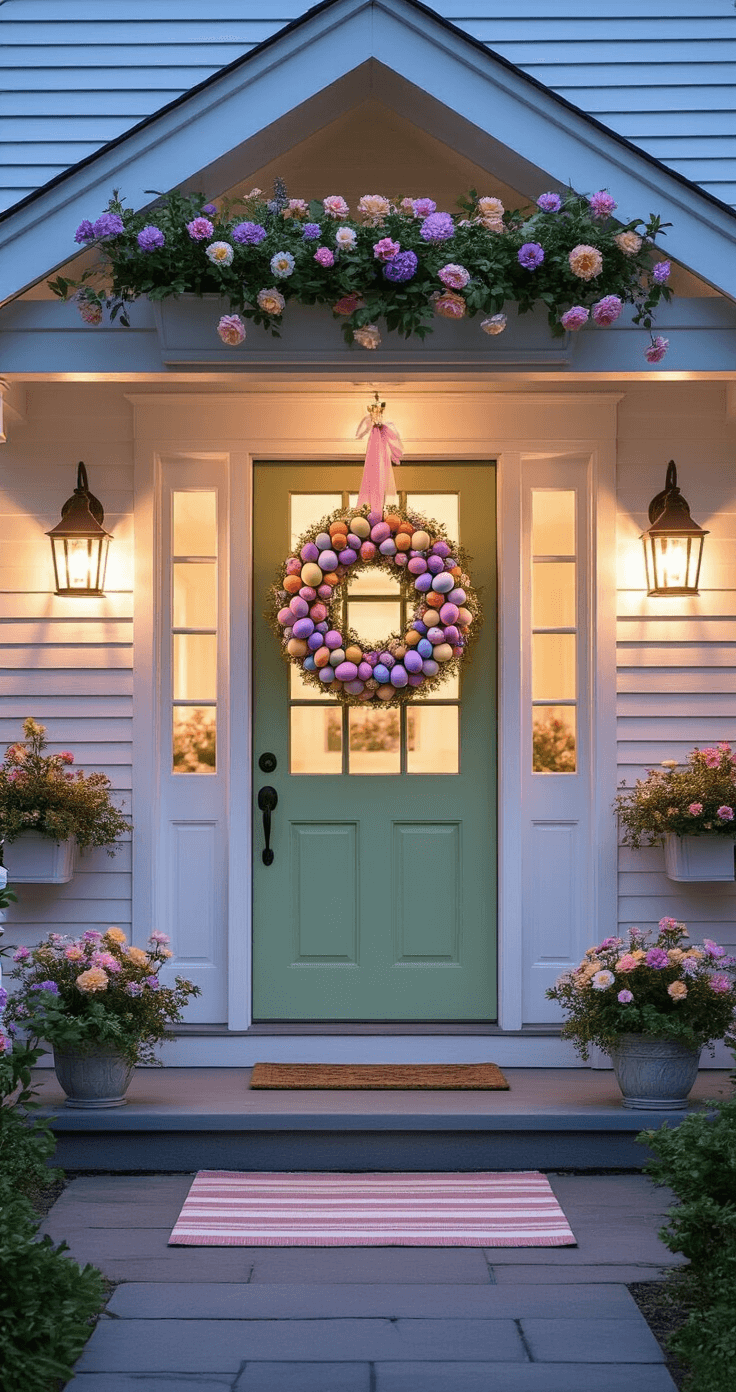
Color coordination matters:
- Stick to 2-3 pastel shades
- Lilac and yellow is my go-to combo
- Pink and mint green if you’re feeling fresh
- All white if you want that fancy boutique look
Fill the awkward spaces:
- Tuck moss into gaps between eggs
- Add small flower stems where you see wreath base
- Wrap ribbon around the bottom or top
- Don’t overthink it—more is sometimes less
The ribbon situation:
I spent 20 minutes on my first bow. It looked like a toddler’s shoelace attempt. Now I just loop ribbon through the top and call it a day. Simple beats complicated when the wind’s going to mess it up anyway.
🎨 Steal This Look
- Paint Color: use Valspar brand. Match the ACTUAL wall color in the image. Format: Valspar ColorName CODE
- Furniture: specific furniture for this room
- Lighting: specific lighting fixture
- Materials: key textures and materials
Your front door is the one spot where neighbors actually judge your taste, so this wreath is your annual chance to look like someone who has their life together.
What This Actually Costs
Here’s the budget breakdown that won’t make you wince:
Bare minimum: About $12-15
- Wreath form: $3-5
- Eggs from dollar store: $5-8
- Hot glue: $3 (or use what you have)
Full production: Under $18
- Better quality base: $7-8
- Nicer plastic eggs: $10
- Ribbon and moss: $5-8
- Flowers if you’re fancy: $3-5
Wait for craft store sales. They happen literally every week.
")


[…] people hang wreaths on doors and call it […]