

This post may contain affiliate links. Please see my disclosure policy for details.
Christmas Village Display Ideas That’ll Make Your Neighbors Actually Stop and Stare
Contents
- Christmas Village Display Ideas That’ll Make Your Neighbors Actually Stop and Stare
- Stop Making Your Village Look Like a Flat Pancake
- Your Village Needs a Story, Not Just Buildings
- The Glass Jar Hack That Changed Everything for Me
- Budget Display That Doesn’t Look Cheap
- Why Your Village Looks Dead (And How to Fix It)
- Lighting Separates Good Displays from Jaw-Dropping Ones
Christmas village displays stress me out every single year.
There, I said it.
You buy all these little houses, arrange them on your mantel, and somehow they look like a sad garage sale instead of the magical winter wonderland you pictured in your head.
I’ve been there—standing in front of my display at 11 PM on a Tuesday, moving the same church building back and forth by half an inch, wondering if I’ve lost my mind.
But here’s what I’ve learned after years of trial and error: creating a stunning Christmas village isn’t about having the fanciest pieces or spending a fortune.
It’s about knowing a few key tricks that make everything come together.
★ Steal This Look
- Paint Color: Sherwin-Williams Snowbound SW 7004
- Furniture: floating wall shelves with built-in LED strips, narrow console table with drawer storage for village accessories, glass-front curio cabinet for year-round display rotation
- Lighting: warm white LED strip lighting with dimmer switch, battery-operated flickering candle lamps for village streetlights, small clip-on spotlights for house illumination
- Materials: artificial snow blanket with iridescent glitter, reclaimed barn wood platforms, mirror panels for faux ice ponds, natural birch bark rounds for elevation
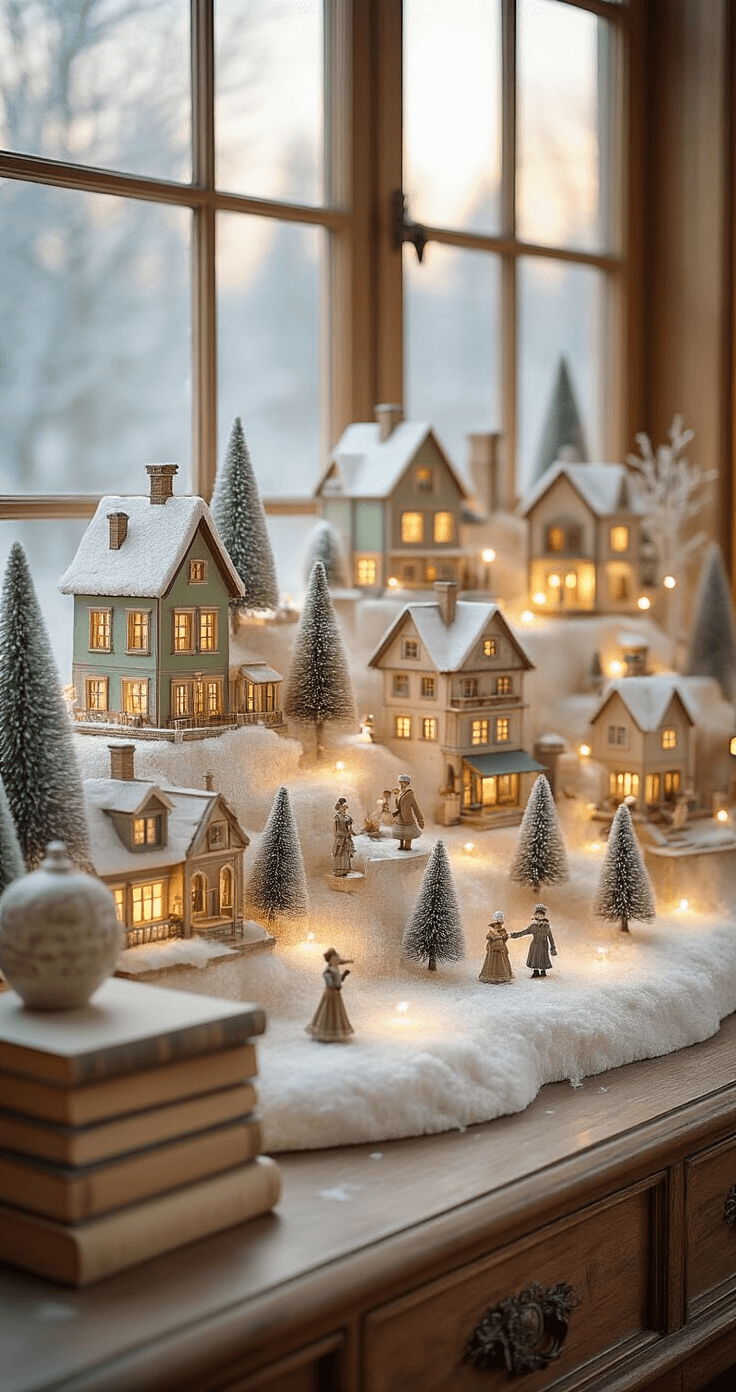
I’ve learned that the displays that stop people in their tracks aren’t the biggest ones—they’re the ones that tell a little story, where you spot something new each time you look, like a tiny figure shoveling snow or a lit window suggesting someone’s home.
Stop Making Your Village Look Like a Flat Pancake
The biggest mistake I see everywhere?
Everything sitting at the same height.
Your village needs layers, drama, elevation—basically, it needs to stop being so damn flat.
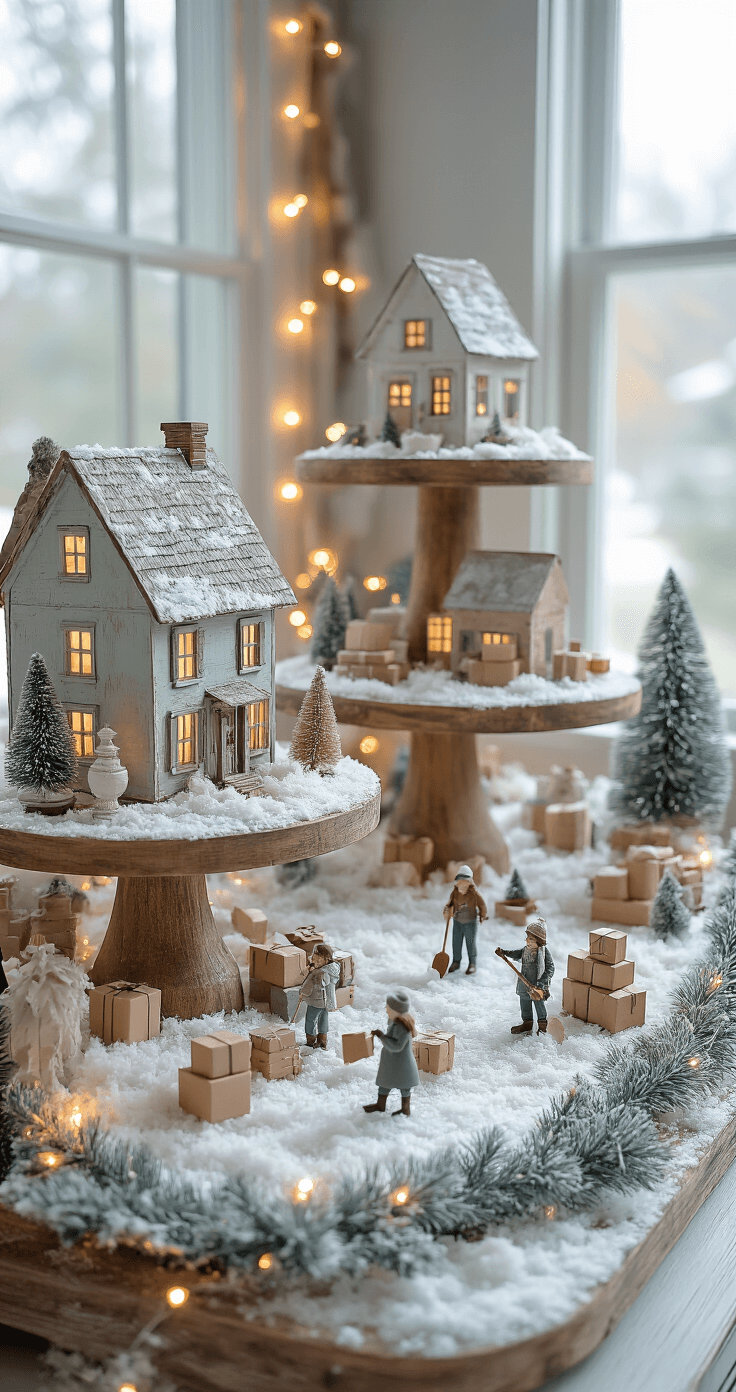
Here’s what actually works:
- Stack books under your snow blanket to create hills
- Use cake stands to elevate key buildings
- Place smaller houses on cupcake stands for extra dimension
- Tuck buildings into glass apothecary jars at varying heights
I learned this trick from a store window display. The designer told me flat displays are where magic goes to die. She was right.
Now I create at least three distinct height levels in every village I set up.
The difference is night and day.
★ Steal This Look
- Paint Color: Benjamin Moore White Dove OC-17
- Furniture: floating wall shelves in staggered heights, a long console table with varying levels, or a tiered plant stand repurposed as village infrastructure
- Lighting: adjustable picture lights with warm 2700K bulbs positioned above each elevation level to cast dramatic shadows
- Materials: stacked vintage hardcover books wrapped in white butcher paper, acrylic cake stands in mixed heights, mercury glass apothecary jars, faux snow blankets with cotton batting underneath for organic mound shapes
I used to spread my village across the entire mantel like a suburban sprawl until my mother-in-law quietly asked why the cathedral looked so insignificant—now I build upward and every piece gets its moment.
🛒 Get The Look
Your Village Needs a Story, Not Just Buildings
Random buildings scattered around look like exactly what they are—random buildings scattered around.
Give your village a narrative.
I organize mine like an actual town:
Main Street area
with the shops and church clustered together
Residential neighborhood
with houses spread out behind
Country section
with a barn and smaller cottages in the back
This takes literally five extra minutes of planning but transforms your display from “stuff on a table” to “place I want to visit.”
Walk around your own town and notice how buildings naturally group. Copy that. Your village will instantly look more intentional.
💡 Steal This Look
- Paint Color: Farrow & Ball Skimming Stone 241
- Furniture: vintage pine farmhouse table with turned legs
- Lighting: adjustable brass picture lights with warm LED bulbs
- Materials: aged burlap, moss, birch bark, weathered wood slices, fine artificial snow flocking
This approach transforms decorating from a chore into storytelling—I find myself imagining the little lives happening inside each cottage, and guests always linger longer when there’s a narrative to discover.
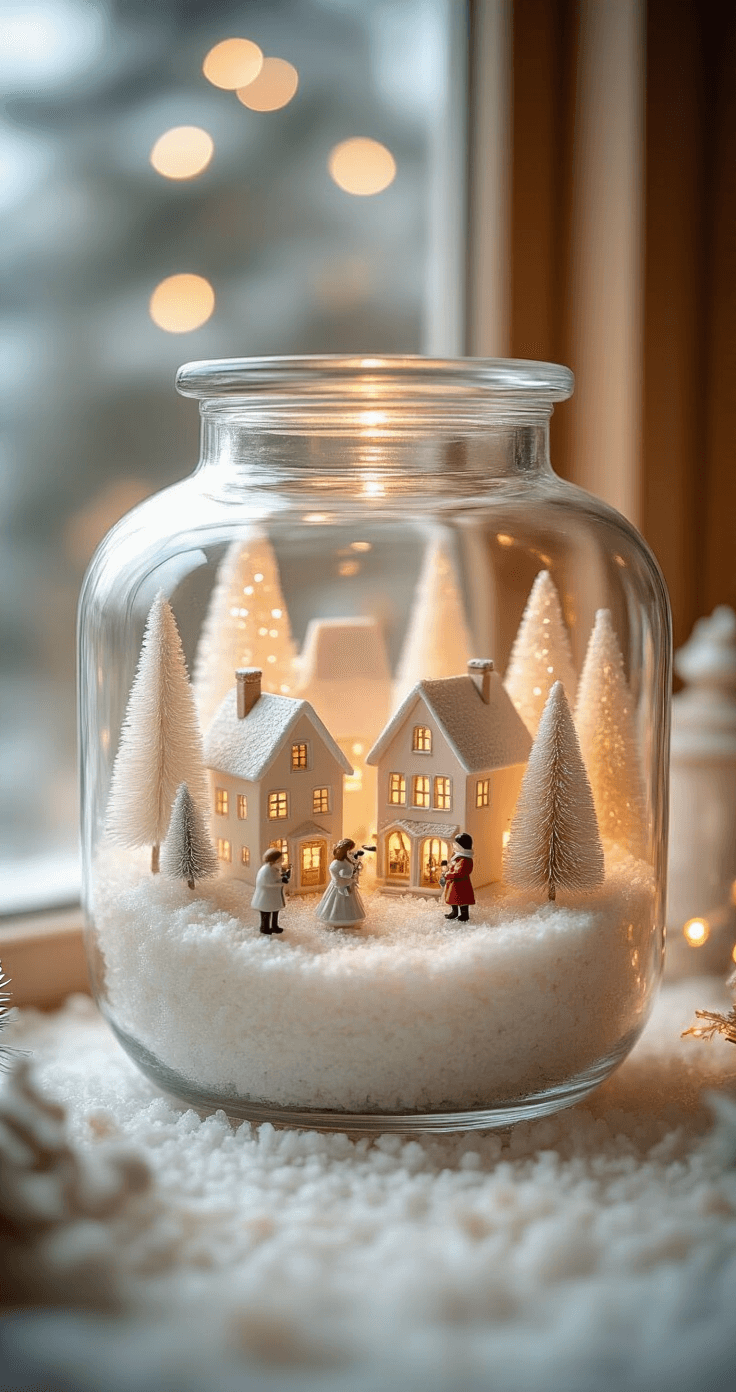
The Glass Jar Hack That Changed Everything for Me
I stumbled on this by accident three years ago.
Fill large glass containers with Epsom salt and nestle a house inside with a couple bottle brush trees.
That’s it.
These self-contained mini-villages solve so many problems:
- They look expensive but cost almost nothing to make
- You can scatter them throughout your house, not just one spot
- They protect your pieces from curious toddlers and destructive cats
- They create that snow globe effect everyone loves
I made six of these last year in different sizes. Guests asked where I bought them. I just smiled and said “Oh, a little shop” because I’m petty like that.
🖼 Steal This Look
- Paint Color: Behr Polar Bear 75
- Furniture: glass-front buffet or sideboard with open shelving for displaying jar villages at varying heights
- Lighting: battery-operated micro LED fairy lights with warm white 2700K color temperature
- Materials: Epsom salt, vintage-style apothecary jars, cork stoppers, weathered wood risers, mercury glass accents
There’s something deeply satisfying about creating a whole world you can hold in your hands, and these jars let you spread that wonder through every room instead of confining it to one display.
Budget Display That Doesn’t Look Cheap
Let’s talk money because this hobby can get out of control fast.
I’ve created villages that cost $300 and villages that cost $30.
The $30 ones often look better.
Dollar Tree is your secret weapon:
- Buildings at $1.50 each
- Miniature trees that look shockingly good
- Figurines that add life to your scene
- Faux snow that works perfectly fine
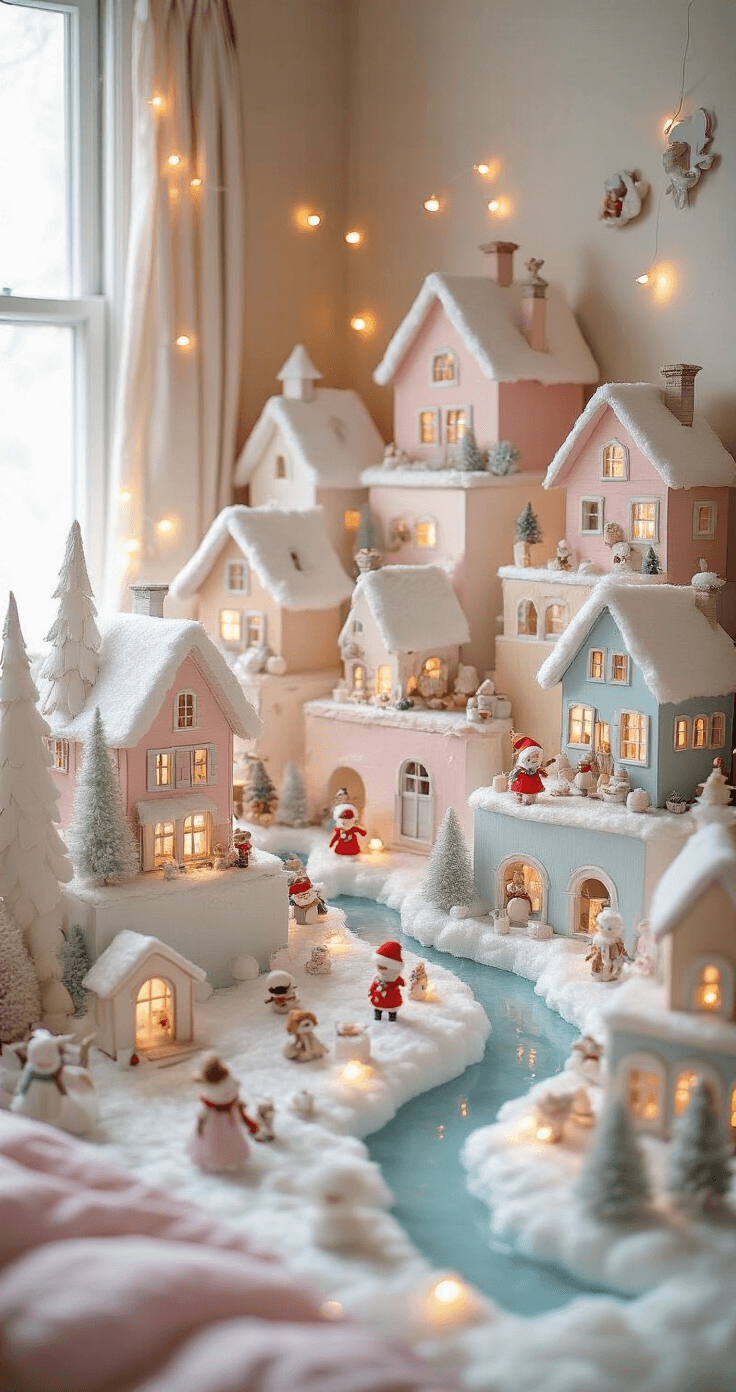
Paint unfinished wooden houses from craft stores in soft pastels mixed with white. Add details with a white paint pen. Nobody will know you didn’t spend a fortune.
I made an entire pastel village for my daughter’s room for under $40. It’s her favorite decoration we own.
The trick isn’t spending more—it’s styling smarter.

🖼 Steal This Look
- Paint Color: Valspar Ultra White 7006-24
- Furniture: floating white wall shelf with built-in LED strip
- Lighting: battery-operated fairy lights with warm white glow
- Materials: unfinished basswood houses, cotton batting, iridescent glitter, matte acrylic craft paint
I built my first $30 village on a folding TV tray in a studio apartment, and guests still asked where I bought the ‘designer set’—proof that intention beats budget every time.
Why Your Village Looks Dead (And How to Fix It)
Villages without people look like ghost towns.
You need figurines.
Not just standing there either—doing things.
I add people shoveling snow, walking dogs, carrying packages, ice skating.
These tiny details make visitors lean in closer.
They create moments and stories within your larger scene.
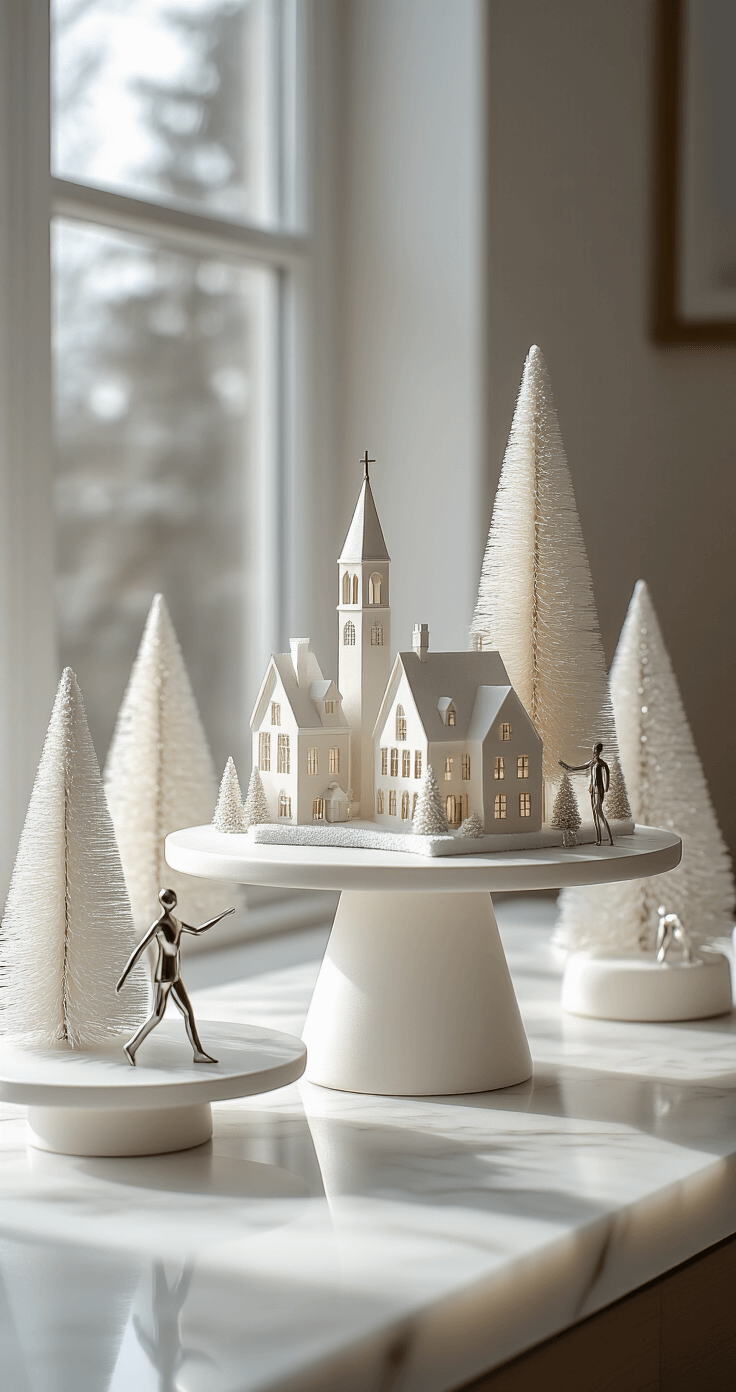
Also, vary your tree colors. Not everything needs to be green.
I use white, cream, and green bottle brush trees mixed together. The variety prevents that “craft store explosion” look.
And please, for the love of everything holy, use different snow textures.
- Thick snow on rooftops.
- Fine dusting on pathways.
- Chunky drifts piled against buildings.
Texture makes your display interesting.
✎ Steal This Look
- Paint Color: use PPG brand. Match the ACTUAL wall color in the image. Format: PPG ColorName CODE
- Furniture: specific furniture for this room
- Lighting: specific lighting fixture
- Materials: key textures and materials
I’ve walked past too many gorgeous ceramic houses that felt hollow because someone skipped the people—your village deserves the tiny baker with flour on his apron and the kid dropping mittens, not just architecture.
Lighting Separates Good Displays from Jaw-Dropping Ones
Battery-operated lights changed my village game completely.
String them behind your buildings so they create a warm glow without visible wires everywhere.
The transformation at night is what makes people stop scrolling through
")


[…] December, my neighbor actually knocked on my door to ask about my window display. She said her kids made her slow down every time they drove past because they wanted to […]