
This post may contain affiliate links. Please see my disclosure policy for details.
Why Your Kitchen Cabinets Deserve the Holiday Treatment
Contents
Your kitchen isn’t just where you cook—it’s where everyone gravitates during holiday gatherings.
Think about it: while you’re basting the turkey or stirring the gravy, guests wander in with wine glasses in hand, kids hover hoping to sneak cookies, and suddenly your workspace becomes the unofficial party headquarters.
So why leave those cabinets bare when they’re getting more attention than your carefully decorated living room?

★ Steal This Look
- Paint Color: Sherwin-Williams Agreeable Gray SW 7029
- Furniture: butcher block kitchen island with bar seating
- Lighting: pendant lights with seeded glass shades over the island
- Materials: warm brass hardware, natural wood cutting boards, matte ceramic canisters
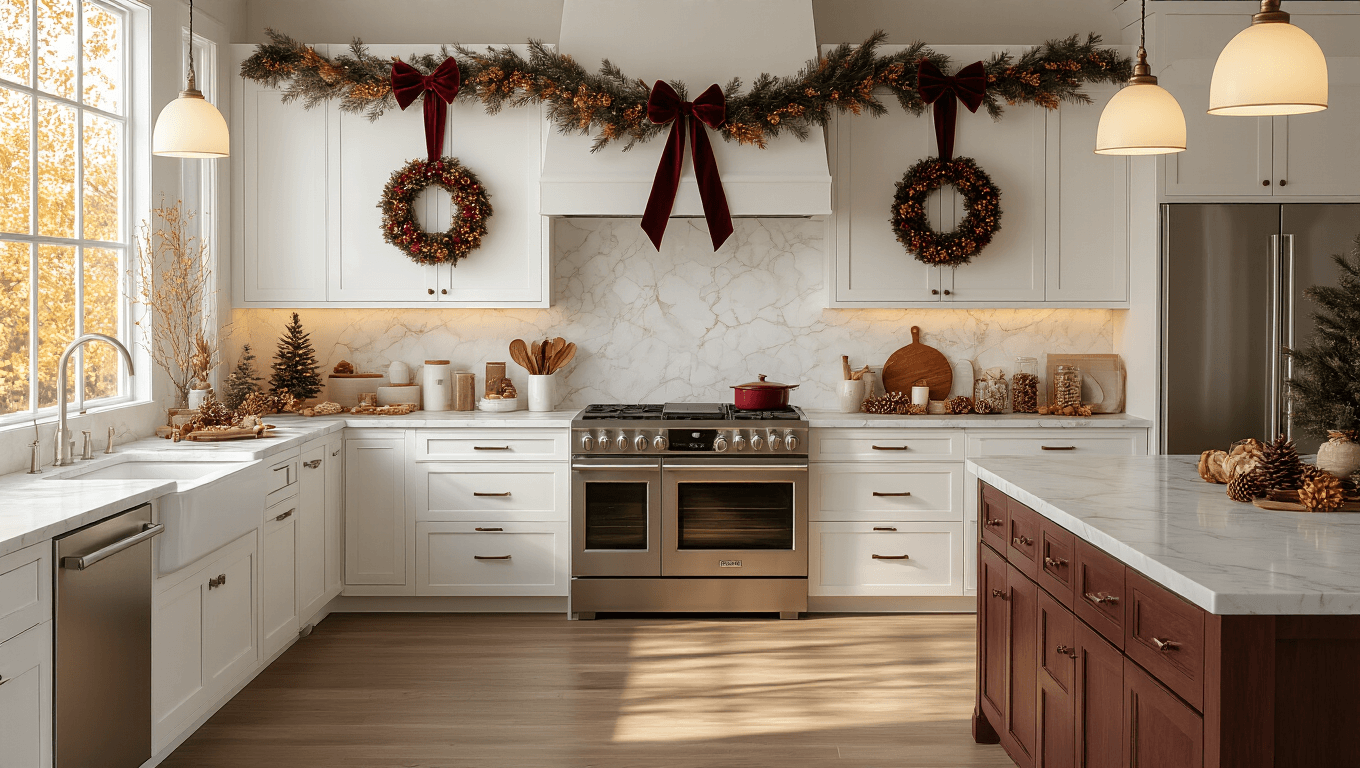
Your kitchen cabinets frame the heart of your home during the holidays—when everyone’s gathered around, those upper surfaces become the backdrop to every meaningful conversation and stolen cookie moment.
Mini Wreaths That Actually Stay Put
Here’s the thing about hanging wreaths on cabinet doors—they look charming until they don’t.
I’ve watched expensive wreaths slip sideways, fall off completely, or get smashed when someone enthusiastically grabbed the cabinet handle.
The secret? Lightweight is everything.
Skip those heavy grapevine numbers that belong on your front door. Instead, grab small artificial Christmas wreaths designed specifically for indoor use—they’re lighter, more flexible, and won’t damage your cabinet finish.
How to Hang Them Without Losing Your Security Deposit
Inside attachment method (my favorite):
- Place Command hooks on the inside top of your cabinet door
- Loop ribbon through the wreath
- Hang from the hook so nothing shows from the outside
- Adjust length so the wreath sits centered on the door
Floating ribbon technique:
- Cut a long piece of ribbon
- Loop it through the top of your wreath
- Tape both ribbon ends to the back of the door with painter’s tape
- The wreath appears to float on the door front
For permanent homes where you’re feeling bold:
- Use tiny finishing nails at the door’s top edge
- Remove easily after the holidays
- Fill holes with wood filler if needed
Fresh vs. Faux: The Eternal Debate
I love the smell of fresh greenery—who doesn’t?
But let me save you some heartache: fresh wreaths on frequently-opened cabinet doors turn brown and crispy faster than you can say “Merry Christmas.”
The constant air movement and kitchen heat accelerate the drying process.
Go faux for your cabinets and save real greenery for your dining table centerpiece.
Dress up artificial wreaths:
- Tuck in cinnamon sticks for texture
- Wire on dried orange slices
- Add small pinecones gathered from your yard
- Tie on jingle bells for movement and sound

✎ Steal This Look
- Paint Color: Benjamin Moore Simply White OC-117
- Furniture: Shaker-style maple kitchen cabinets with brushed nickel pulls
- Lighting: Under-cabinet LED strip lighting with warm 2700K temperature
- Materials: Matte artificial greenery, velvet ribbon, brushed metal hooks, glass-front upper cabinets
Kitchen cabinets are the unsung heroes of holiday decorating—they’re eye-level, abundant, and transform your entire cooking space into something magical without sacrificing a single inch of counter space for baking.
The Wrapped Present Look That Screams Festive
Nothing says “I went the extra mile” quite like cabinets wrapped to look like giant presents.
But here’s where most people mess up—they use ribbon that’s too narrow.
Ribbon Width Matters More Than You Think
Go wide or go home:
- Choose ribbons 2-3 inches wide minimum
- Wired Christmas ribbon holds its shape beautifully
- The wire edge prevents the annoying flip-and-twist problem
- You can reshape bows easily if they get smooshed
The Smart Way to Attach Ribbons
I’ve tried every method imaginable, and here’s what actually works:
For vertical ribbon stripes:
- Measure your cabinet door height
- Add 2 inches for tucking
- Use painter’s tape on the back edge (top and bottom)
- Press firmly and let it set for 30 minutes before opening doors
For the bow centerpiece:
- Make your bow separately (YouTube is your friend here)
- Attach with a small glue gun dot in the center
- Or use double-sided foam tape for easy removal
- Test on an inconspicuous spot first
Single Door vs. Double Door Strategy
This distinction changed everything for me.
Single-door cabinets:
- Treat each as its own gift box
- Center the bow on each door
- Keep ribbons simple—one vertical stripe
- Consider alternating bow colors for visual interest
Double-door cabinets:
- Treat them as ONE large present
- Place the bow off-center on one door
- Run ribbons continuously across both doors
- Secure ribbons where doors meet for a seamless look
Color Schemes That Won’t Make You Cringe
Traditional red and green can feel overdone.
I learned this after my first attempt looked like Christmas threw up in my kitchen.
Try these sophisticated alternatives:
- Burgundy and cream for warmth without screaming
- Metallics (gold or copper) that complement stainless appliances
- Navy and silver for modern kitchens
- Blush pink and champagne for something unexpected
- All white with greenery for Scandinavian vibes
Match your ribbons to something already in your kitchen—your backsplash, curtains, or even your dish towels—for a pulled-together look.

Dried Orange Garlands for That Nostalgic Touch
There’s something about dried orange slices that instantly makes a kitchen feel cozy and inviting.
I started making these after seeing them in a boutique hotel lobby, and now I can’t imagine the holidays without them.
Where to Drape Them for Maximum Impact
Best spots:
- Along the top edge of upper cabinets
- Above your stove hood
- Across a breakfast bar overhang
- Around a kitchen window frame near your cabinets
Avoid placing them where you’ll bump into them constantly—I learned this the hard way when I strung one right where I reach for plates.
DIY or Buy: Let’s Be Realistic
Making dried orange garlands sounds Pinterest-perfect until you realize it takes TIME.
The honest timeline for DIY:
- Slice oranges thinly (20 minutes)
- Bake at low temp for 4-6 hours
- Let cool completely (2 hours)
- String them together (30 minutes)
If you’re already stressed about holiday prep, just buy pre-made dried orange slice garland and call it a day.


[…] rearranging your kitchen layout without a complete demolition. That’s the magic of modular […]
[…] is like giving your cabinets a complete wardrobe […]