

This post may contain affiliate links. Please see my disclosure policy for details.
Transforming Your Home Into a Winter Wonderland: The Ultimate Guide to Outdoor Christmas Decorations That’ll Make Your Neighbors Jealous
Contents
- Transforming Your Home Into a Winter Wonderland: The Ultimate Guide to Outdoor Christmas Decorations That’ll Make Your Neighbors Jealous
- Why Your Outdoor Christmas Display Matters More Than You Think
- Essential Lighting That Creates Maximum Holiday Magic
- Pathway Lighting That Guides Holiday Magic
- Yard Figures and Focal Points That Stop Traffic
- DIY Projects That Add Personal Magic
Outdoor Christmas decorations can transform even the most modest home into a magical winter wonderland that stops traffic and spreads holiday cheer throughout the neighborhood.
Trust me, I’ve been there.
Standing in my front yard three weeks before Christmas, staring at my bare house while my neighbor’s place looked like Santa’s workshop exploded in the best possible way.
That was the year I decided to crack the code on outdoor holiday decorating.
Why Your Outdoor Christmas Display Matters More Than You Think
Let’s be honest.
Your home’s exterior is the first thing guests see when they arrive for holiday gatherings.
It sets the entire mood for the season.
But here’s what most people don’t realize – outdoor Christmas decorations aren’t just about impressing others.
They’re about creating that warm, fuzzy feeling every single time you pull into your driveway after a long December day.
The magic happens when you nail these key elements:
- Visual impact from the street
- Cohesive color scheme
- Proper lighting placement
- Weather-resistant materials
- Energy-efficient operation
🏠 Steal This Look
- Paint Color: Benjamin Moore Black Forest Green HC-187
- Furniture: weathered teak bench with storage for outdoor cushions
- Lighting: oversized galvanized steel barn lantern with flickering LED candle
- Materials: galvanized metal, brushed cedar, matte black powder-coated aluminum, textured burlap ribbon
There’s something deeply personal about outdoor holiday decorating—it’s the one time of year we voluntarily invite our neighbors to judge our taste, and when done right, it transforms a house into a beacon that says ‘you’re home now.’
Essential Lighting That Creates Maximum Holiday Magic
Roof Lights: Your Home’s Crown Jewel
Roof lighting transforms your house into a beacon of holiday spirit.
I learned this the hard way during my first attempt at decorating.
I started with those tiny twinkling lights and wondered why my display looked like a sad afterthought compared to houses down the street.
The secret? Size matters.
C7 and C9 bulbs are your best friends for rooflines and eaves.
They’re visible from blocks away and create that classic Christmas glow we all remember from childhood.
Pro tip: Icicle lights add incredible movement and dimension to your roofline.
They create this gorgeous “dripping snow” effect that looks magical on winter nights.
For maximum roof impact:
- Outline your entire roofline with consistent spacing
- Use clips designed for your roof type (gutters, shingles, etc.)
- Test every strand before hanging (trust me on this one)
- Keep extension cords hidden along gutters or under eaves
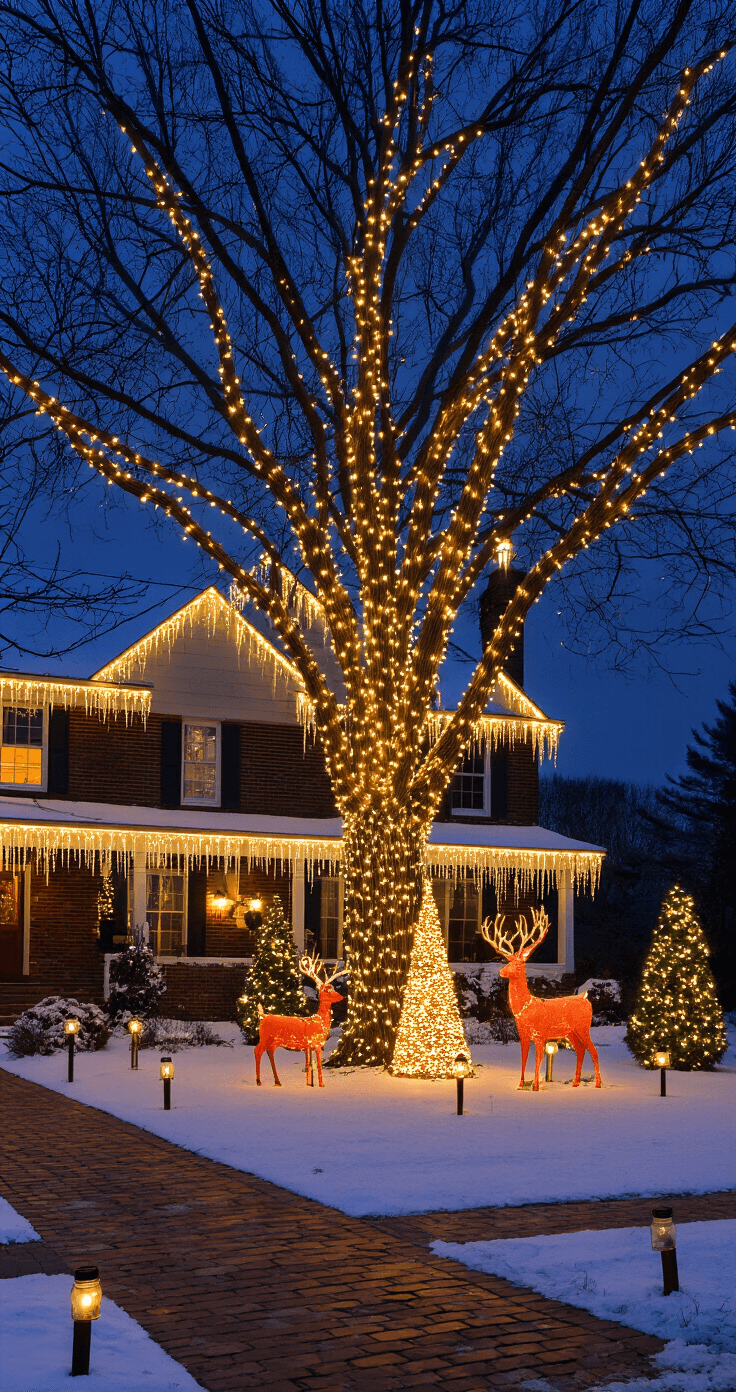
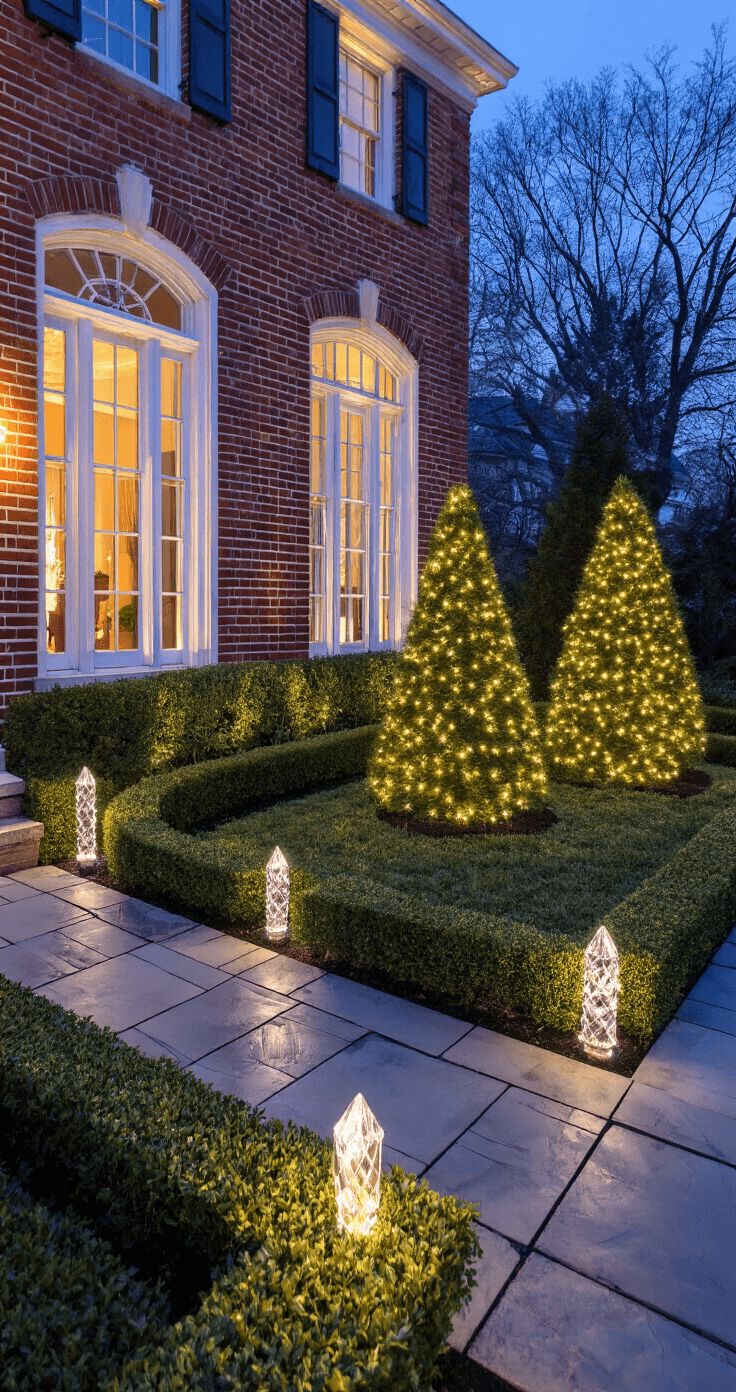
Tree and Shrub Lighting: Nature Meets Christmas Magic
Trees and shrubs offer endless opportunities for creativity.
My game-changer discovery was trunk wrap lights.
Instead of just draping lights over branches, wrapping them around trunks creates these incredible glowing pillars in your landscape.
Here’s my foolproof tree lighting method:
- Start at the base and work your way up
- Wrap every 2-3 inches for dense coverage
- Use mini lights for delicate branches
- Go with larger bulbs for thick trunks
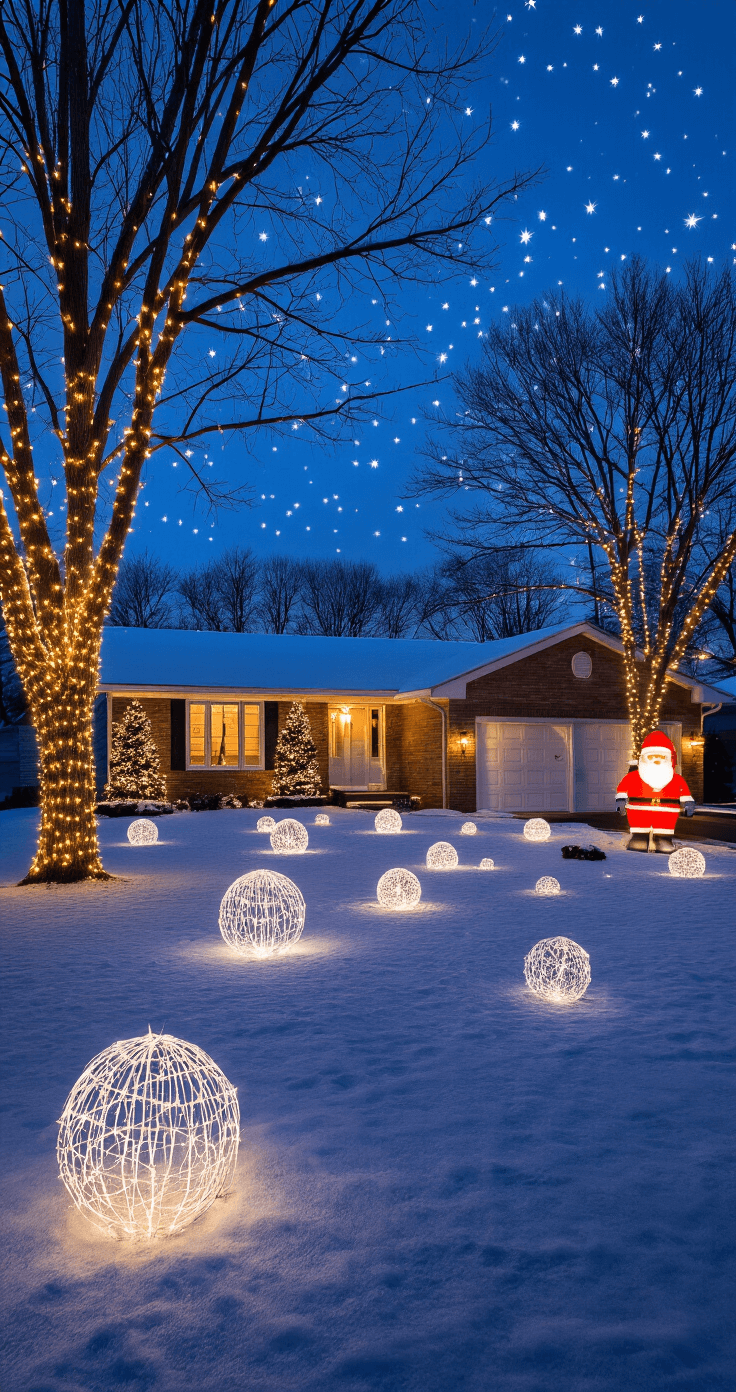
DIY Light Balls deserve special mention here.
These chicken wire light spheres cost pennies to make but look like expensive landscape lighting.
I made six different sizes last year and scattered them across my front lawn.
Guests kept asking where I bought them!
🏠 Steal This Look
- Paint Color: use Farrow & Ball brand. Match the ACTUAL wall color in the image. Format: Farrow & Ball ColorName CODE
- Furniture: specific furniture for this room
- Lighting: C9 LED warm white roofline string lights with commercial-grade sockets, 12-inch spacing
- Materials: key textures and materials
There’s something deeply satisfying about being the house that makes neighbors slow their cars on evening drives—roof lighting is your single biggest opportunity for that moment of collective wonder.
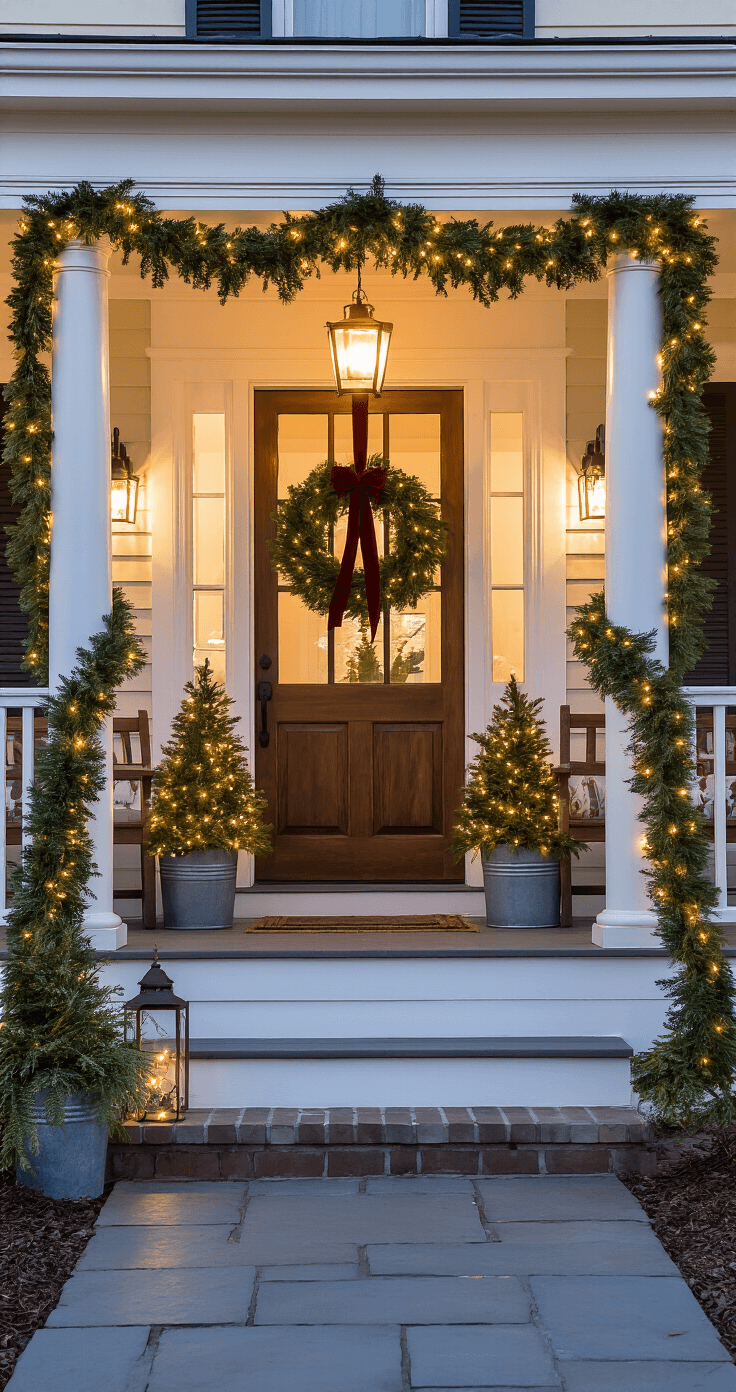
Pathway Lighting That Guides Holiday Magic
Pathway lighting does double duty.
It welcomes guests safely to your door while extending your holiday display beyond your house.
My favorite pathway solutions:
- Stake lights in consistent patterns
- Globe pathway bulbs for elegant spacing
- Mini Christmas trees that match your color scheme
- Mason jar lanterns for rustic charm
The key is creating a clear visual line from your driveway to your front door.
I space my pathway elements every 3-4 feet for optimal effect without overcrowding.
★ Steal This Look
- Paint Color: use Behr brand. Match the ACTUAL wall color in the image. Format: Behr ColorName CODE
- Furniture: weather-resistant Adirondack chairs flanking the walkway entrance, a narrow console table on the porch for displaying lanterns
- Lighting: low-voltage LED stake lights with warm white 2700K bulbs, solar-powered globe pathway lights with frosted glass, and battery-operated mason jar lanterns with flickering candle inserts
- Materials: powder-coated metal for stake durability, hand-blown glass globes, reclaimed wood for lantern hangers, and weatherproof braided extension cords in dark green
There’s something quietly satisfying about watching neighbors slow down as they pass your house, and pathway lighting is often what catches their eye first—it’s your home’s way of reaching out into the neighborhood.
Yard Figures and Focal Points That Stop Traffic
Inflatable Decorations: Love Them or Hate Them
I used to be an inflatable skeptic.
Then I watched my nephew’s face light up when he spotted our 8-foot inflatable Santa from three blocks away.
Inflatable pros:
- Easy setup and storage
- Huge visual impact
- Kid-friendly appeal
- Weather-resistant
Inflatable considerations:
- Choose quality brands for longevity
- Secure properly against winter winds
- Plan electrical access for continuous operation
- Position strategically for maximum visibility
Light Show Trees: The Ultimate Statement Piece
Pre-lit cone trees with programmable light patterns changed everything for me.
These freestanding beauties create professional-level displays with minimal effort.
I positioned my 8-foot light show tree as the centerpiece of my front yard.
It cycles through different patterns every few seconds, creating movement and interest that static displays can’t match.
✎ Steal This Look
- Paint Color: use Valspar brand. Match the ACTUAL wall color in the image. Format: Valspar ColorName CODE
- Furniture: weatherproof storage bench with hidden compartments for inflatable storage and electrical cord management
- Lighting: programmable RGB LED spotlight with stake mount for uplighting yard figures
- Materials: powder-coated aluminum frames, marine-grade vinyl inflatables, UV-resistant acrylic, galvanized steel ground stakes, outdoor-rated extension cords with lighted ends
There’s something deeply satisfying about creating a display that makes strangers slow their cars—it’s the closest most of us get to public art, and the neighborhood kids become your unofficial critics.
DIY Projects That Add Personal Magic
Wooden Log Reindeer: Rustic Charm on a Budget
Last year’s DIY project success story.
Using basic logs from my firewood pile, I created a family of reindeer that cost less than $20 total.
Materials needed


")


[…] for you. Here are some of the most captivating vampire costume ideas, complete with step-by-step guides to help you transform into the creature of the […]