
This post may contain affiliate links. Please see my disclosure policy for details.
Thanksgiving Tablescapes That’ll Make Your Guests Actually Want to Sit Down
Thanksgiving tablescapes might sound fancy, but here’s the truth: you don’t need a degree in interior design or a Pinterest-perfect life to pull this off.
I’ve been there, staring at my dining table three hours before guests arrive, wondering how to make it look like I didn’t just panic-buy everything at the grocery store.
Here’s what I’ve learned after years of trial and error (and one memorable year involving a centerpiece fire—long story).
Why Your Table Actually Matters
Your Thanksgiving table sets the mood before anyone takes their first bite.
Think about it: this is where conversations happen, where your uncle tells that same story for the tenth year running, where memories get made.
A thoughtfully decorated table tells your guests they matter.
It says you cared enough to try.
Start With What You’ve Got
Before you spiral into buying mode, walk around your house.
Seriously, do it right now.
I bet you already own most of what you need.
Look for these items:
- White plates (they’re your blank canvas)
- Glasses and jars in various sizes
- Fabric pieces that could work as runners or napkins
- Candles collecting dust in that drawer
- Serving platters you forgot you owned
The best table linens don’t have to be expensive or brand new.
That vintage tablecloth from your grandmother? Perfect.

Building Your Foundation (The Smart Way)
I always start with the base layer because it’s like getting dressed—you need the foundation before the accessories make sense.
Layer like this:
- Tablecloth first (neutral colors work best—cream, beige, soft gray)
- Runner on top (this is where you can get bold with patterns or texture)
- Placemats at each seat (woven or natural materials add instant warmth)
The trick? Don’t match everything perfectly.
That Instagram-perfect coordination actually looks sterile in real life.
Mix textures instead—smooth linen with rough burlap, shiny metallics with matte ceramics.

The Centerpiece That Won’t Make People Lean Around It
I learned this the hard way: if your guests can’t see each other’s faces, your centerpiece is too tall.
End of story.
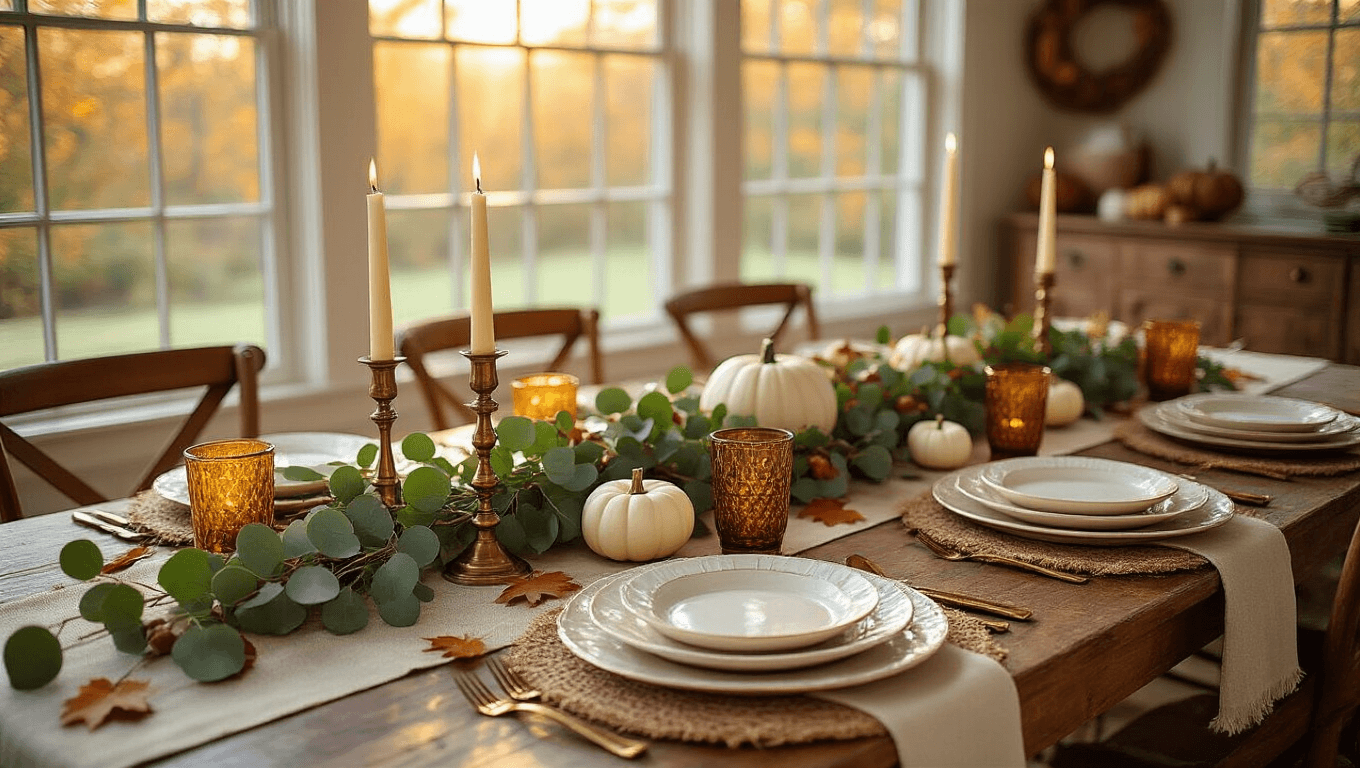
My go-to centerpiece formula:
- Keep it under 12 inches tall (unless you’re using super thin candlesticks)
- Use odd numbers of elements (3 pumpkins, 5 candles, 7 stems)
- Vary the heights slightly for visual interest
- Leave breathing room—you’ll need space for serving dishes
Last year, I walked into my backyard with kitchen shears and gathered branches, berries, and fallen leaves.
Cost: zero dollars.
Compliments: countless.
I scattered mini pumpkins from the farmer’s market down the center, stuck the foliage in vintage glass bottles, and called it done.

Quick Centerpiece Ideas That Actually Work
The 10-Minute Wonder:
Grab whatever’s in your yard (leafy branches, interesting twigs, safe berries), combine with grocery store produce like pears or small pumpkins, arrange in clear jars or basic vases, and surround with your regular white dishes.
Done.
The Floral Situation:
If you’re going with flowers, skip the massive arrangement.
Instead, buy a bunch of orange or rust-colored blooms, cut them short, and place them in drinking glasses or small vases spaced down the table.
Fill the gaps between with Clementines, small pumpkins, or even cinnamon sticks tied with twine.
The casual repetition looks intentional and costs way less than one giant arrangement.
The Foraged Look:
This is my personal favorite because it feels organic and effortless.
- Pinecones scattered around brass candlesticks
- Fall leaves (press them first so they lay flat)
- Acorns and nuts in small bowls
- Branches with berries still attached
Pro tip: spray your foraged items with a light clear sealant so they don’t shed all over the table mid-dinner.

Place Settings Without the Pretense
Here’s where people overcomplicate things.
You don’t need matching china sets or fancy chargers (though chargers do make everything look more expensive, I’ll give them that).
Build each place setting in this order:
- Placemat or charger (even wooden cutting boards work)
- Dinner plate
- Salad plate on top
- Napkin (folded simply or tied with ribbon)
- Flatware
- Glass
Simple napkin tricks that look impressive:
- Tie with velvet ribbon in jewel tones (emerald, burgundy, burnt orange)
- Tuck in a sprig of rosemary or small leaf
- Slip through a wooden napkin ring
- Just fold it into a rectangle and lay it on the plate—sometimes simple wins
I’ve written place cards on large leaves with a metallic marker.
Sounds Pinterest-y, I know, but it took three minutes and people loved them.
<img
")


