This post may contain affiliate links. Please see my disclosure policy for details.
How I Transformed My Tiny Uni Dorm Into a Pinterest-Worthy Paradise (Without Breaking the Bank)
Uni dorm room decor doesn’t have to look like a prison cell meets storage unit.
I get it. You’ve just moved into a space the size of a shoebox, staring at white walls that scream “institutional beige,” and you’re wondering how on earth you’re supposed to make this feel like home.
Your roommate’s already claimed the better side. The lighting is awful. You can’t paint, hang heavy shelves, or do anything that’ll cost you your deposit.
And let’s be honest, your budget is approximately three coffees and some spare change.
I’ve been there, and I’m about to show you exactly how I styled my cramped dorm room into something that made everyone stop at my doorway and ask, “Wait, can I come in?”
")
The Reality Check Nobody Tells You About Dorm Styling
Here’s what I wish someone had told me before I started.
You don’t need expensive furniture. You don’t need permission to knock down walls. You don’t even need particularly good taste to begin with.
What you need is a plan, around $50-$200, and roughly two hours on a Sunday afternoon.
I spent 60-90 minutes styling my 100-square-foot room, another 45-60 minutes photographing it for my Pinterest board (yes, I’m that person), and the results lasted me the entire academic year.
Quick snapshot of what you’re working with:
- Budget: $50-$200 total
- Time needed: 2-3 hours start to finish
- Difficulty: Laughably easy
- Room size: 9-14 square meters (that’s tiny, but we’re making it work)
- Skills required: Ability to arrange pillows and not fall off a step stool
Why Your Dorm Room Looks Like Everyone Else’s (And How to Fix It)
Walk down any dorm hallway and you’ll see the same setup repeated like a depressing pattern.
Bare mattress with one sad pillow. Desk covered in textbooks and energy drink cans. Maybe a poster hastily stuck up with that weird putty that leaves marks.
The problem isn’t that you lack creativity. It’s that you’re treating your dorm like temporary housing instead of your actual home for nine months.
I’m going to walk you through the exact system I used, the same one that got my room featured on three different Pinterest boards and made my mom actually proud of my life choices for once.
")
The Color Palette That Makes Small Spaces Feel Bigger
Forget what you think you know about decorating.
In a space this small, color is everything. Get it wrong and your room feels like a cluttered storage closet. Get it right and suddenly you’ve got a space that photographs beautifully and actually feels calm.
Here’s my foolproof formula:
Base layer (60% of your room):
- White
- Cream
- Light gray
These are your walls, your bedding base, your largest pieces. Boring? Maybe. But they’re the canvas that makes everything else pop.
Mid-tones (30% of your room):
- Light wood furniture
- Beige accents
- Soft neutrals
Think woven storage baskets, natural fiber rugs, wooden desk organizers.
Accent colors (10% of your room):
Pick ONE or maximum TWO from this list:
- Sage green
- Dusty pink
- Navy blue
- Terracotta orange
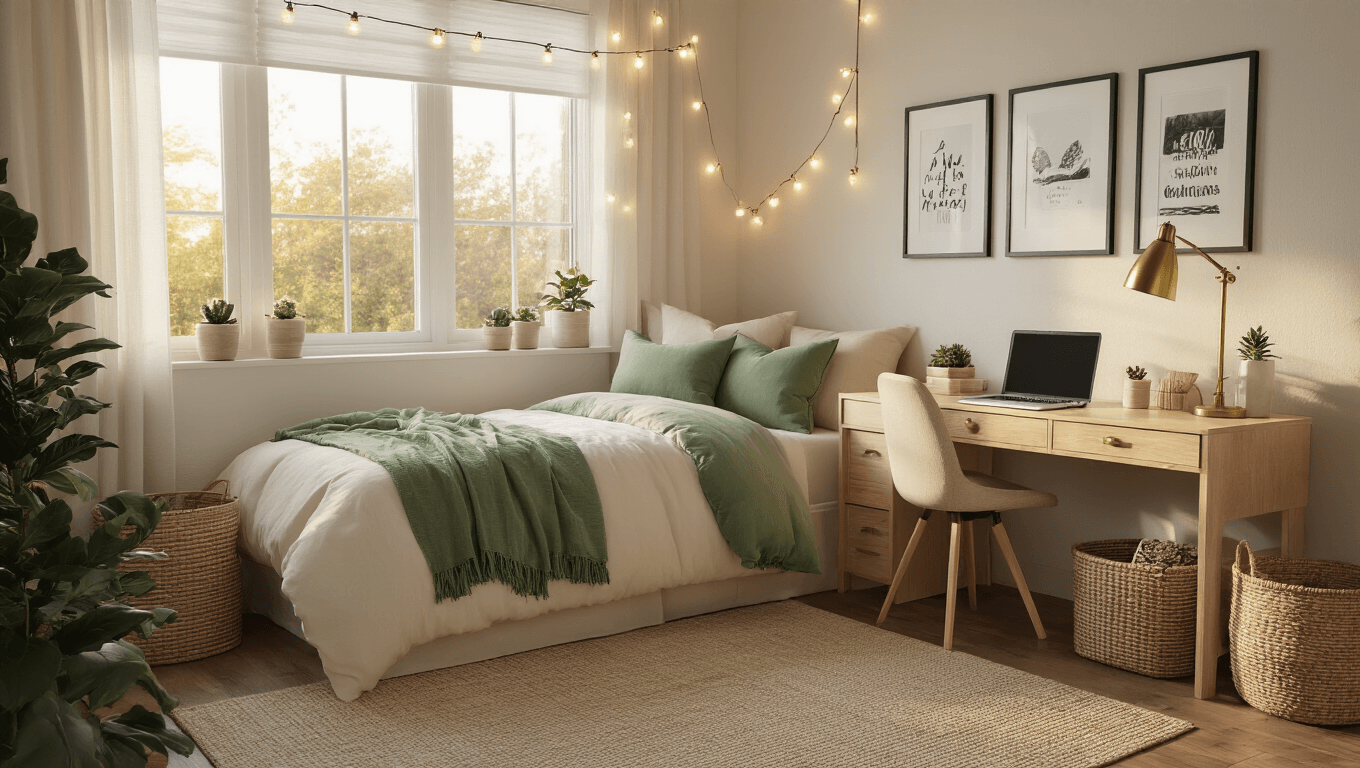
I went with sage green and it was the best decision I made. It shows up in my throw pillows, my wall art, my notebook on my desk, and a small plant pot.
Repeat your accent color in 3-5 spots around the room. This is what designers call “visual cohesion” and what I call “making it look like you didn’t just throw random stuff together.”
")
What You Actually Need (And What’s Just Instagram Nonsense)
Let me save you from buying useless clutter.
Essential items that earn their keep:
- One good throw blanket – Not five, not a collection. One that you’ll actually use.
- 3-4 pillows max – Two for sleeping, two for looking pretty when people visit.
- String lights or fairy lights – The fastest way to make any space feel cozy. Hang them along your wall or around your bed frame.
- One small rug – Even a 3×5 footer changes everything. It defines your space and makes the floor less “institutional.”
- Basic storage bins – Under-bed storage boxes are non-negotiable. Hide the chaos.
- Wall decor that doesn’t need nails – Washi tape, command strips, and a cork board or fabric bulletin board.
Things you absolutely don’t need:
- Expensive artwork (print free designs online, I’ll tell you where)
- Matching furniture sets (mix and match looks better anyway)
- Anything that requires tools or your landlord’s permission
- More than one potted plant if you’ve killed every succulent you’ve ever owned
")
The 90-Minute Styling Session That Changed Everything
Right, here’s exactly what I did on a Saturday afternoon in September.
Hour one: The clearout (30 minutes)
I removed everything that wasn’t nailed down. Every poster, every random bit of paper, every phone charger.
Stuffed clothes in the closet, shoved everything else into those storage bins under my bed.
The goal here is maximum blank canvas