
This post may contain affiliate links. Please see my disclosure policy for details.
Budget-Friendly Back Patio Ideas: Transform Your Outdoor Space Without Breaking the Bank
Contents
- Budget-Friendly Back Patio Ideas: Transform Your Outdoor Space Without Breaking the Bank
- DIY Patio Foundations: Your Budget-Friendly Starting Point
- Shade Solutions That Won’t Drain Your Wallet
- Furniture: Comfort Without the Crazy Prices
- Lighting: Setting the Mood for Pennies
- Green Touches: Nature on a Budget
- Money-Saving Pro Tips
- Final Thoughts
Who says creating a stunning back patio requires a massive budget? I’m about to show you how to turn your outdoor space into a dreamy retreat without spending a fortune.
DIY Patio Foundations: Your Budget-Friendly Starting Point
Paver Patios: Creativity Meets Affordability
Forget expensive professional installations. You can create a jaw-dropping paver patio with your own two hands:
Pro Tips for Paver Perfection:
- Choose budget-friendly materials like concrete pavers
- Create unique patterns by mixing different sized stones
- Fill gaps with moss for a charming, natural look

Gravel: The Unsung Hero of Budget Patios
Why spend thousands when gravel can be your best friend?
Gravel Installation Hack:
- Total cost: Typically $1-$3 per square foot
- Minimal tools required
- Excellent drainage and quick installation
- Variety of colors and textures available

💡 Steal This Look
- Paint Color: Benjamin Moore Kendall Charcoal HC-166
- Furniture: modular concrete block seating with outdoor cushions
- Lighting: string lights with black wire draped overhead
- Materials: gray concrete pavers, pea gravel, crushed limestone base, polymeric sand, creeping thyme
There’s something deeply satisfying about stepping onto a patio you built yourself, knowing every sore muscle and weekend afternoon created a space that genuinely belongs to you.
👑 Get The Look
Shade Solutions That Won’t Drain Your Wallet
DIY Pergolas: Affordable Overhead Elegance
Building a pergola isn’t rocket science. With basic carpentry skills and some weekend dedication, you can create a stunning overhead structure.
Budget Pergola Building Tips:
- Use pressure-treated lumber
- Look for seasonal sales at home improvement stores
- Consider bamboo for a unique, cost-effective alternative

Shade Sails: Instant Cool Without the High Price Tag
Shade sails are the ultimate budget-friendly cooling solution:
- Cost: $50-$200 per sail
- Easy DIY installation
- Multiple color and size options
- Removable for seasonal changes

★ Steal This Look
- Paint Color: Farrow & Ball Green Smoke 47
- Furniture: DIY pressure-treated lumber pergola with 2×6 rafters spaced 12 inches apart
- Lighting: string lights draped between pergola rafters
- Materials: pressure-treated pine, bamboo screening, canvas shade sails in sand or terracotta
There’s something deeply satisfying about sitting under shade you built yourself—my first pergola wobbled slightly and the paint job was uneven, but every summer dinner under it felt earned in a way store-bought structures never quite match.
Furniture: Comfort Without the Crazy Prices
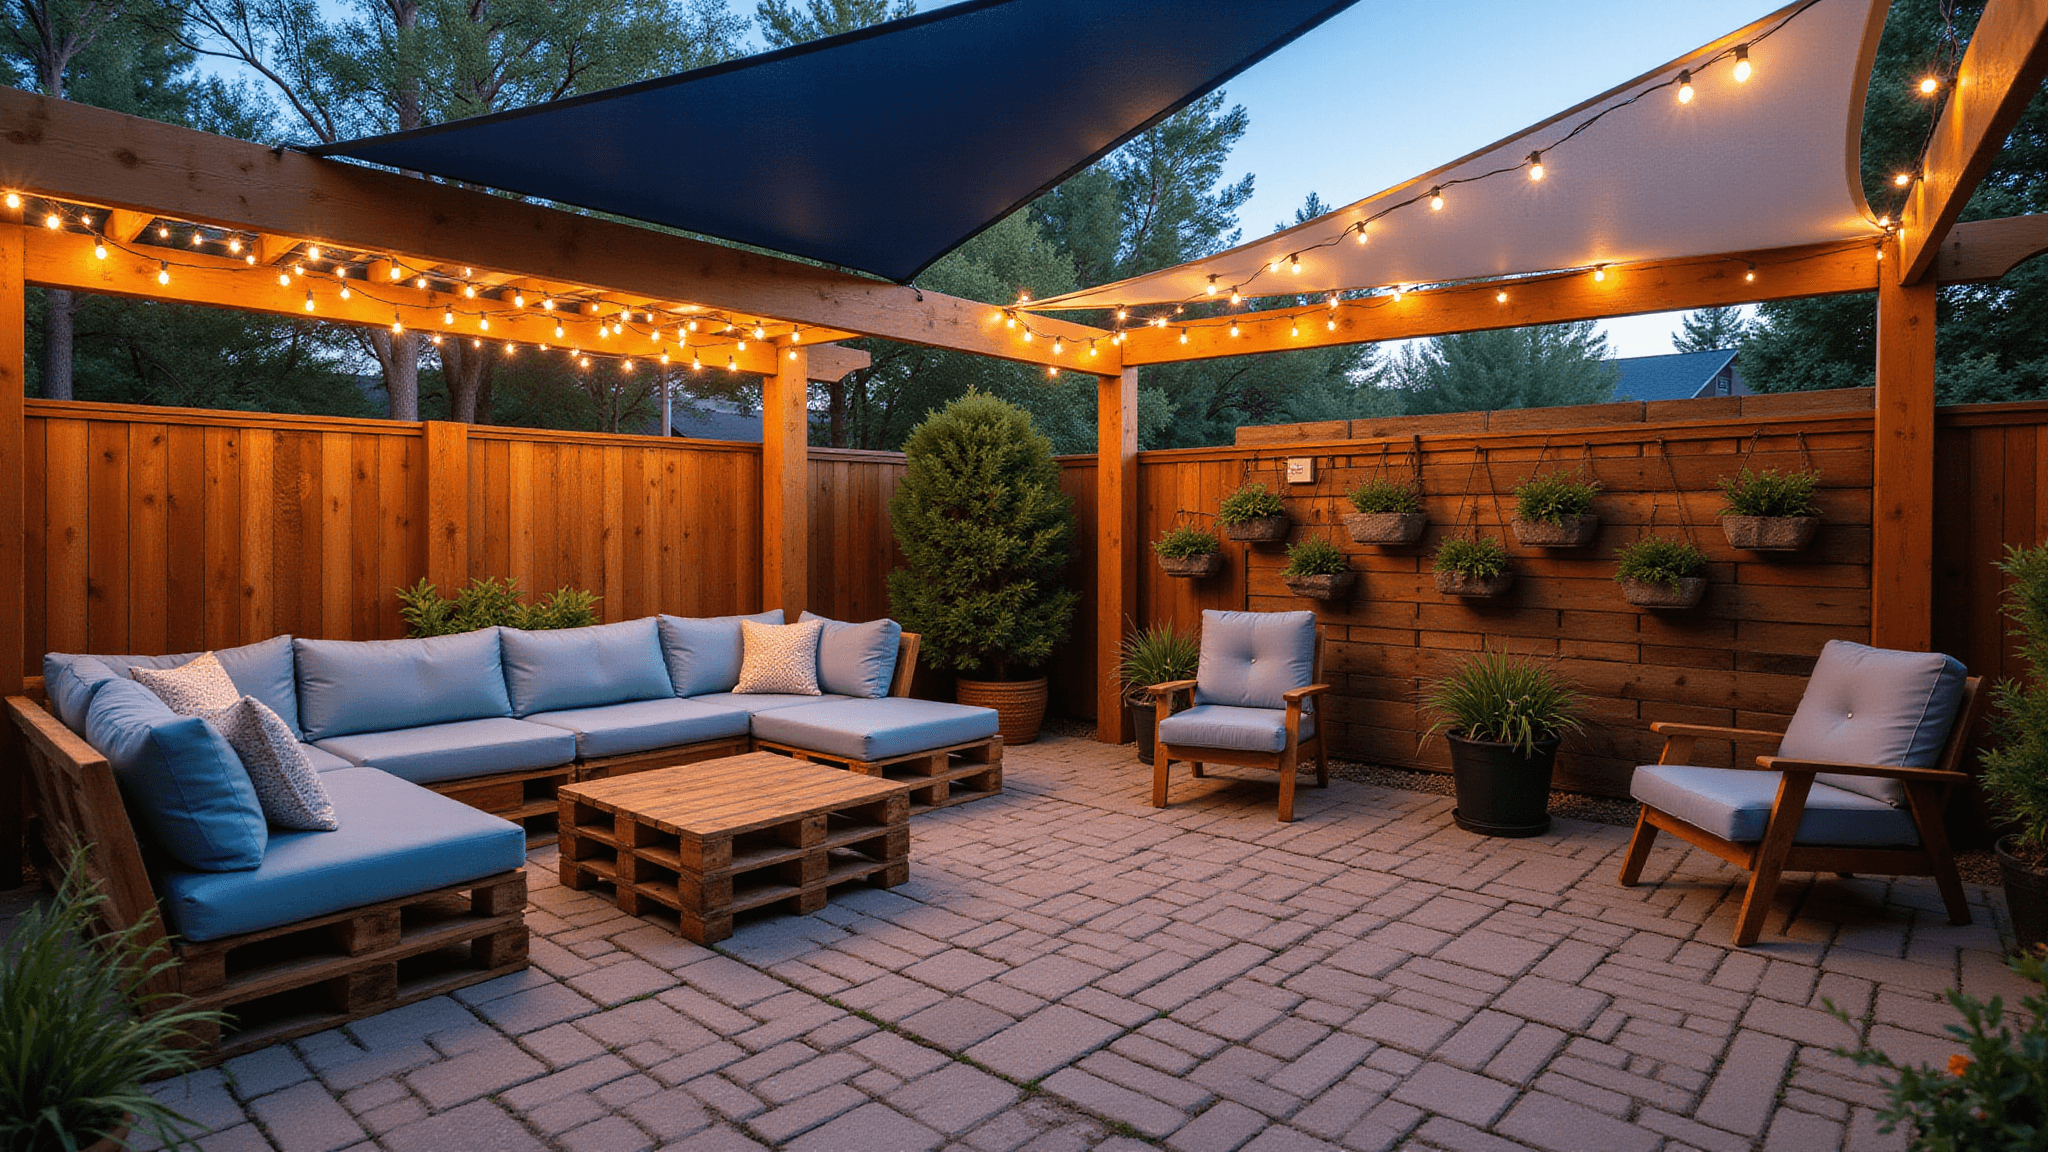
Pallet Furniture: Upcycling Magic
Who knew wooden pallets could become stylish outdoor furniture?
Pallet Furniture Essentials:
- Free or low-cost materials
- Minimal tools required
- Customize with outdoor cushions
- Perfect for small and large spaces

✎ Steal This Look
- Paint Color: use Behr brand. Match the ACTUAL wall color in the image. Format: Behr ColorName CODE
- Furniture: DIY pallet sectional sofa with weather-treated pine pallets arranged in L-configuration, topped with 4-inch thick navy blue outdoor cushions
- Lighting: solar-powered Edison bulb string lights draped overhead on galvanized steel guide wire
- Materials: rough-sawn pallet wood, outdoor-rated foam cushions in Sunbrella canvas, matte black powder-coated steel hairpin legs for elevation
There’s something deeply satisfying about building your own seating from cast-off materials—guests always ask where you bought it, and you get to say ‘I made that’ with legitimate pride.
👑 Get The Look
Lighting: Setting the Mood for Pennies
String Lights: Instant Atmosphere
A few string lights can transform your patio from bland to grand:
- Solar-powered options eliminate electricity costs
- Multiple color temperatures available
- Easy installation
- Creates magical evening ambiance

✎ Steal This Look
- Paint Color: use Valspar brand. Match the ACTUAL wall color in the image. Format: Valspar ColorName CODE
- Furniture: weathered wood Adirondack chairs or a simple metal bistro set
- Lighting: warm white 2700K solar-powered LED globe string lights with black wire
- Materials: galvanized metal hooks, jute twine, reclaimed wood posts, mason jar lanterns
There’s something deeply satisfying about watching your first string lights flicker on at dusk—it’s the moment your patio stops being a yard and starts being your favorite room of the house.
Green Touches: Nature on a Budget
Container Gardening: Big Impact, Small Investment
You don’t need a massive garden to add greenery:
- Use recycled containers
- Mix herbs and decorative plants
- Vertical gardening saves space
- Low-maintenance options available

🖼 Steal This Look
- Paint Color: PPG Olive Sprig PPG1125-4
- Furniture: galvanized metal trough planters repurposed as seating benches
- Lighting: solar-powered mason jar string lights wrapped around railing posts
- Materials: weathered terracotta, raw cedar stakes, burlap planter liners, river rock mulch
There’s something deeply satisfying about stepping onto your patio and snipping fresh basil for dinner—this approach lets you build that ritual without the intimidation of raised beds or landscape crews.
Money-Saving Pro Tips
Budget Breakdown:
- Prioritize foundational elements
- DIY whenever possible
- Shop end-of-season sales
- Use multipurpose items
- Implement projects gradually
Estimated Total Cost Range:
- Basic Patio Refresh: $200-$500
- Mid-Range Transformation: $500-$1,500
- High-End Budget DIY: $1,500-$3,000
Final Thoughts
Creating a stunning back patio doesn’t require a small fortune. With creativity, some elbow grease, and strategic planning, you can design an outdoor space that looks like it cost thousands but actually fits your budget.
Remember: The most beautiful patios aren’t about how much money you spend, but the love and personal touch you bring to the space.


—Here's How You Can Too")
[…] crafty? Here are some budget-friendly DIY ideas to jazz up your […]
[…] Decorate Without Breaking the Bank […]