
This post may contain affiliate links. Please see my disclosure policy for details.
How to Create a Stunning Candy Christmas Tree That’ll Make Your Guests Drool
Contents
Candy Christmas trees are taking over the holiday decor scene, and honestly, I couldn’t be more thrilled about it.
You know that feeling when you walk past a bakery window and can’t help but press your nose against the glass? That’s exactly what your Christmas tree should do to people.
I stumbled into this trend completely by accident three years ago when my niece knocked over half my ornament box, and I was left scrambling with what I had in my pantry. Best decorating disaster ever.
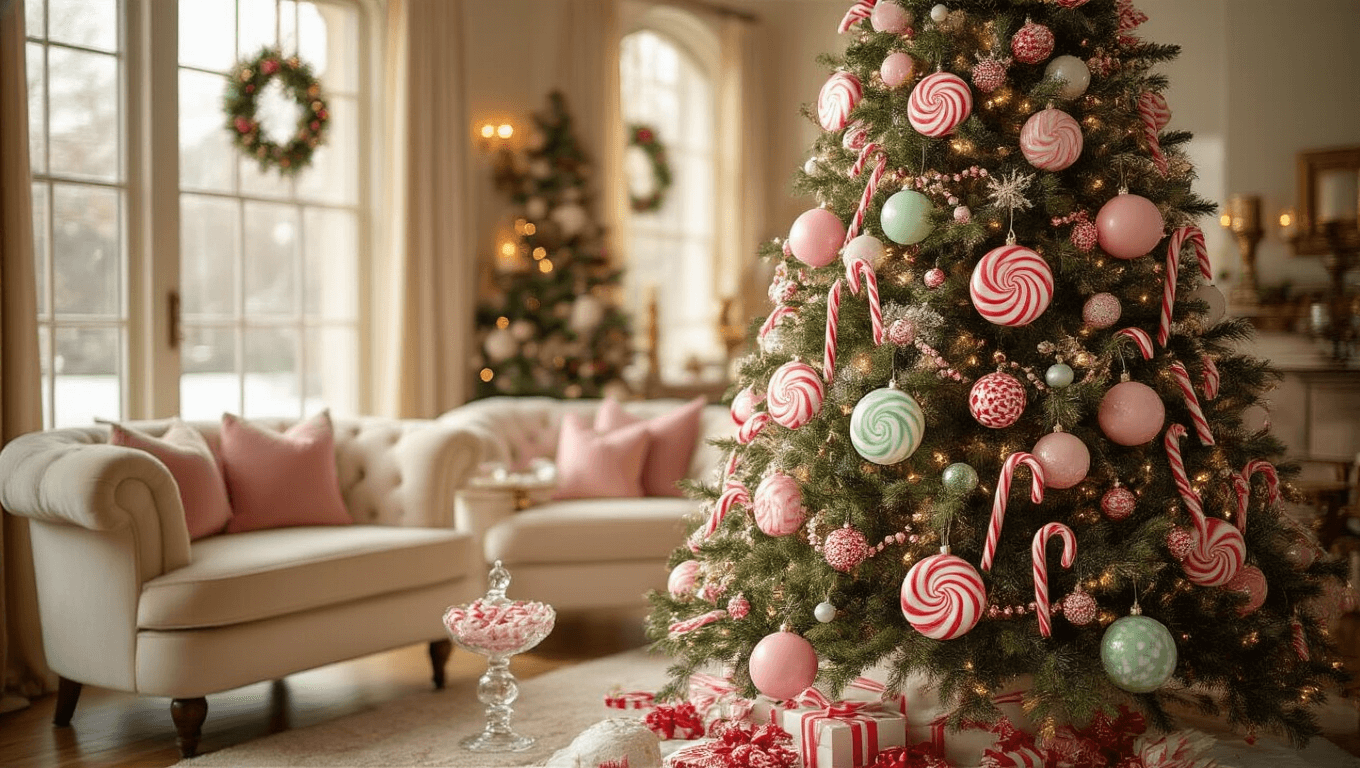
🎨 Steal This Look
- Paint Color: Sherwin-Williams Pure White SW 7005
- Furniture: vintage apothecary cabinet or glass-front hutch for displaying extra candy ornaments and creating a cohesive sweets shop vignette
- Lighting: oversized bubblegum pink glass pendant or cluster of globe pendants in varying candy colors (peppermint red, buttercream yellow, mint green)
- Materials: high-gloss lacquered finishes, hand-blown glass ornaments, cellophane-wrapped candy garlands, peppermint stripe ribbon, faux sugar glitter accents
There’s something wonderfully nostalgic about a candy-themed tree that transports you straight back to childhood wonder, and I’ve found guests inevitably linger longer in rooms with this playful holiday focal point—it’s impossible not to smile.
Why Your Tree Needs a Sweet Makeover This Year
Let me guess what’s running through your head right now.
Won’t the candy melt under the lights?” “Is this going to attract ants into my living room?” “Will I end up eating all my decorations before Christmas even arrives?
Valid concerns, every single one.
But here’s the thing—candy Christmas trees aren’t just about actual edible candy stuck to your branches (though we’ll get to that option). We’re talking about a whole aesthetic that brings that sugary, nostalgic joy without necessarily creating a pest problem or testing your willpower.

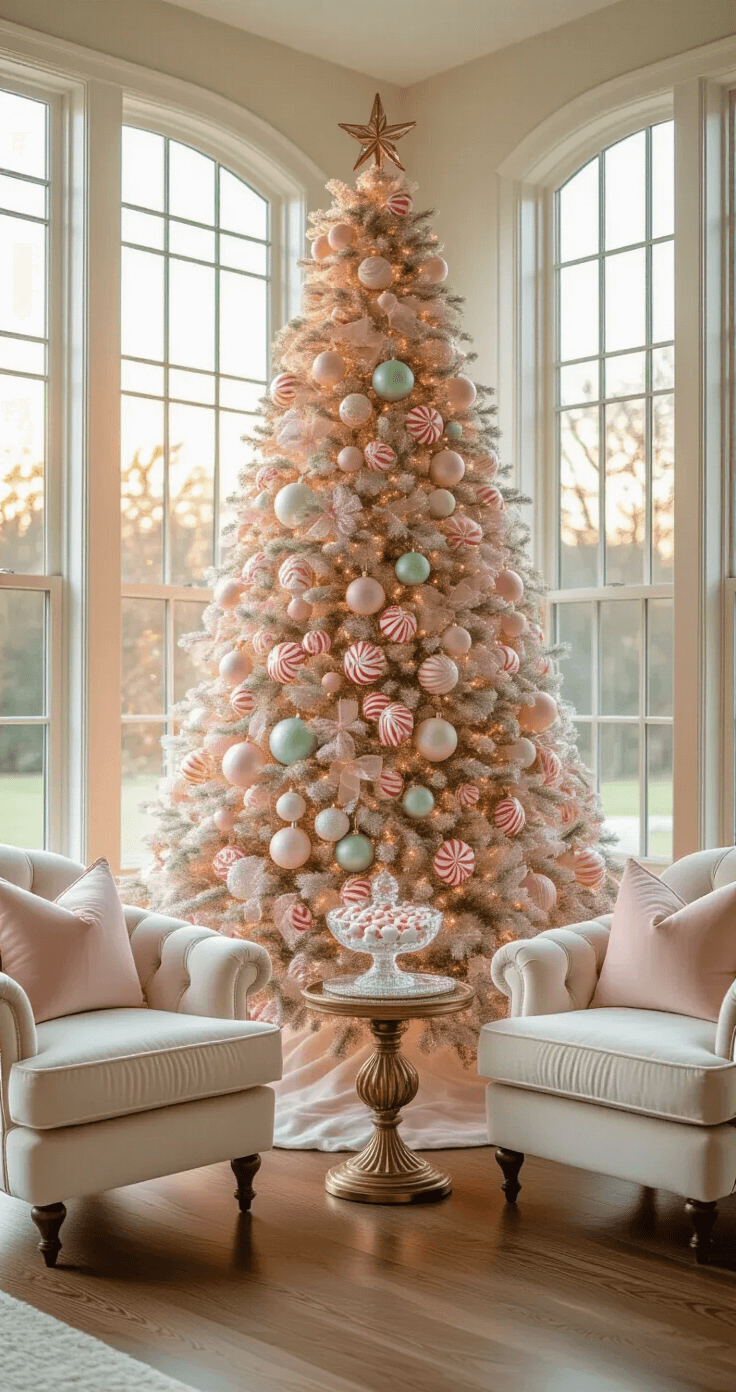
🏠 Steal This Look
- Paint Color: Benjamin Moore Chantilly Lace OC-65
- Furniture: white slipcovered sofa with rounded arms, natural wood coffee table with soft edges
- Lighting: oversized paper lantern pendant in soft white
- Materials: matte ceramic, brushed brass, linen, unfinished wood, frosted glass
There’s something wonderfully rebellious about a grown-up space that doesn’t take itself too seriously, and this tree becomes the conversation starter that makes guests feel instantly at ease.
The Two Paths: Edible vs. Ornamental
You’ve got two main routes here, and both are absolutely spectacular.
The Edible Route:
- Actual wrapped candies wired to branches
- DIY cone trees made with real treats
- Gingerbread ornaments
- Wrapped peppermint candy decorations you can eventually eat
The Ornamental Route:
- Candy-themed glass ornaments
- Resin or plastic candy replicas
- Oversized candy ornament sets
- Permanent candy-inspired decor
I personally mix both, because life’s too short to follow just one set of rules.

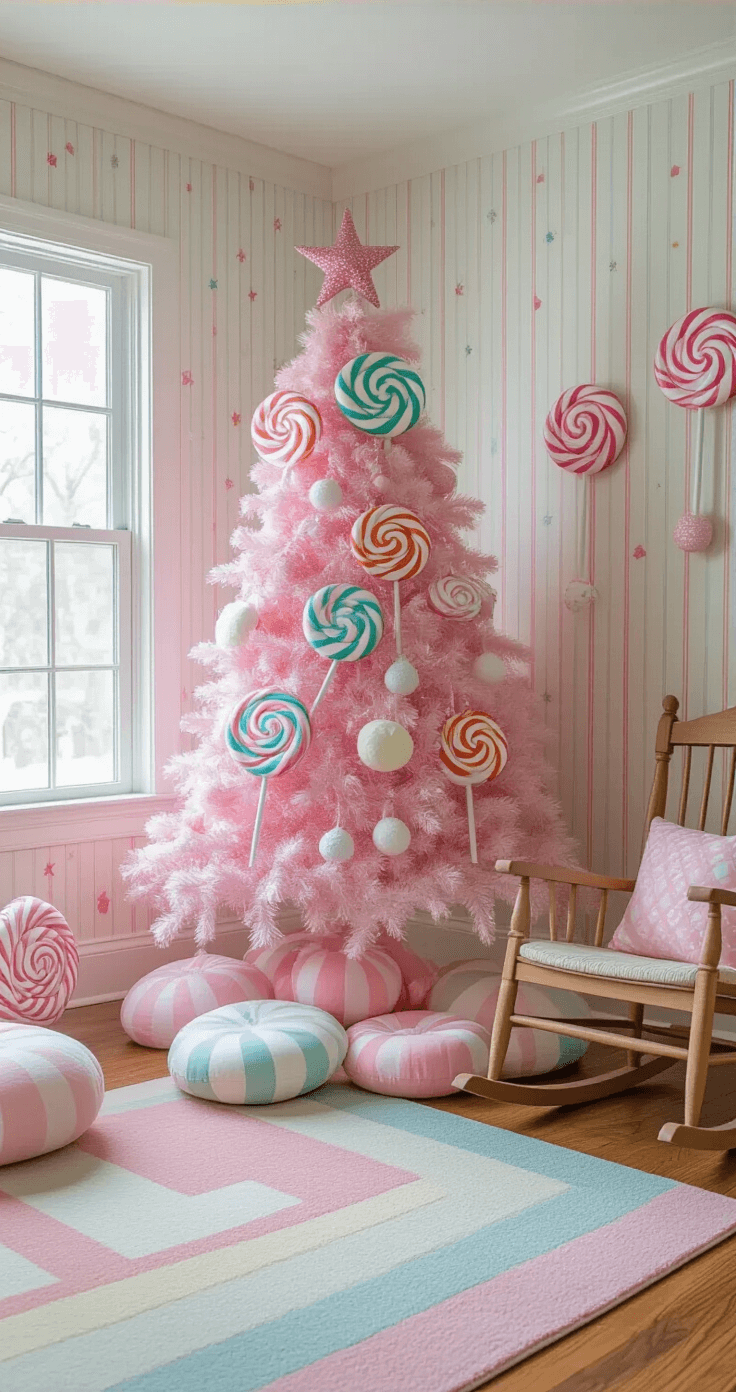
💡 Steal This Look
- Paint Color: Farrow & Ball Pink Ground 202
- Furniture: white spindle-back dining chairs with natural wood seats, paired with a round pedestal table for intimate holiday gatherings
- Lighting: vintage-inspired schoolhouse pendant with brass hardware and opal glass shade
- Materials: matte ceramic gingerbread houses, glossy resin peppermint accents, wired glass candy ornaments, natural birch branches, baker’s twine
There’s something wonderfully nostalgic about a kitchen or dining space that smells faintly of peppermint and sugar during December, and mixing both paths lets you capture that sensory magic while building a collection that lasts beyond the holiday.
DIY Magic: The Ice Cream Cone Christmas Tree
This project changed my entire perspective on holiday crafting.
What You’ll Need:
- Sugar ice cream cones (the pointy ones)
- Royal icing mix
- Candy-coated chocolates in green shades
- A piping bag with small round tip
- Paring knife
- Water
Here’s How to Actually Do It:
Start with your cones. If you want different heights (which you absolutely should), dampen the cone about an inch from the wide end with water. Let it sit for maybe 30 seconds until it softens just enough.
Cut along that dampened line with your paring knife. The water is your friend here—it prevents the cone from shattering into a million pieces like it would if you just hacked at it dry.
Let those cut cones dry completely. I mean bone-dry. Leave them overnight if you have to.
Mix up your royal icing following the package directions, but make it slightly thicker than you think you need. Thin icing means sliding chocolates, and sliding chocolates mean frustration.
Load up your piping bag and start dotting the cone from bottom to top. Don’t pipe the whole thing at once—work in sections.
Press your green candy-coated chocolates into each dot of icing immediately. Start with darker greens at the bottom and work your way up to lighter shades for a realistic tree effect.
Let them set completely before you move them. Trust me on this one.
🎨 Steal This Look
- Paint Color: Behr Polar Bear 75
- Furniture: small marble-topped bistro table for displaying finished cone trees
- Lighting: warm white LED puck lights under glass display cloche
- Materials: matte ceramic cake stands, natural wood serving boards, glossy candy finishes against matte surfaces
There’s something wonderfully nostalgic about turning simple sugar cones into miniature evergreens; it reminds me of the gingerbread houses my grandmother would let us decorate however we wanted, no rules attached.
🛒 Get The Look
The Candy Couture Approach for Your Actual Christmas Tree
This is where things get properly exciting.
I watched a tutorial once where someone wrapped their entire tree in candy aesthetics, and I thought they were absolutely bonkers. Then I tried it. Now I’m the bonkers one, and I couldn’t care less.
The Shopping List:
- Oversized candy cane decorations
- Large lollipop props
- Christmas floral wire in green
- Faux wrapped candies in various sizes
- Candy-striped ribbon
The Technique:
Work from bottom to top, just like building a sundae. Layer your largest pieces near the bottom.
Here’s the critical part everyone messes up: securing the decorations. Don’t just hook them on one branch and call it done.
Take your floral wire and wrap it around the decoration, then weave it through multiple branches. Loop it around at least two or three different branches to distribute the weight.
This matters because Aunt Carol will touch everything. She always does. Your decorations need to survive Aunt Carol.
Position your oversized pieces first, then fill in gaps with smaller candy ornaments. Think of it like Tetris, but sparkly and delicious-looking.
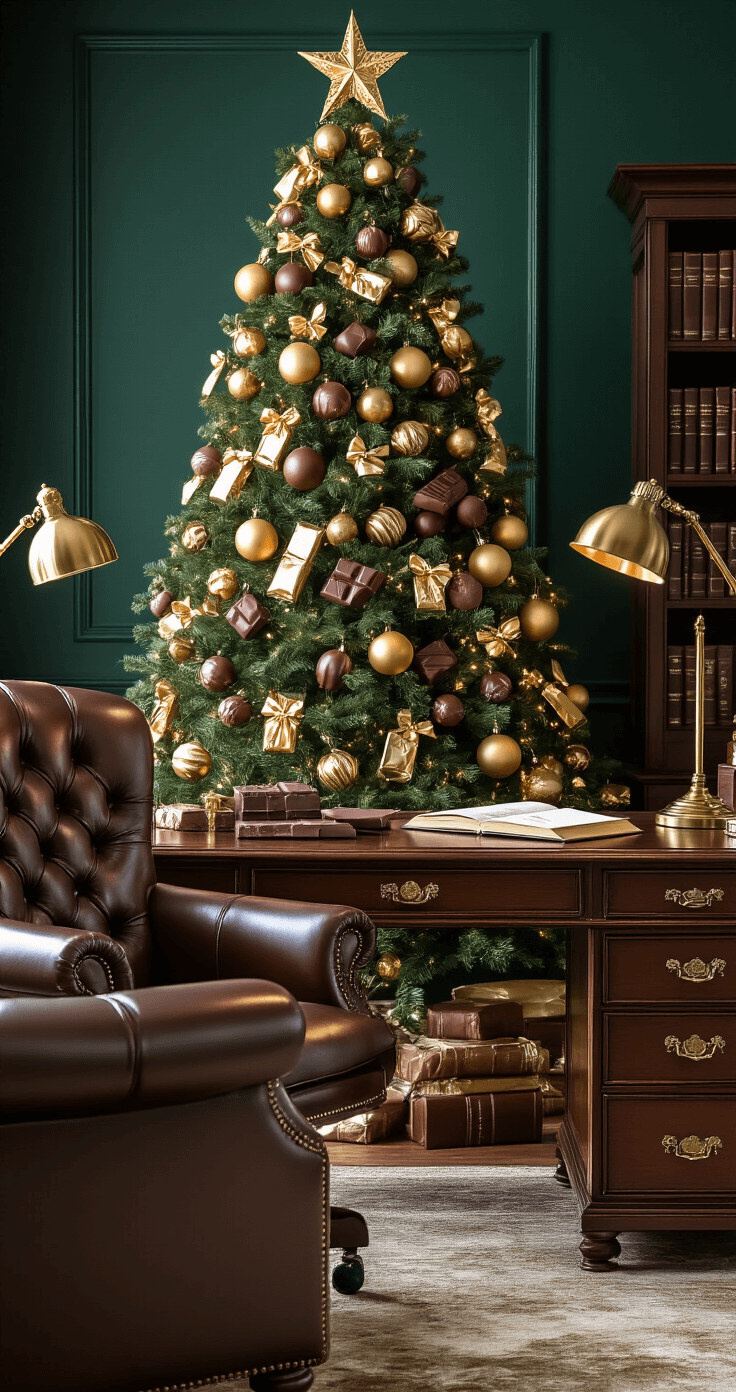
✎ Steal This Look
- Paint Color: use Valspar brand. Match the ACTUAL wall color in the image. Format: Valspar ColorName CODE
- Furniture: specific furniture for this room
- Lighting: specific lighting fixture
- Materials: key textures and materials
I learned this the hard way after my first candy tree took a dramatic tumble at 2 AM—now I wire everything like I’m securing cargo on a cross-country move, and I sleep soundly through December.
Color Schemes That Actually Work
Let’s talk about what makes or breaks a candy Christmas tree.
Classic Peppermint:
- Red and white stripes
- Touches of silver
- Cool-toned lights
This one’s timeless and works in literally any home style.
Pastel Candy Shop:
- Soft pinks
- Baby blues
- Mint greens
- White as your base
- Warm white lights
This is my personal favorite because it feels like stepping into a vintage candy store.
Rainbow Sprinkle:
- Every color you can find
- Metallic accents


")


[…] I’m rushing to get my tree ready for unexpected guests, this is my go-to […]