This post may contain affiliate links. Please see my disclosure policy for details.
Creating Your Perfect Concrete Fire Pit: A Complete Outdoor Styling Guide
Contents
- Creating Your Perfect Concrete Fire Pit: A Complete Outdoor Styling Guide
- Why a Concrete Fire Pit? The Ultimate Outdoor Game-Changer
- Essential Tools You’ll Need
- Design Considerations: Making It Uniquely Yours
- Step-by-Step Concrete Fire Pit Creation
- Safety First: Non-Negotiable Guidelines
- Styling Your New Fire Pit: Making Magic Happen
- Maintenance: Keeping Your Fire Pit Looking Fabulous
- Pro Photography Tips (Because Instagram Needs to See This!)
- Budget-Friendly Hacks
- Common Mistakes to Avoid
- Final Thoughts: Your Backyard Transformation Awaits
Every backyard dreams of that magical centerpiece that transforms ordinary outdoor spaces into extraordinary gathering spots. My concrete fire pit project is about to become your new weekend obsession.

Why a Concrete Fire Pit? The Ultimate Outdoor Game-Changer
Let’s cut to the chase. A concrete fire pit isn’t just a decorative element – it’s an experience waiting to happen. Whether you’re a weekend warrior or a design enthusiast, this project checks all the boxes:
Quick Project Snapshot
- Total Time: 2-4 hours
- Difficulty: Moderate DIY challenge
- Budget: $50-$300
- Style Options: Modern, Rustic, Industrial
Essential Tools You’ll Need
Concrete Fire Pit Toolkit
- Heavy-duty mixing bucket
- Protective gloves
- Safety glasses
- Concrete mix
- Custom mold (PVC pipe or mixing bowl)
- Trowel
- Sealant
- Optional: Concrete pigments for custom color

Design Considerations: Making It Uniquely Yours
Style Variations to Explore
- Minimalist Gray: Sleek, contemporary look
- Terra Cotta Warmth: Earthy, Mediterranean vibes
- Industrial Chic: Raw concrete with metal accents
Step-by-Step Concrete Fire Pit Creation
Preparation is Key
- Choose your location carefully
- Check local fire code regulations
- Create a stable, level base
- Design your mold
Mixing and Pouring Pro Tips
- Concrete Consistency: Think thick pancake batter
- Avoid Air Bubbles: Tap mold gently while pouring
- Curing Time: Minimum 48 hours before use

Safety First: Non-Negotiable Guidelines
Warning: Never skip these critical safety steps:
- Use protective gear
- Work in ventilated area
- Keep water nearby
- Follow manufacturer’s concrete instructions
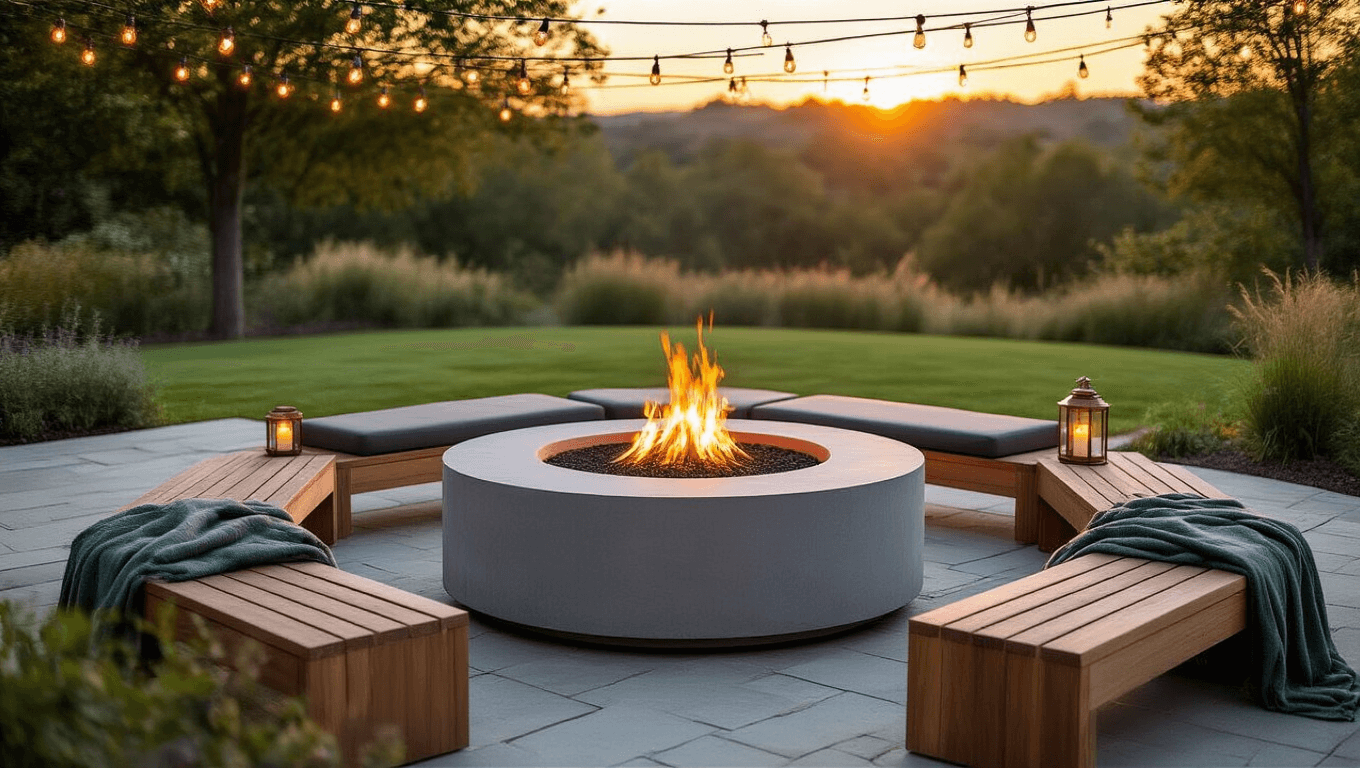
Styling Your New Fire Pit: Making Magic Happen
Complementary Decor Elements
- Weathered wooden benches
- Cozy outdoor cushions
- Textured throw blankets
- Strategic lighting (string lights work wonders)

Maintenance: Keeping Your Fire Pit Looking Fabulous
Quick Care Routine
- Annual sealing
- Clean after each use
- Cover during extreme weather
- Remove ash and debris regularly
Pro Photography Tips (Because Instagram Needs to See This!)
Capture the Perfect Shot
- Shoot during golden hour
- Use natural side lighting
- Include surrounding landscape
- Style with minimal, intentional props

Budget-Friendly Hacks
Save Money Without Compromising Style
- Use found objects as molds
- Mix your own concrete
- Shop secondhand for styling accessories
- DIY your own cushions and accessories
Common Mistakes to Avoid
Red Flags That Scream “Rookie Move”:
- Improper drainage
- Cheap sealant
- Neglecting fire safety
- Overcrowding the space

Final Thoughts: Your Backyard Transformation Awaits
A concrete fire pit isn’t just a project – it’s an investment in unforgettable moments. From cozy family nights to epic entertaining, you’re about to become the backyard hero.
Your Next Steps
- Gather materials
- Plan your design
- Create fearlessly
- Enjoy endlessly
Pro Tip: Every epic outdoor space starts with one bold decision. This is yours.


")

 In Freezing Weather")