

This post may contain affiliate links. Please see my disclosure policy for details.
Ribbon on Christmas Tree Ideas That’ll Make Your Tree Look Like a Million Bucks
Contents
- Ribbon on Christmas Tree Ideas That’ll Make Your Tree Look Like a Million Bucks
- Why Your Tree Needs Ribbon (Trust Me On This)
- The Ribbon Types That Actually Matter
- The Three-Ribbon Rule That Changed Everything
- Color Combos That Won’t Make You Look Like a Hot Mess
- The Techniques That Actually Work (Not the Pinterest Fails)
- How Much Ribbon You Actually Need (Math, But Make It Easy)
Ribbon on Christmas tree decorating has completely transformed how I approach holiday decor, and I’m about to show you exactly how to nail this look without spending hours wrestling with fabric.
Look, I used to think ribbons were just fancy add-ons that interior designers threw on trees in magazine spreads. Then I tried it myself one year out of desperation when my ornament collection looked pathetic. Game changer.

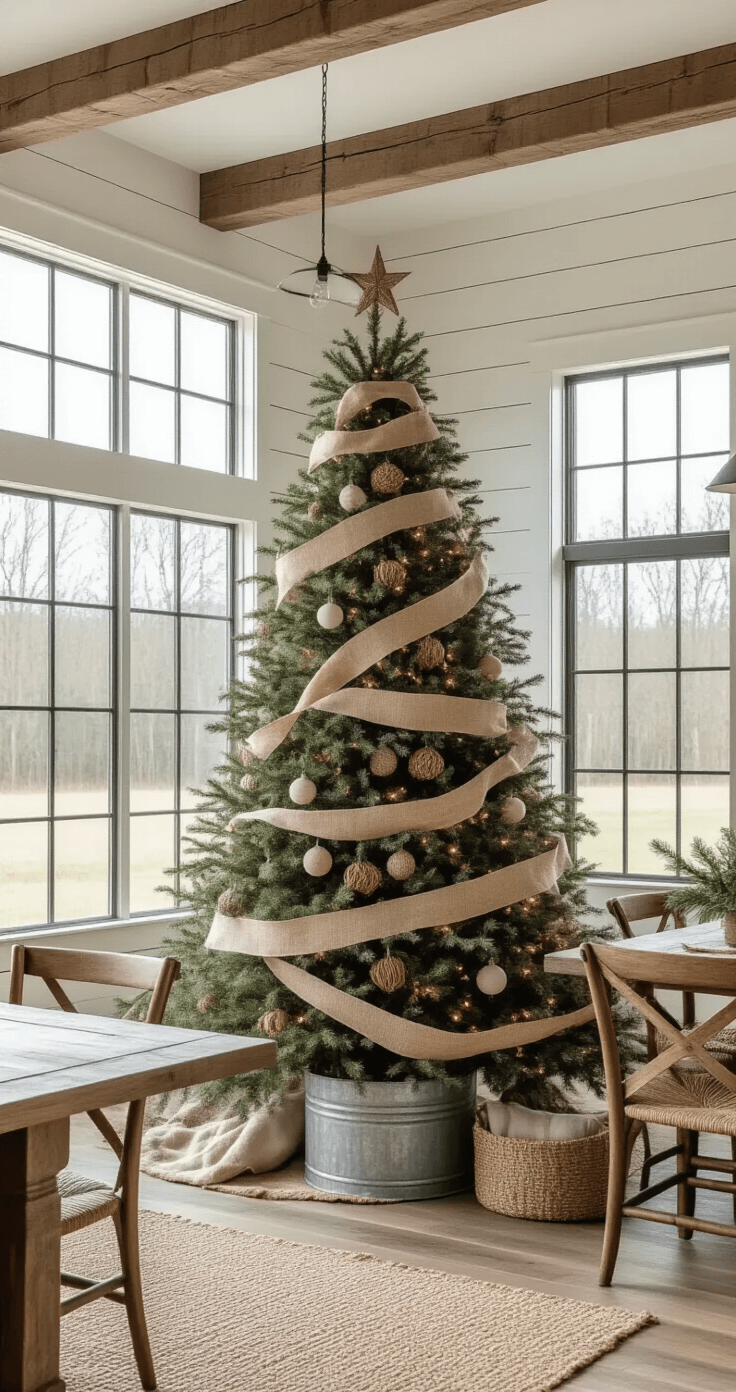
🎨 Steal This Look
- Paint Color: Sherwin-Williams Pure White SW 7005
- Furniture: slipcovered linen sofa in natural ivory, reclaimed wood coffee table with live edge
- Lighting: oversized aged brass chandelier with candle-style bulbs
- Materials: plush velvet ribbon, wired burlap ribbon, mercury glass ornaments, fresh cedar garland
This is the room where you’ll actually sit and stare at your tree for hours, so the ribbon work needs to hold up to real life—not just look good in a fleeting Instagram shot.
Why Your Tree Needs Ribbon (Trust Me On This)
Your tree probably looks fine with just ornaments and lights. But fine isn’t what we’re going for here.
Ribbon adds movement, fills awkward gaps between branches, and gives your tree that designer touch that makes guests ask where you bought it already decorated.
I learned this the hard way after years of trees that looked… okay. Just okay.
The Ribbon Types That Actually Matter
Wired ribbon is your best friend when you’re starting out. It holds its shape, doesn’t flop around like a sad noodle, and you can reuse it year after year.
I keep rolls of wired Christmas ribbon in my storage bin because they’re workhorses.
Here’s what else works:
- Velvet ribbon – Screams luxury, catches light beautifully, perfect for traditional vibes
- Burlap ribbon – Farmhouse charm, rustic feel, hides imperfections like a dream
- Satin ribbon – Elegant and smooth, reflects lights gorgeously
- Sheer organza – Adds ethereal layers without overwhelming the tree
- Plaid ribbon – Classic Christmas, works with literally everything
Pro tip: Skip the unwired ribbon unless you hate yourself. It sags, slides, and generally makes you want to throw the whole tree out the window.
🎨 Steal This Look
- Paint Color: Farrow & Ball Hague Blue No. 30
- Furniture: vintage-look velvet Chesterfield sofa in deep forest green
- Lighting: bronze adjustable-arm pharmacy floor lamp with warm 2700K bulb
- Materials: aged brass, reclaimed wood mantel, hand-thrown ceramic vessels, nubby wool throws
I learned this the hard way after three hours wrestling with unwired satin that kept sliding into the tree’s interior like it was hiding—I now keep a dedicated ribbon drawer with only wired varieties and my December sanity has fully returned.
The Three-Ribbon Rule That Changed Everything
Designer trees use three types of ribbon, and once someone told me this, I couldn’t unsee it.
Main ribbon – This is your star player, your show-off piece. Go bold here with patterns, glitter, embroidery, or whatever makes your heart sing. I usually pick something about 2.5 to 4 inches wide.
Supporting ribbon – This goes on first (counterintuitive, I know). It’s your backup singer – complements the main without competing. Think solid colors that pull from your main ribbon’s palette.
Accent ribbon – The finishing touch that fills gaps and adds surprise pops of color. Usually thinner, sometimes sparkly, always delightful.
I spent three Christmases doing just one ribbon before learning this. My trees were fine. Now they’re chef’s kiss.
Color Combos That Won’t Make You Look Like a Hot Mess
- Red and gold – Cannot be killed, will not die, forever classic. I pair a rich burgundy velvet with gold metallic Christmas tree ribbon and it looks expensive every single time.
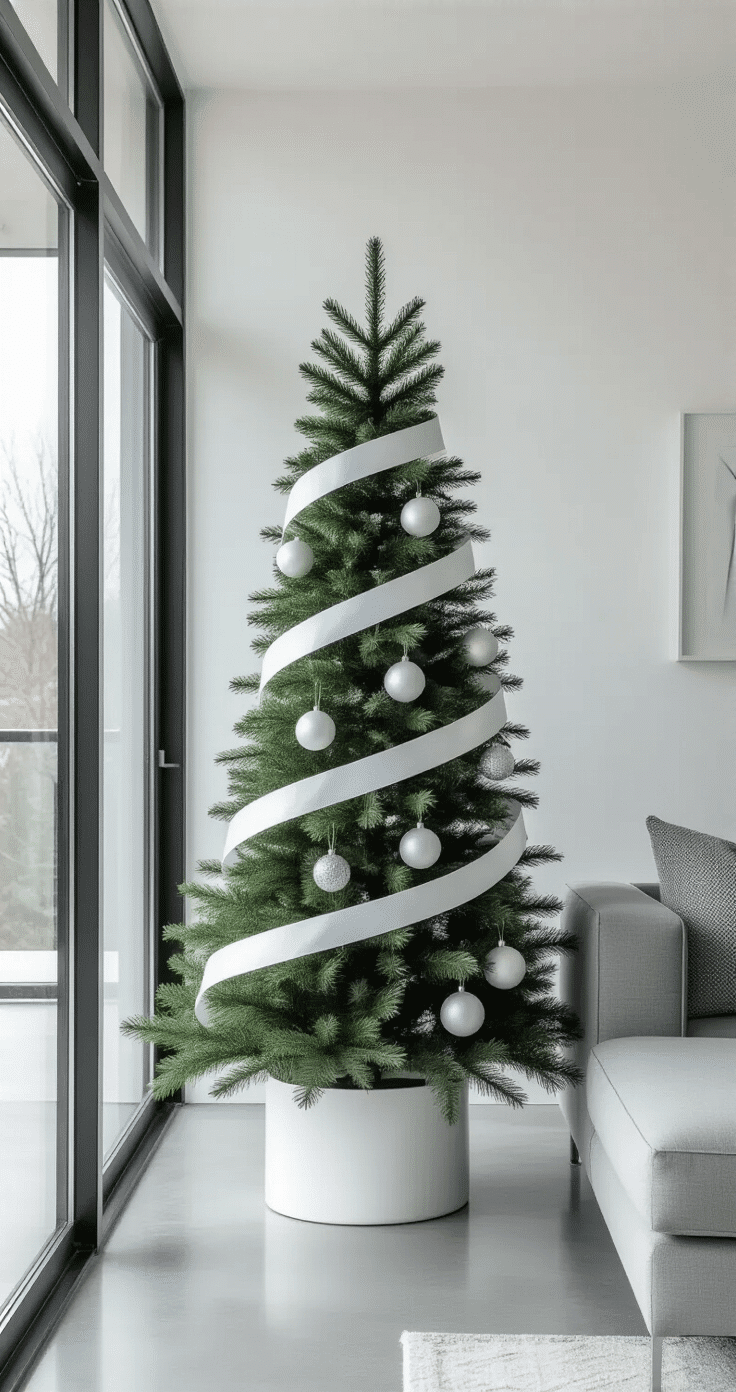
- Silver and white – Winter wonderland vibes, pairs with literally any ornament color. Add some icy blue if you’re feeling spicy.
- Navy, copper, and cream – This combo stopped people in their tracks at my house last year. Unexpected but sophisticated.
- Emerald green and champagne gold – Jewel tones are having a moment and I’m here for it.
- Blush pink, gold, and ivory – Soft, romantic, makes your tree look like it belongs in a boutique hotel.
- Rustic plaids with burlap – Perfect if your style is more cabin than castle. Throw in some burlap ribbon and you’re golden.
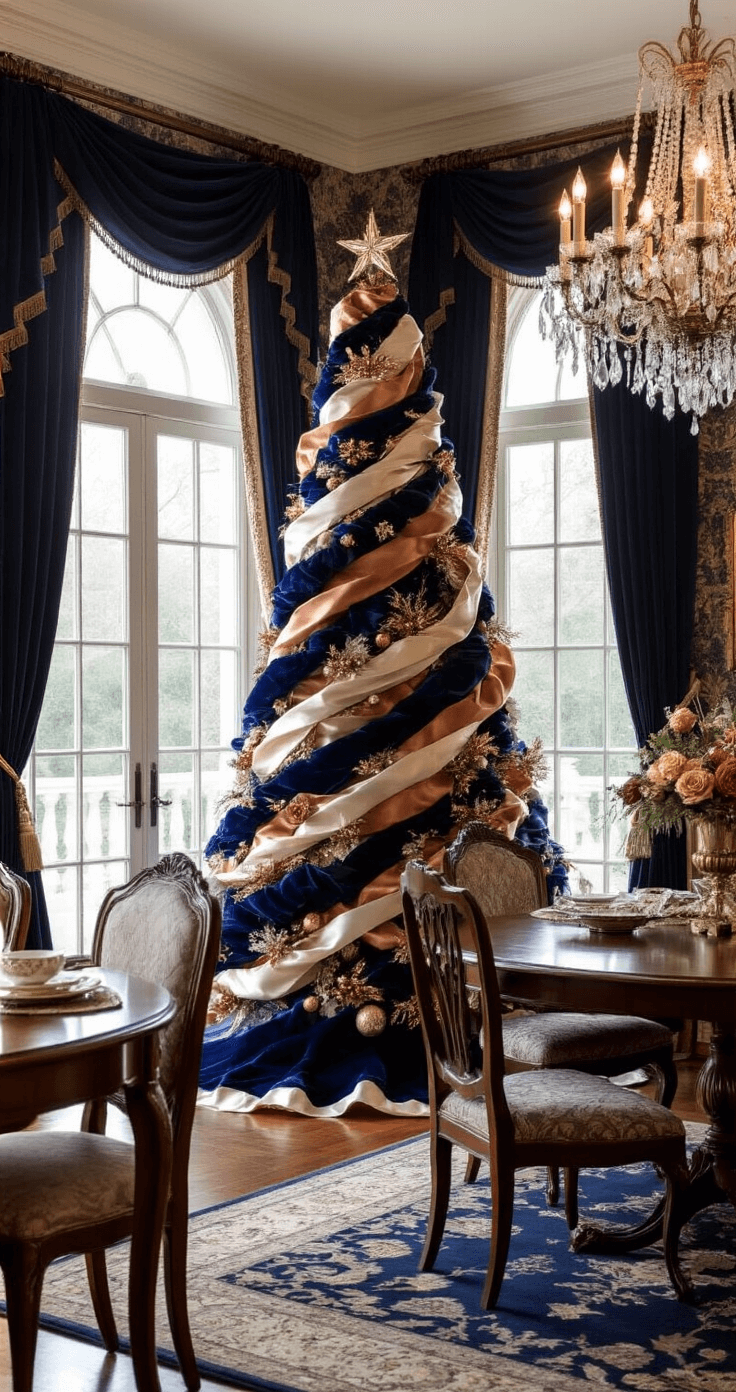
★ Steal This Look
- Paint Color: Valspar Burgundy Wine 1011-7
- Furniture: tufted velvet Chesterfield sofa in deep burgundy, distressed wood farmhouse dining table, brass bar cart with glass shelves
- Lighting: crystal chandelier with warm candle-style bulbs, brass swing-arm wall sconces
- Materials: velvet, metallic gold lame, raw burlap, copper sheeting, aged brass, mercury glass
I’ve learned that committing to one dominant color story actually gives you more freedom with ornaments, since the ribbon does the heavy lifting of tying everything together.
The Techniques That Actually Work (Not the Pinterest Fails)
The Cascade Method
Start at the top of your tree. Tuck your ribbon end into the tree near the top. Let it cascade down vertically in swooping sections, tucking it into branches every foot or so.
This creates beautiful vertical movement that draws the eye up. I do this with my main ribbon first, then add the others.
The Horizontal Wrap
This is your garland approach. Wind the ribbon around the tree horizontally, weaving in and out of branches as you go. Space your wraps about 12-18 inches apart depending on your tree size.
Works brilliantly with velvet ribbon because it creates these lush bands of texture.
The Billow Technique
This one sounds fancy but it’s stupid simple. Make loose, flowing loops with your ribbon and tuck them into branches every few sections. The loops should look casual, like fabric caught in a gentle breeze.
Don’t make them perfect. Perfect looks stiff and weird.
The Tuck and Twist
Weave your ribbon in and out of branches, twisting it occasionally to show both sides. This works especially well with ribbon that has different finishes on each side.
Secure with small floral wire or clips if you need to, but usually tucking into branches holds fine.
🏠 Steal This Look
- Paint Color: PPG Swiss Coffee PPG1075-1
- Furniture: slipcovered linen sofa in natural oatmeal, reclaimed wood farmhouse dining table with turned legs
- Lighting: oversized woven rattan pendant over the dining area, brass pharmacy floor lamp with linen shade
- Materials: raw Belgian linen, unlacquered brass, reclaimed oak, hand-thrown ceramics, wool bouclé throws
I learned the Cascade Method from my mother-in-law after years of fighting with horizontal wraps that never looked full enough—now it’s the only way I start my tree every December, and guests always ask how I got that ‘designer vertical flow.’
How Much Ribbon You Actually Need (Math, But Make It Easy)
I use about 3-5 yards of ribbon per foot of tree height. So my 7-foot tree gets roughly 21-35 yards total across all my ribbon types.
Sounds like a lot? It is. But you can reuse it forever, and it’s cheaper than buying enough ornaments to fill a tree properly.
Quick formula:
- Small tree (4-5 feet): 12-20 yards total
- Medium tree (6-7 feet): 20-30 yards total
- Large tree (8+ feet): 30-50 yards total
Buy more than you think you need. You can always use less, but running out mid-decoration is a special kind of torture.


[…] you’ve tied all your ribbons on, grab those sharp scissors and start cutting the ribbon into a tree […]