

This post may contain affiliate links. Please see my disclosure policy for details.
How to Add Ribbon to Your Christmas Tree Like a Pro Designer
Contents
Adding ribbon to a Christmas tree transforms an ordinary holiday display into something that screams “I hired a professional decorator” – even when you absolutely didn’t.
I’ve spent years perfecting this technique after watching countless friends struggle with limp, sad-looking ribbon that made their trees look like they were wearing ill-fitting scarves.
Trust me, there’s a right way and a wrong way to do this.

Why Your Tree Needs Ribbon (And Why You’ve Been Doing It Wrong)
Let’s be honest – you’ve probably tried adding ribbon before and ended up with something that looked more “craft store explosion” than “winter wonderland.”
The problem isn’t you. It’s that nobody taught you the designer secrets.
Ribbon adds:
- Texture and movement that catches light beautifully
- Color coordination that ties your whole theme together
- Professional polish that makes guests ask where you learned to decorate
- Affordable luxury – seriously, good ribbon costs way less than fancy ornaments
The Golden Rule: Wired Ribbon or Go Home
Here’s where most people mess up right from the start.
Regular craft ribbon is your enemy. It flops around like a dying fish and refuses to hold any shape whatsoever.
You need wired ribbon.
The wire edges let you:
- Shape perfect loops that stay put
- Create cascading waterfalls of fabric
- Adjust and readjust without starting over
- Build volume that doesn’t collapse overnight
I learned this the hard way after three Christmases of fighting with floppy ribbon that looked terrible in photos.
Prep Work That Actually Matters
Before you even think about ribbon, your tree needs some tough love.
Step 1: Fluff Like Your Life Depends On It
- Work from the inside out on every branch
- Separate each needle cluster
- Fill in bare spots by bending branches forward
- Step back every few minutes to check for gaps
Step 2: Get Those Lights Perfect
Your Christmas tree lights go on before ribbon, period. No exceptions. No shortcuts.
Step 3: Measure Your Ribbon
For a 6-8 foot tree, you’ll need:
- 30-40 feet for light coverage
- 50-60 feet for full, lush coverage
- Add 20 feet for each additional ribbon color
Cut into manageable 36-42 inch strips. This gives you way more control than wrestling with one endless piece.
Three Techniques That Actually Work
The Waterfall Method (My Personal Favorite)
This creates those gorgeous cascading waves you see in magazines.
Start at the top of your tree:
- Tuck ribbon end deep into branches near the trunk
- Let it drape naturally down about 18 inches
- Tuck it back into the tree
- Pull it out again lower down for the next “waterfall”
- Repeat in a spiral pattern around the tree
Pro tip: Vary the length of each cascade – some short, some long, some medium. Perfect uniformity looks artificial and boring.
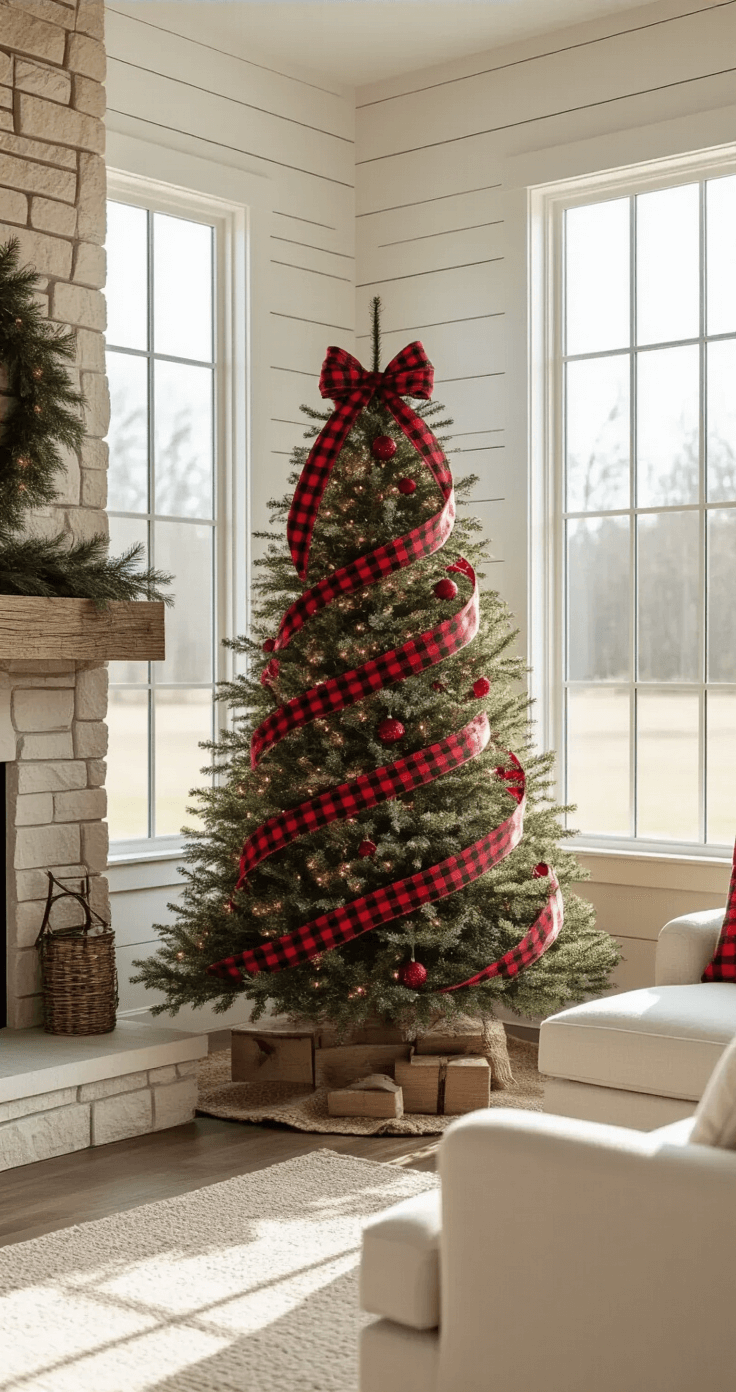
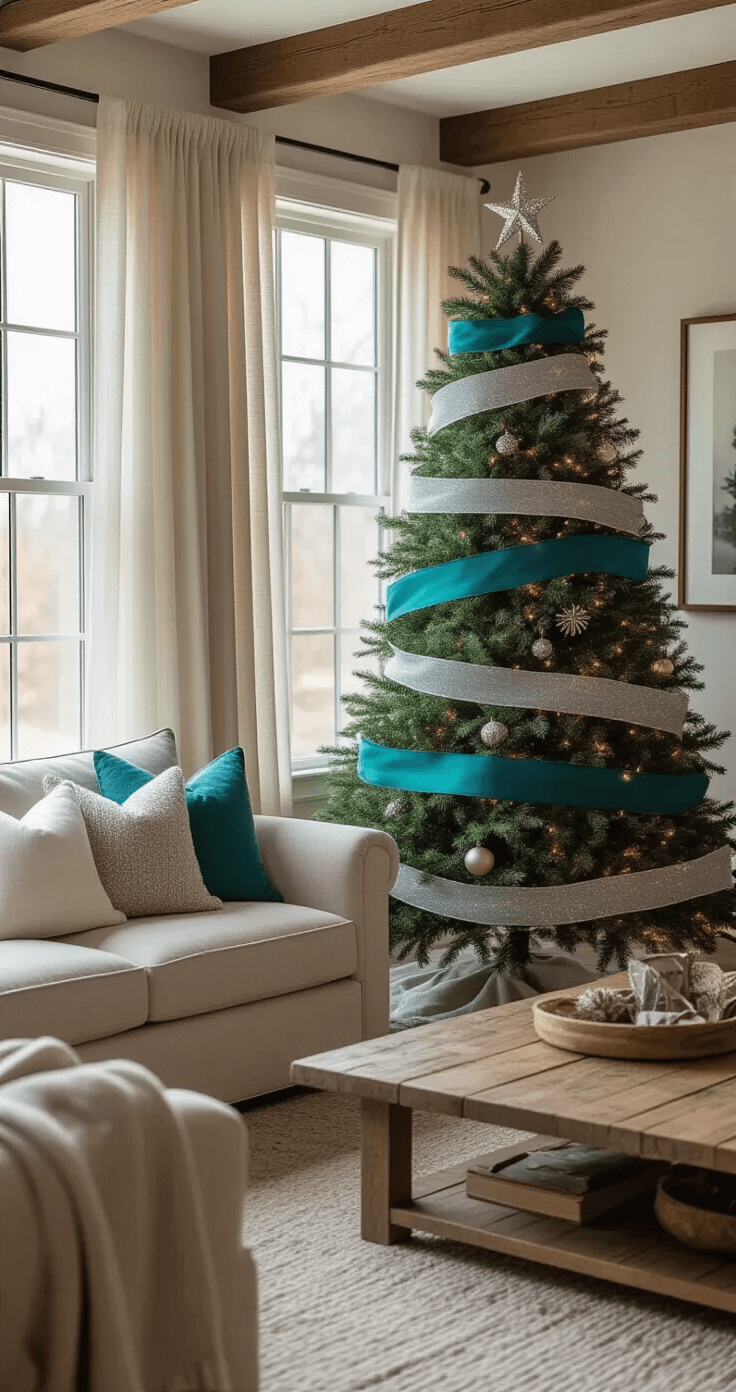
The Spiral Wrap
Classic and foolproof for beginners.
- Start high and work diagonally down
- Tuck ribbon into branches every 12-15 inches
- Keep the angle consistent as you spiral
- Don’t pull tight – let it drape naturally between attachment points
The Random Loop Method
For a more organic, whimsical look:
- Create individual loops of varying sizes
- Attach them randomly around the tree
- Mix in some straight cascades for contrast
- Layer different ribbon colors and widths
Color Combinations That Never Fail
I’ve tried every ribbon combination imaginable. These always work:
Classic Elegance:
- Gold velvet ribbon with cream satin
- Deep burgundy with gold edges
Modern Sophistication:
- Silver and white in different textures
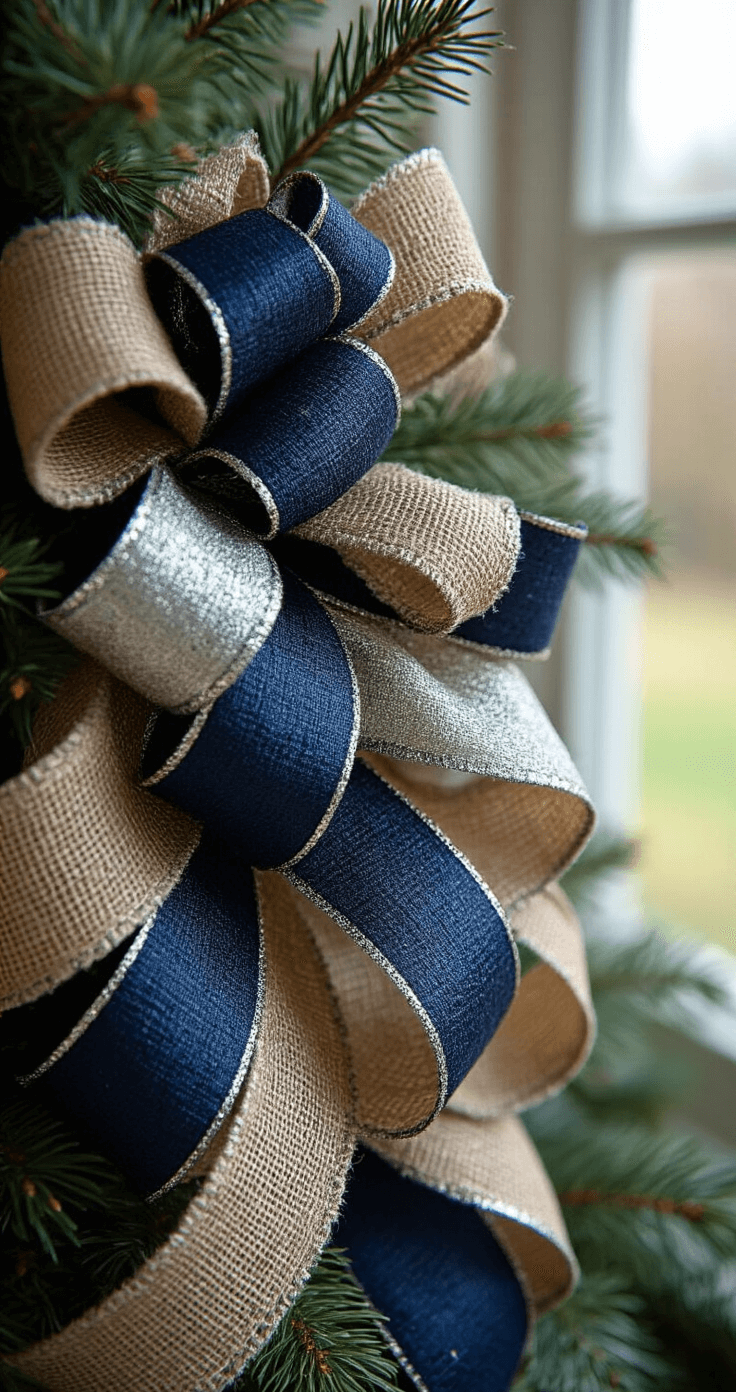
- Navy blue with silver accents
Rustic Charm:
- Burlap with red plaid
- Natural jute with pine green
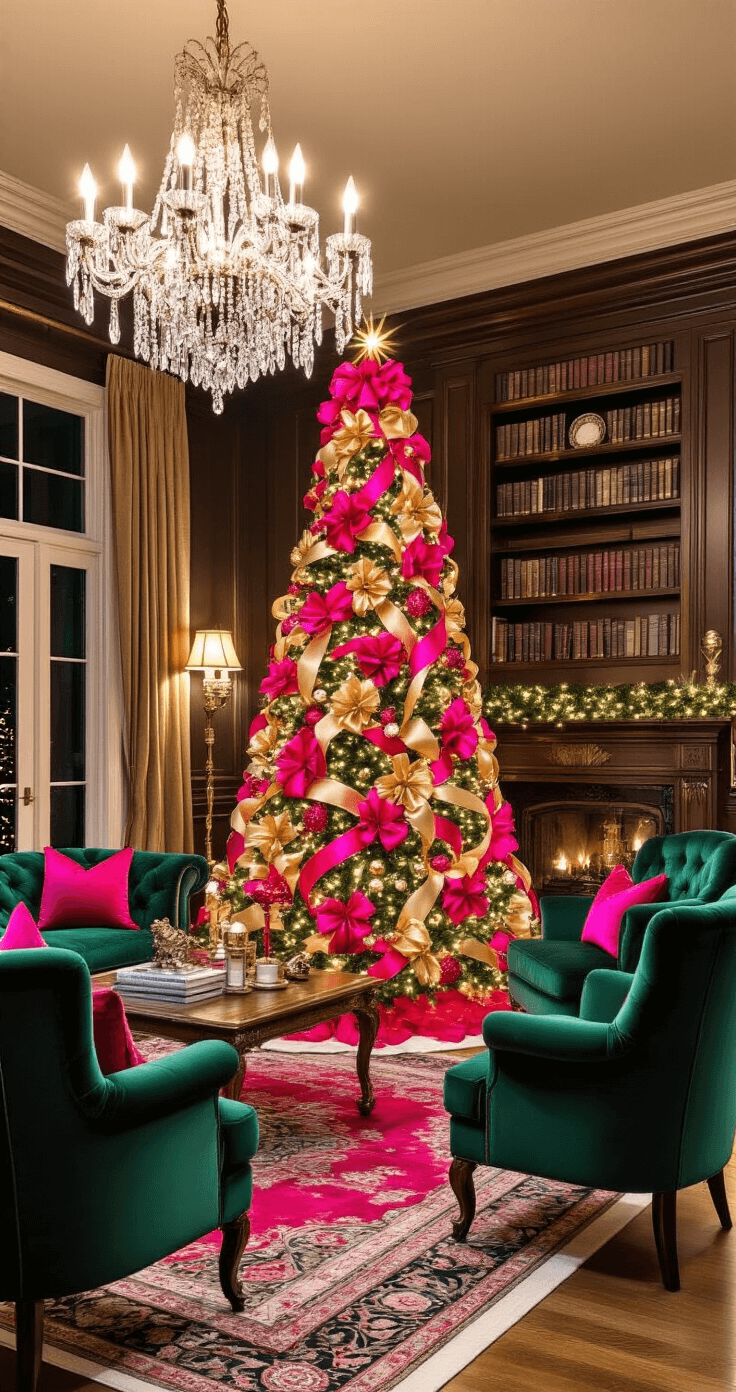
Bold and Beautiful:
- Hot pink with gold (trust me on this one)
- Teal with silver
The Layering Game-Changer
Here’s what separates amateur hour from designer magic: layering.
Start wide, then narrow:
- Put your widest ribbon (3-4 inches) on first
- Add medium ribbon (2-3 inches) in a complementary color
- Finish with narrow accent ribbon (1 inch) for sparkle
I use burlap ribbon as my base layer because it adds incredible texture without overwhelming everything else.


 Cry")


[…] Pro tips for tree care during the cold months: […]