

This post may contain affiliate links. Please see my disclosure policy for details.
Creating the Perfect Rustic Christmas Tree: Your Complete Guide to Farmhouse Holiday Charm
Contents
Rustic Christmas tree decorating transforms your holiday centerpiece into a cozy, authentic display that feels like it’s been lovingly collected over generations.
I’ve been styling Christmas trees for years, and nothing beats the warmth of a rustic design when you want your home to feel like a true holiday haven.
Are you tired of cookie-cutter Christmas trees that look like they rolled straight out of a catalog? Do you want something that actually reflects your personality instead of what the department store thinks Christmas should look like?
Let me walk you through creating a rustic Christmas tree that’ll make your guests feel like they’ve stepped into the coziest farmhouse retreat.
Why Rustic Christmas Trees Hit Different
Rustic Christmas trees aren’t about perfection. They’re about stories, memories, and that lived-in feeling that makes a house feel like home.
I remember the first time I ditched my matching ornament sets for a more organic approach. My tree went from looking like a showroom display to feeling like something my grandmother might have lovingly decorated.
The magic happens when you embrace:
- Natural imperfections that add character
- Mixed textures that create visual interest
- Handmade elements that tell your story
- Vintage finds that carry history

Essential Elements That Make It Work
🖼 Steal This Look
- Paint Color: Sherwin-Williams Accessible Beige SW 7036
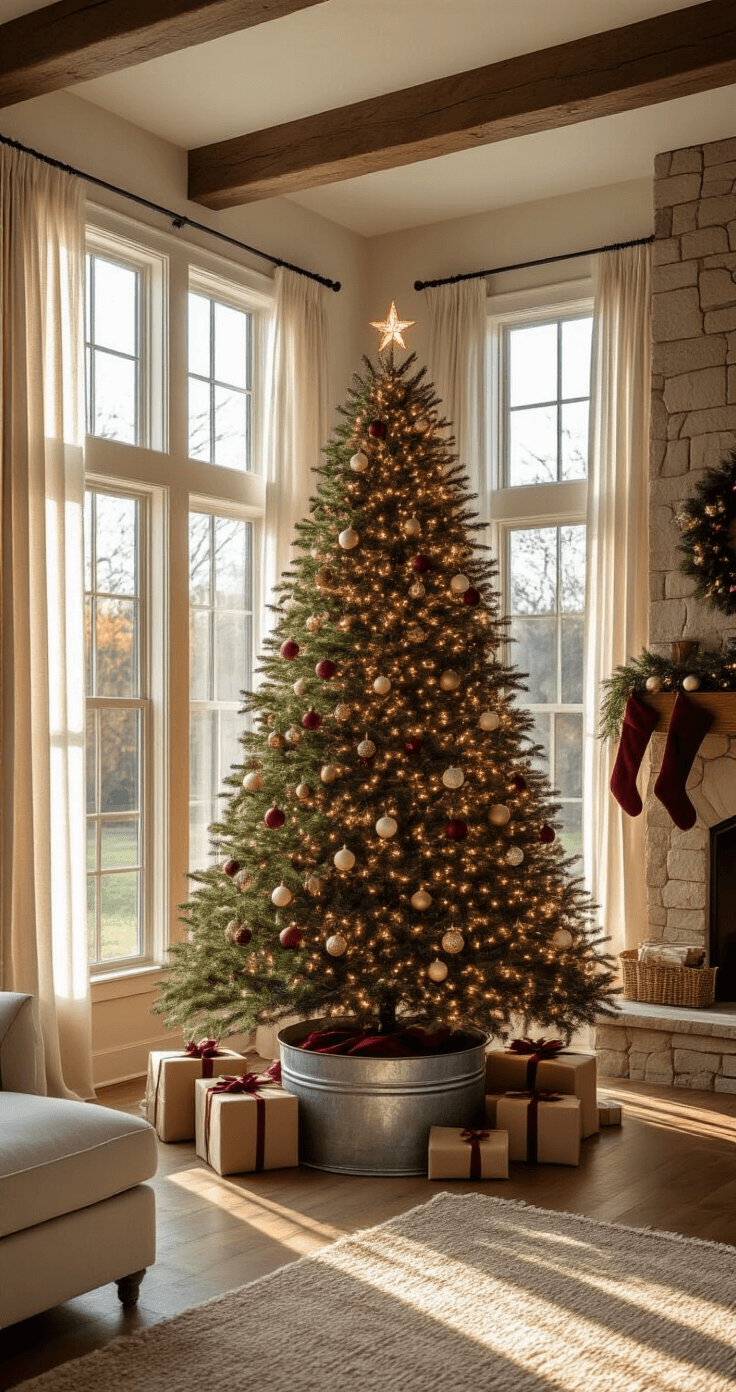
- Furniture: reclaimed wood farmhouse console table positioned behind the tree as a display surface for vintage wooden crates and galvanized metal buckets
- Lighting: oversized Edison bulb string lights with exposed filaments and black cloth-wrapped cord
- Materials: rough-hewn burlap ribbon, hand-blown glass ornaments with visible bubbles, dried orange slices, cinnamon sticks tied with twine, weathered wood bead garlands, and galvanized metal jingle bells
There’s something deeply satisfying about a tree that looks like it grew up in the same house as your grandmother’s quilt—imperfect, storied, and genuinely welcoming rather than professionally staged.
Natural Materials Are Your Best Friends
Skip the plastic fantastic approach. Your rustic tree needs organic elements that bring the outdoors inside.
Here’s what I always reach for:
- Dried orange slices – they smell amazing and add warm color
- Fresh pinecones – free decorations hiding in your backyard
- Birch branches – perfect for filling gaps and adding texture
- Winterberries – natural pops of red that photograph beautifully
Pro tip: dried orange slices from Amazon work perfectly if you don’t have time for DIY.
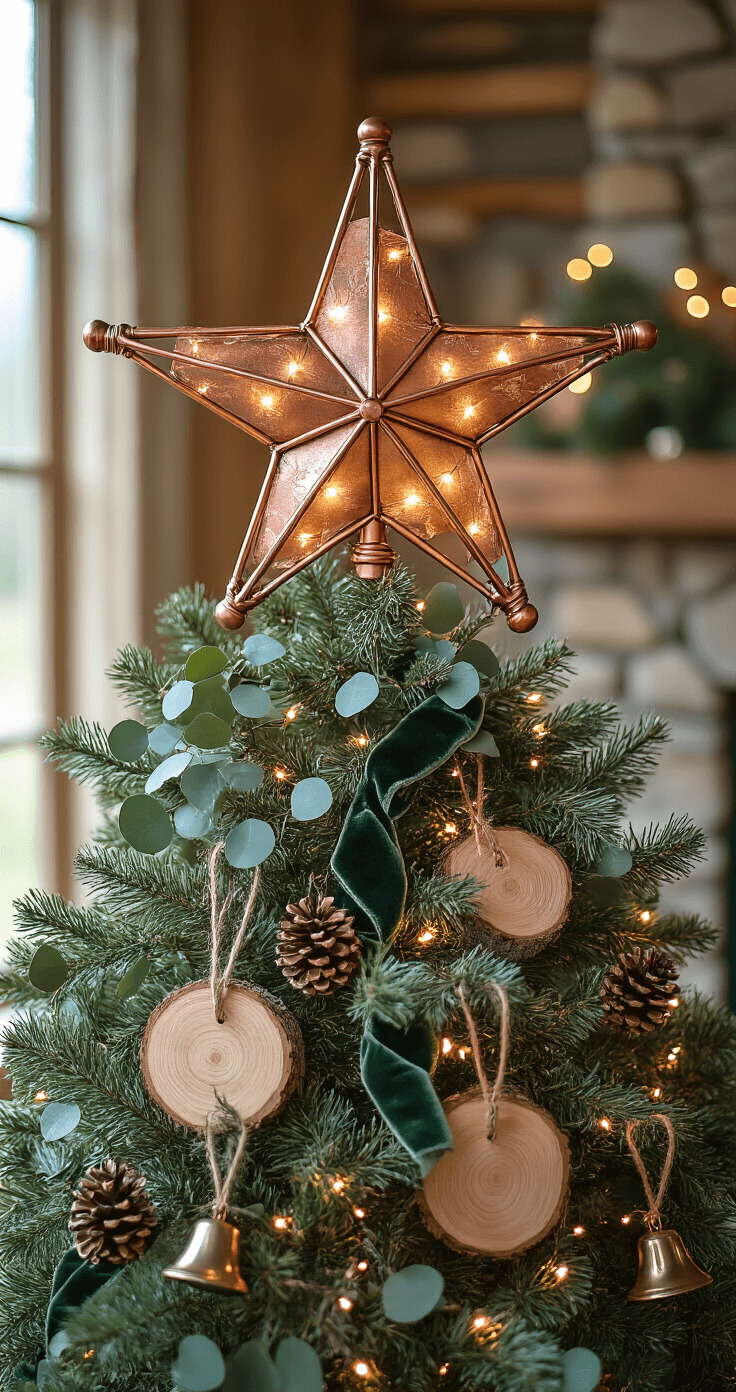
★ Steal This Look
- Paint Color: Benjamin Moore Simply White OC-117
- Furniture: reclaimed wood farmhouse dining table with live edge
- Lighting: wrought iron chandelier with candle-style bulbs
- Materials: raw birch bark, dried citrus, unbleached cotton ribbon, weathered pine, seeded eucalyptus
There’s something deeply satisfying about trimming a tree with materials you could theoretically gather yourself—these textures connect us to slower, more intentional holiday traditions.
🎁 Get The Look
Vintage Ornaments Tell Stories
Forget about matching sets. The best rustic trees look like they’ve been decorated with treasures collected over decades.
I hunt for:
- Vintage Shiny Brite ornaments at flea markets
- Hand-me-down baubles with character marks
- Handmade pieces from craft fairs
- Antique glass ornaments with that perfect patina
The key is finding one unifying thread – maybe it’s gold accents, red tones, or cream colors – that ties everything together.
Your Step-by-Step Styling Blueprint
🎨 Steal This Look
- Paint Color: Farrow & Ball Pointing 2003
- Furniture: weathered pine farmhouse console table with turned legs
- Lighting: antiqued brass adjustable-arm picture light
- Materials: aged mercury glass, tarnished silver, crackled ceramic, raw linen, distressed wood
There’s something deeply personal about unwrapping ornaments that carry the fingerprints of previous owners—each scratch and faded patch of color becomes a conversation starter when guests gather around your tree.
Start With the Right Foundation
Before you hang a single ornament, get your base sorted.
Lighting comes first:
- String warm white LED lights from inside branches outward
- Avoid cool-toned bulbs that kill the cozy vibe
- Layer lights at different depths for that magical glow
Ditch the boring tree skirt:
Instead of generic fabric, try:
- Galvanized metal tubs for farmhouse appeal
- Vintage wooden crates for rustic charm
- Woven baskets that hide the ugly plastic stand

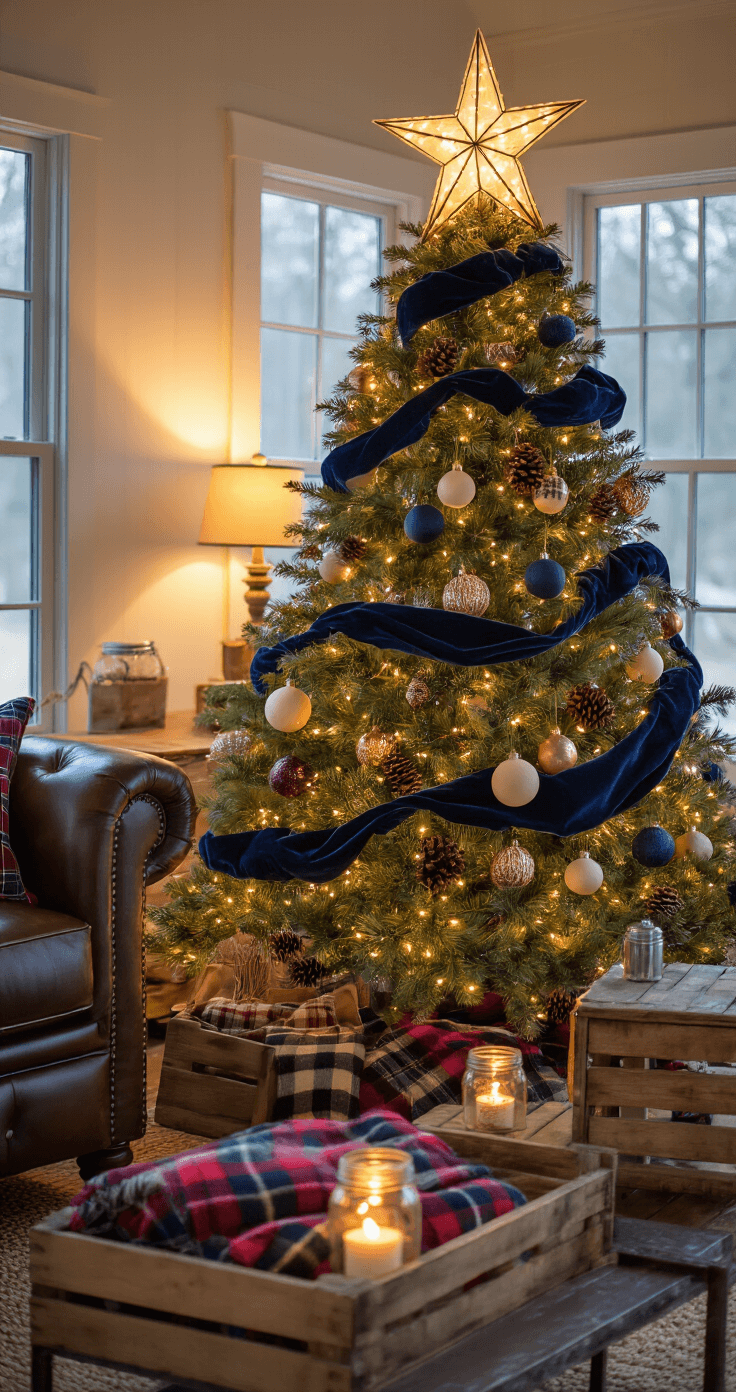
★ Steal This Look
- Paint Color: use Behr brand. Match the ACTUAL wall color in the image. Format: Behr Cozy Cottage MQ3-10
- Furniture: reclaimed wood console table with turned legs
- Lighting: oversized wrought iron chandelier with candle-style bulbs
- Materials: rough-hewn barn wood, galvanized steel, chunky knit wool, burlap, pine garland
There’s something deeply satisfying about building a tree from bare branches upward—it’s the same slow pleasure as kneading bread or stacking firewood, and the result feels earned rather than bought.
Layer Your Garlands Like a Pro
Garlands add movement and texture that makes your tree feel full and lush.
My go-to combinations:
- Popcorn garlands – classic and surprisingly pretty
- Cranberry strings – natural color that photographs beautifully
- Burlap ribbon – adds texture without being fussy
- Twine with bells – subtle sound and rustic appeal
Don’t wrap them tight like a present. Drape them loosely in gentle swoops that look natural and effortless.
Ornament Placement That Actually Makes Sense
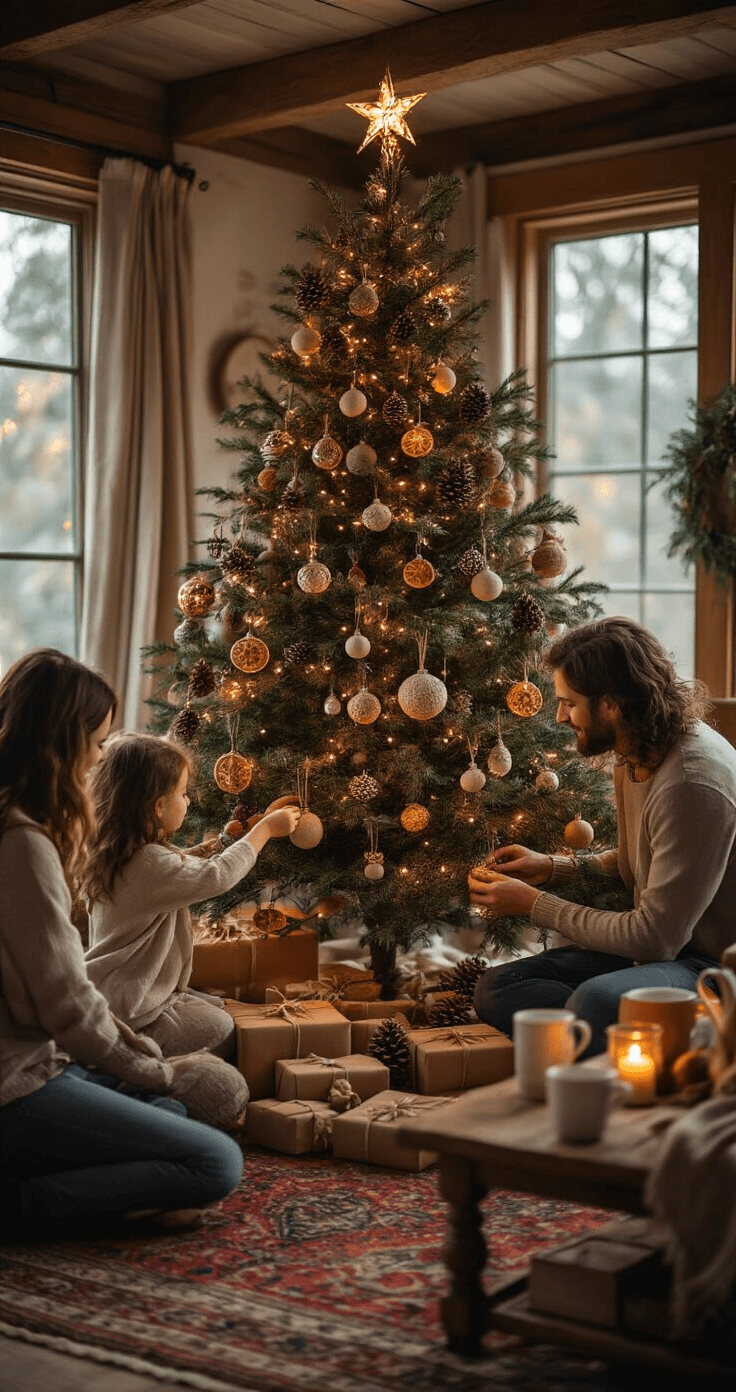
🎨 Steal This Look
- Paint Color: Valspar Homestead Resort Parlor Sage 6003-8C
- Furniture: distressed pine farmhouse console table with turned legs
- Lighting: antler chandelier with Edison bulbs
- Materials: raw burlap, jute twine, dried orange slices, weathered wood beads
There’s something deeply satisfying about a tree that looks like it was decorated with found objects from a winter walk—this layering technique gets you there without the decades of collecting.
Think in Zones, Not Perfection
I used to drive myself crazy trying to space ornaments evenly. Now I work in clusters that feel organic.
Large statement pieces first:
- Position oversized pinecones at different heights
- Hang vintage focal ornaments where they’ll catch light
- Add handmade pieces that deserve spotlight moments
Fill in with medium ornaments:
- Group similar colors in loose clusters
- Vary the depths – some close to trunk, others on branch tips
- Leave breathing room between groups
Finish with small details:
- Tiny ornaments fill gaps without overwhelming
- Natural elements
")


[…] farmhouse kitchen lighting is all about that perfect blend of practicality and personality. It’s like finding […]