

This post may contain affiliate links. Please see my disclosure policy for details.
Transform Your Space with Vintage Christmas Tree Decor That’ll Make Your Guests Go “Wow!”
Contents
- Transform Your Space with Vintage Christmas Tree Decor That’ll Make Your Guests Go “Wow!”
- Why Your Current Christmas Decor Feels Off (And It’s Not Your Fault)
- The Magic Formula: What Makes Vintage Christmas Decor Actually Work
- Setting Up Your Vintage Christmas Tree: The Foundation That Makes Everything Else Easy
- The Vintage Color Palette That Never Fails
- Essential Tools and Props That’ll Make This Actually Happen
- Step-by-Step Setup That Actually Works
Vintage Christmas tree decor isn’t just about slapping some old ornaments on a tree and calling it a day.
I learned this the hard way three years ago when I proudly showed off what I thought was my “vintage masterpiece” to my sister. She took one look and said, “Did you raid a thrift store explosion?” Ouch. But she wasn’t wrong.
That embarrassing moment sent me down a rabbit hole of discovering what vintage Christmas decorating actually means. And let me tell you, once you nail this style, your holiday decor game will never be the same.
Why Your Current Christmas Decor Feels Off (And It’s Not Your Fault)
Most of us make the same mistake I did. We think vintage means “old and random.”
Real vintage Christmas decor follows specific rules:
- Color palettes that actually complement each other
- Textures that create depth without chaos
- Proportions that make sense in your space
- Lighting that enhances instead of overwhelms
The difference between amateur vintage and jaw-dropping vintage comes down to understanding these fundamentals.
The Magic Formula: What Makes Vintage Christmas Decor Actually Work
Here’s what I wish someone had told me from the start.
The secret isn’t in having the oldest ornaments. It’s in creating a cohesive story that feels both nostalgic and intentional.
Your vintage Christmas tree needs three key elements:
- A dominant color story (not every color you can find)
- Varied textures that complement each other
- Strategic lighting that creates warmth
I spent way too much time collecting random “vintage” pieces before I figured this out. Don’t make my mistake.
Setting Up Your Vintage Christmas Tree: The Foundation That Makes Everything Else Easy
Start with your space, not your ornaments.
I cannot stress this enough. Your room size determines everything else.
Small to medium spaces (most living rooms and entryways):
- Choose a tree that’s proportional to your ceiling height
- Leave at least 3 feet of clearance around the base
- Consider sight lines from your main seating area
Clear your space completely first. Remove everything that isn’t staying. This sounds obvious, but you’d be amazed how many people try to style around clutter.
Background matters more than you think:
- Neutral walls let your tree be the star
- Dark corners need extra lighting consideration
- Windows can provide gorgeous natural backlighting during the day

The Vintage Color Palette That Never Fails
Forget rainbow chaos. Classic vintage Christmas sticks to specific color combinations that actually work together.
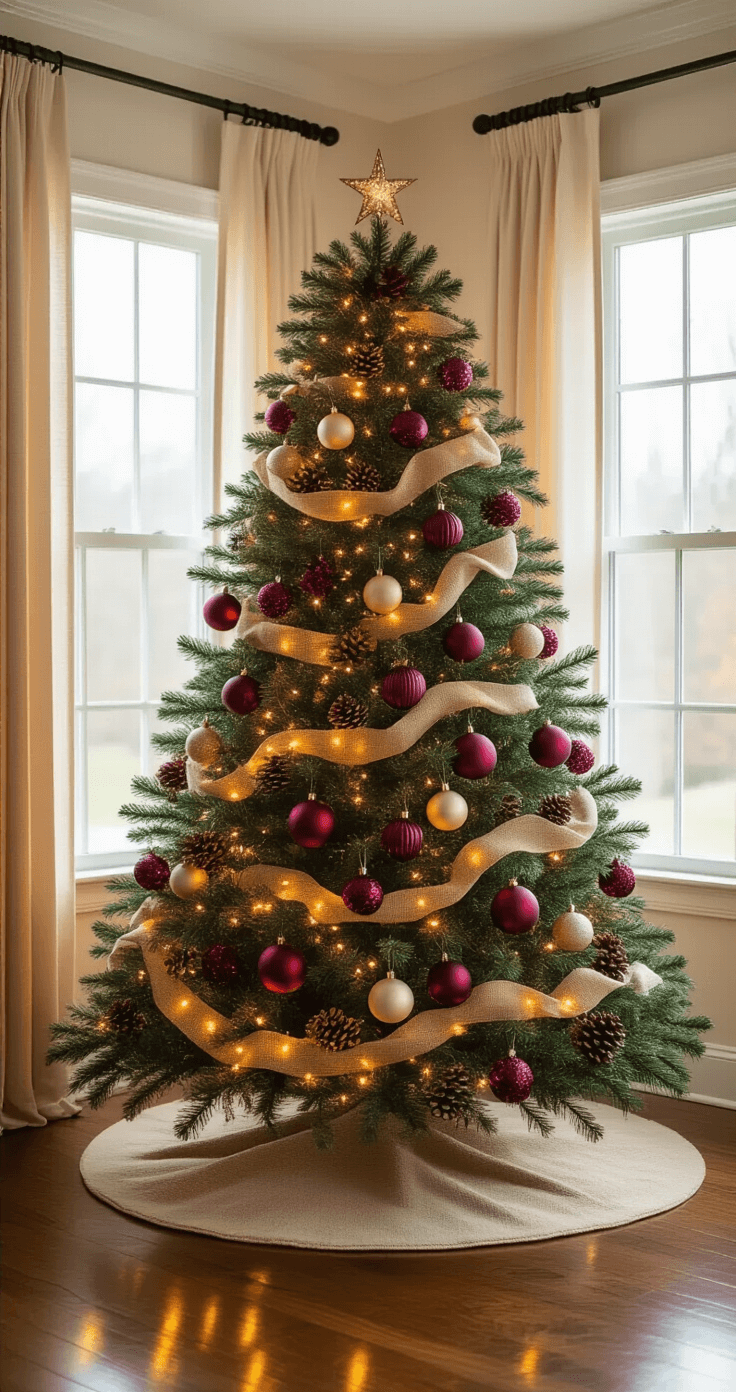
The foolproof vintage palette:
- Deep forest green (your base)
- Rich burgundy red (your accent)
- Warm gold (your metallic)
- Cream or ivory (your neutral)
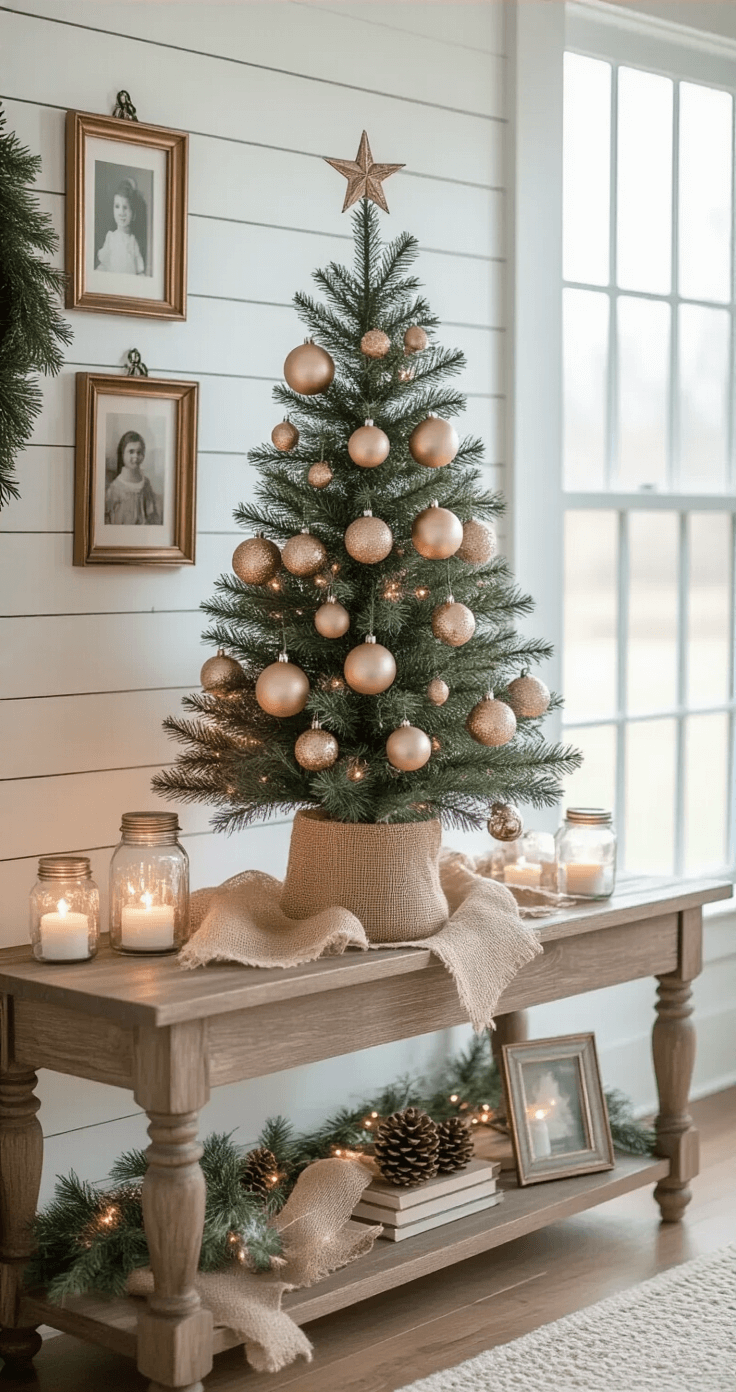
Want to go bolder? Try the sophisticated vintage route:
- Silver instead of gold
- Deep navy mixed with traditional red
- Muted rose gold for a softer feel
I learned this lesson when I mixed bright red, gold, silver, AND copper ornaments on the same tree. It looked like Christmas threw up. Pick your metals and stick with them.
Essential Tools and Props That’ll Make This Actually Happen
You don’t need to break the bank, but you do need the right basics.
Must-have lighting:
- Warm white LED Christmas lights (skip the harsh white ones)
- String them first, before any ornaments
- Plan on 100 lights per foot of tree height
Vintage ornament essentials:
- Glass ball ornaments in your chosen colors
- Mix matte and shiny finishes
- Vary your sizes (small, medium, large)
Texture makers:
- Burlap or fabric ribbon for garland
- Pinecones (real ones work great)
- Wooden ornaments for organic contrast

Step-by-Step Setup That Actually Works
Here’s exactly how I set up my vintage Christmas tree now (and why it works every time):
Step 1: Prep Your Tree (15 minutes)
- Fluff branches from inside out
- Check that your tree is straight in its stand
- Test your light strings before putting them on
Step 2: Light Installation (30 minutes)
- Start from the inside of the tree, working outward
- Wrap lights around each branch, not just the tips
- Step back frequently to check for dark spots
Step 3: Garland Application (20 minutes)
- Add garland before ornaments
- Drape naturally – forced loops look amateur
- Less is more here
Step 4: Ornament Placement Strategy (45-60 minutes)
- Largest ornaments first – place these deeper in the tree
- Medium ornaments next – fill in the middle layer
- Smallest ornaments last – these go on the tips
Pro tip: Put your best ornaments at eye level. That’s where people look first.
")


[…] is where understanding tree biology actually helps your decorating […]