

This post may contain affiliate links. Please see my disclosure policy for details.
Wall Christmas Tree: Your Guide to Festive Space-Saving Magic
Contents
Wall Christmas trees are revolutionizing how we decorate for the holidays, especially when floor space is at a premium.
I still remember the first time I walked into my tiny studio apartment with a full-size Fraser fir. The tree took up half my living room and made the space feel like a forest maze rather than a cozy holiday haven.
That’s when I discovered the genius of wall-mounted Christmas trees.
★ Steal This Look
- Paint Color: Sherwin-Williams Alabaster SW 7008
- Furniture: floating wall-mounted console table in warm white oak
- Lighting: adjustable brass swing-arm sconce with linen shade
- Materials: raw birch branches, matte black metal brackets, chunky knit wool garlands, hammered copper accents
There’s something quietly rebellious about refusing the floor-bound tree tradition—my studio wall tree became the conversation starter that made every cramped holiday gathering feel intentional rather than apologetic.
Why Your Small Space Deserves a Wall Christmas Tree
Look, I get it. You want that magical Christmas feeling, but your apartment has the square footage of a walk-in closet.
Here’s what makes wall trees absolutely brilliant:
- Save 70% of your floor space compared to traditional trees
- Zero risk of toppling over (goodbye, broken ornaments and water spills)
- Half the decorations needed – your wallet will thank you
- Perfect for renters – no heavy stands or potential carpet damage
- Kid and pet-friendly – no low-hanging branches to grab
I learned this the hard way when my friend’s toddler decided our traditional tree was a jungle gym.
Ready-Made Wall Trees That Actually Look Good
Sometimes you want the magic without the DIY marathon.
IKEA VINTERFINT Wall Decoration ($19.99) This 6-foot beauty comes with 180 warm LED lights and bendable branches. I’ve used this in three different apartments, and it never fails to impress guests.
Commercial Options Range:
- Basic 3-foot models: $30-50
- Premium 6-foot versions: $100-150
- Pre-lit wall Christmas trees offer plug-and-play convenience
The key is choosing one that matches your wall color and room size.
🖼 Steal This Look
- Paint Color: Farrow & Ball Skimming Stone 241
- Furniture: IKEA BILLY bookcase in white to flank the tree and create a built-in library feel
- Lighting: Schoolhouse Electric Isaac Plug-In Sconce in brass for warm side illumination
- Materials: matte painted drywall, natural birch plywood, warm white LED, brass accents, linen-textured ribbon
There’s something quietly satisfying about unboxing a wall tree that actually works on the first try—no tangled lights, no lopsided branches, just twenty minutes of peaceful installation while your coffee stays hot.
DIY Wall Christmas Tree Projects That Actually Work
The Pine Garland Method (My Personal Favorite)
Time needed: 45 minutes
Skill level: Beginner
This method saved my Christmas when I moved apartments two days before hosting dinner.
What you’ll need:
- Three 9-foot lengths of artificial pine garland
- Removable adhesive strips
- Painter’s tape
- Battery-operated LED string lights
Step-by-step:
- Map your tree shape using painter’s tape (3-foot base works perfectly)
- Start at the top – attach garland using adhesive strips
- Work downward in layers, making each row slightly wider
- Fluff as you go – this makes all the difference in fullness
- Add lights first, then ornaments
Pro tip: I always add an extra handful of garland at the bottom corners. It prevents that sad, sparse look that screams “DIY disaster.”
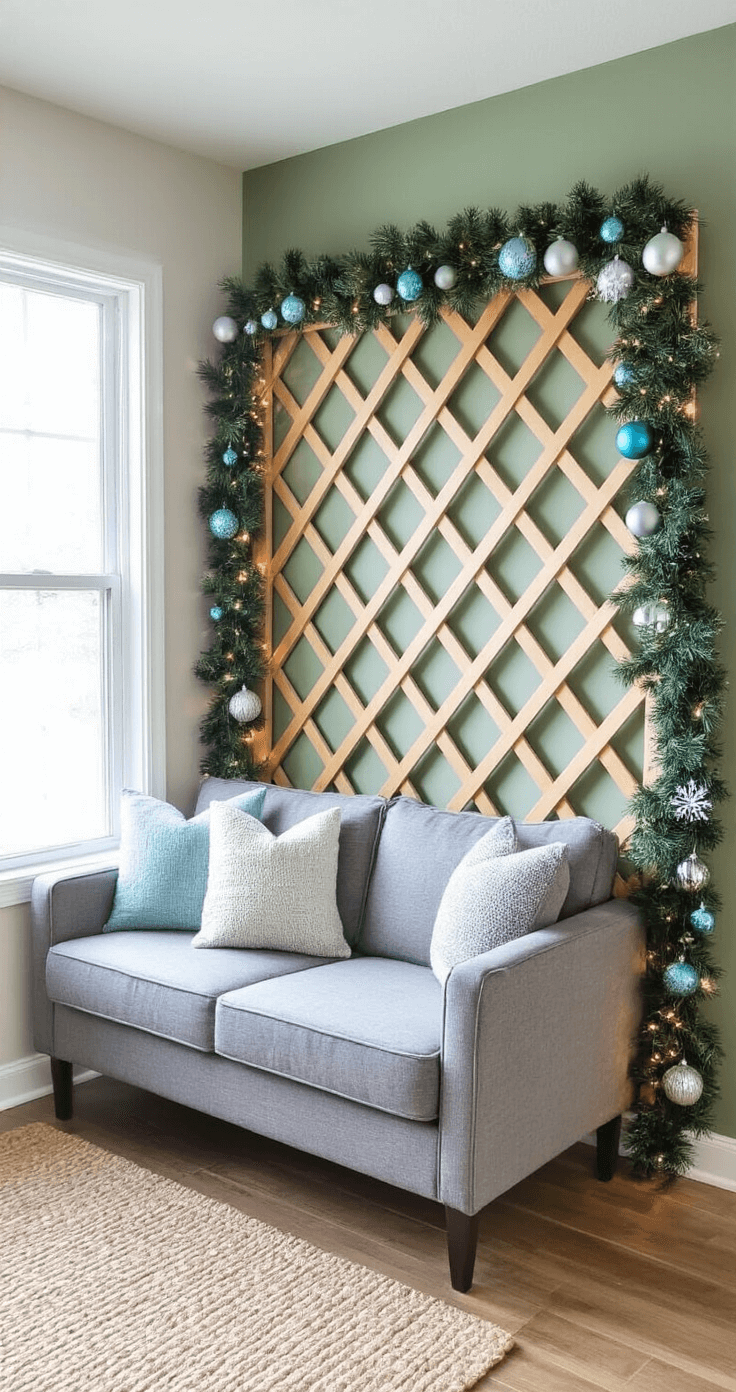
The Lattice Framework Method
Time needed: 2 hours
Skill level: Intermediate
Perfect if you want something sturdy enough for heavier ornaments.
Materials:
- Two 8-foot pine lattice strips (3/4-inch)
- Drill with small bits
- Picture hanging strips (heavy-duty)
- Pine garland for wrapping
- Floral wire
The process:
- Cut your “trunk” – one 6-foot vertical piece
- Create branches – cut five horizontal pieces (30″, 24″, 18″, 12″, 6″)
- Mount the trunk using heavy-duty strips
- Attach branches at 12-inch intervals
- Wrap with garland using floral wire
- Decorate like a regular tree
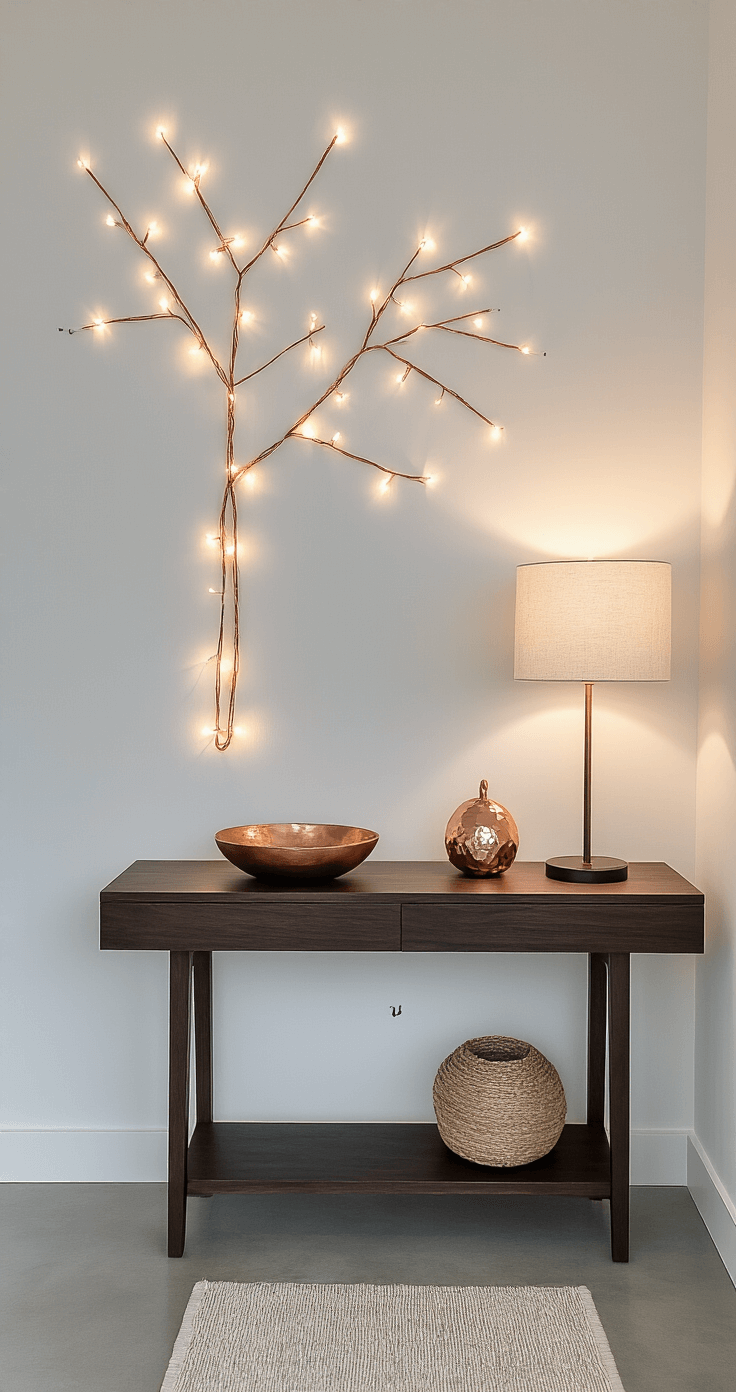
The String Light Tree (15-Minute Wonder)
When you need festive right now.
What works:
- 18+ removable wall hooks
- One very long string of lights
- Strategic hook placement
Start wide at the bottom, narrow at the top. Drape lights from hook to hook. Done.
It’s minimalist, modern, and takes literally no storage space.
🏠 Steal This Look
- Paint Color: Behr Polar Bear 75
- Furniture: narrow console table beneath the tree for presents and decorative base
- Lighting: battery-operated warm white LED string lights with timer function
- Materials: faux pine garland with mixed needle lengths, velvet ribbon bows, wooden bead garland for texture layering
This is the project I return to when space is tight and budget is tighter—it transforms a blank rental wall into something that feels intentional and festive without the commitment.
Making Your Wall Tree Look Magazine-Worthy
Color Coordination Is Everything
Match your existing decor:
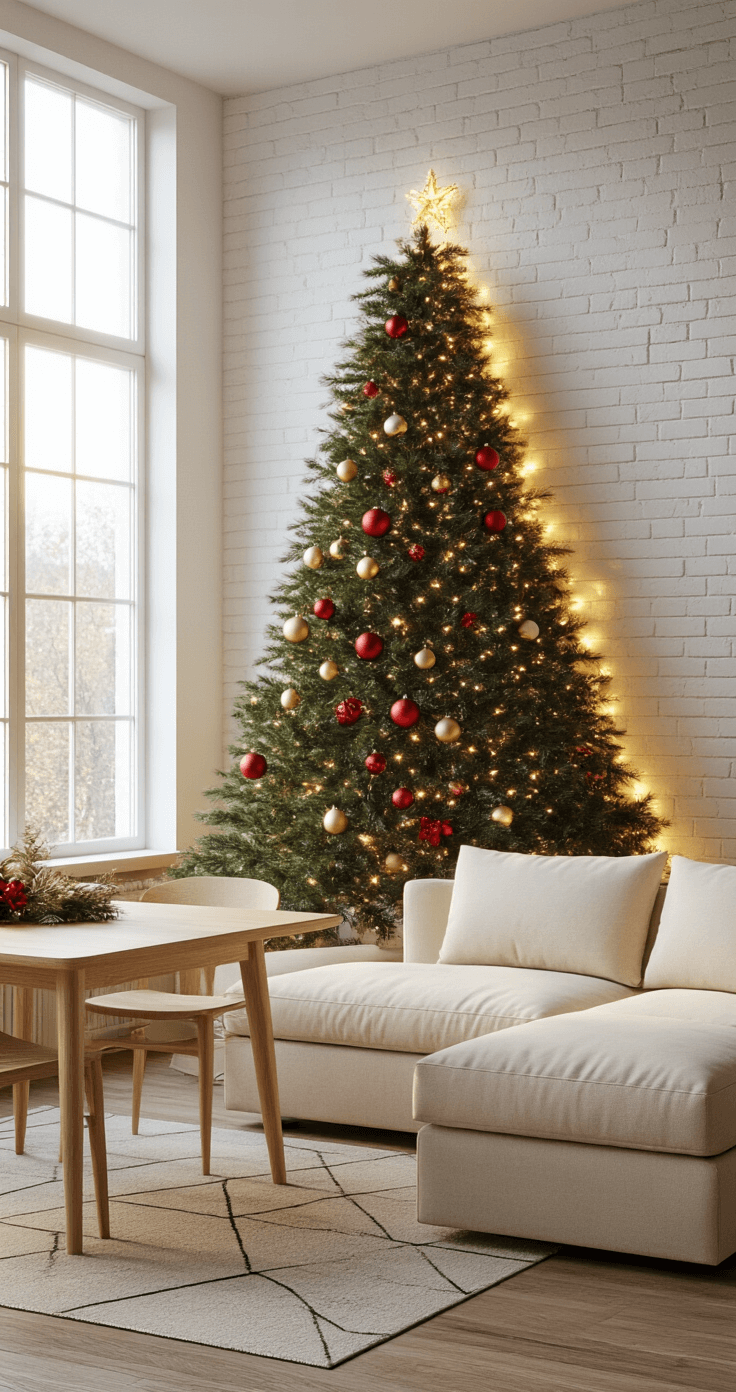
- Traditional homes: warm whites + red/gold ornaments
- Modern spaces: cool whites + silver/blue accents
- Boho vibes: warm lights + natural wood/copper elements
The Layering Secret
I learned this from a designer friend who charges $200/hour for holiday decorating.
Layer in this order:
- Lights first (always)
- Ribbon or garland for texture
- Large statement ornaments
- Medium ornaments to fill gaps
- Small details last
Proportion Matters
Your wall tree should be roughly 2/3 the height of your wall. Too small looks lost. Too large overwhelms the space.
I made this mistake in my first apartment – a 3-foot tree on a 12-foot wall looked like a sad shrub.
<img
")


[…] Espalier Technique: Train trees flat against walls […]