This post may contain affiliate links. Please see my disclosure policy for details.
DIY Kitchen Cabinets: Transform Your Space with Stunning Makeovers
Contents
- DIY Kitchen Cabinets: Transform Your Space with Stunning Makeovers
- Why DIY Kitchen Cabinets? Your Budget’s Best Friend
- Style Options: Something for Everyone
- Essential Tools: Your DIY Arsenal
- Step-by-Step Cabinet Makeover Guide
- Pro Tips That Will Save Your Sanity
- Color Palette Magic
- Common Mistakes to Avoid
- Photography Tips for Showing Off Your Hard Work
- Budget-Friendly Hacks
- When to Call a Professional
- Final Thoughts
Hey there, fellow home enthusiasts! Are you tired of staring at those boring, outdated kitchen cabinets that scream “bland” instead of “beautiful”? I’ve been exactly where you are, and I’m about to show you how to turn your kitchen into a magazine-worthy space without breaking the bank.

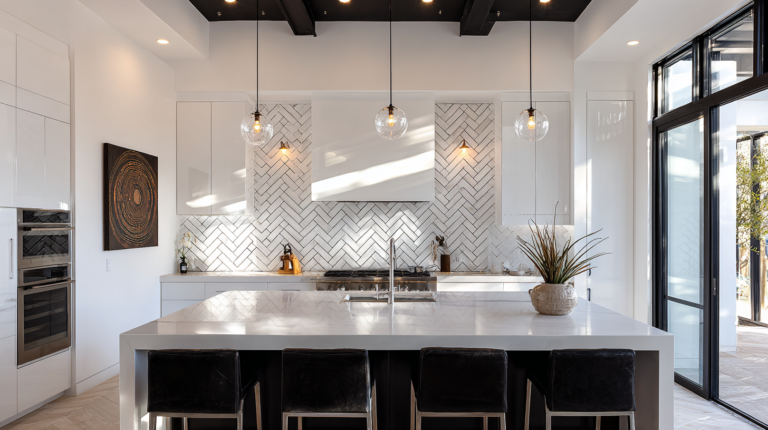
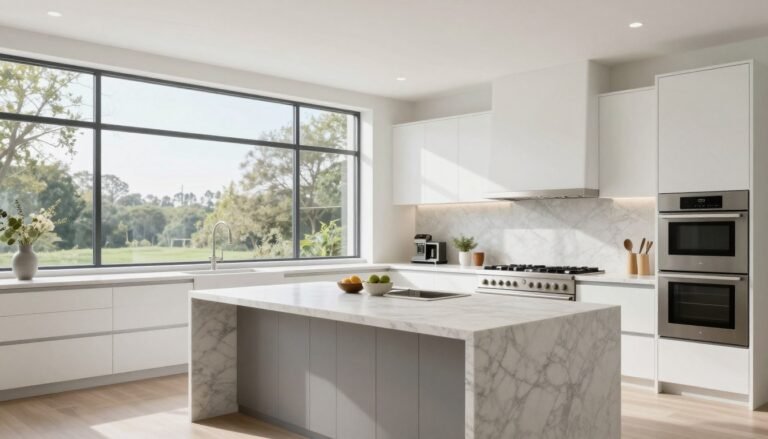
🖼 Steal This Look
- Paint Color: Sherwin-Williams Alabaster SW 7008
- Furniture: open shelving with black metal brackets, vintage-style island with turned legs
- Lighting: schoolhouse pendant lights in aged brass finish
- Materials: shiplap backsplash, butcher block countertops, matte black hardware, natural rattan baskets
Kitchen cabinets carry the weight of every rushed morning coffee and midnight snack, so transforming them feels like reclaiming the heart of your home with your own two hands.
Why DIY Kitchen Cabinets? Your Budget’s Best Friend
Let’s be real. Kitchen renovations can cost a fortune. But what if I told you that you could dramatically transform your kitchen for as little as $100? Yep, you heard that right!
Budget Breakdown That Will Make You Smile
- Refacing/Repainting: $100 – $700
- Ready-to-Assemble (RTA) Cabinets: $2,500 – $5,500
- Custom Build: $500 – $2,500+ (materials only)
Style Options: Something for Everyone
Whether you’re into:
- Modern minimalist vibes
- Cozy farmhouse feels
- Sleek Scandinavian design
- Bold and eclectic looks
There’s a cabinet style waiting to become your kitchen’s new best friend.

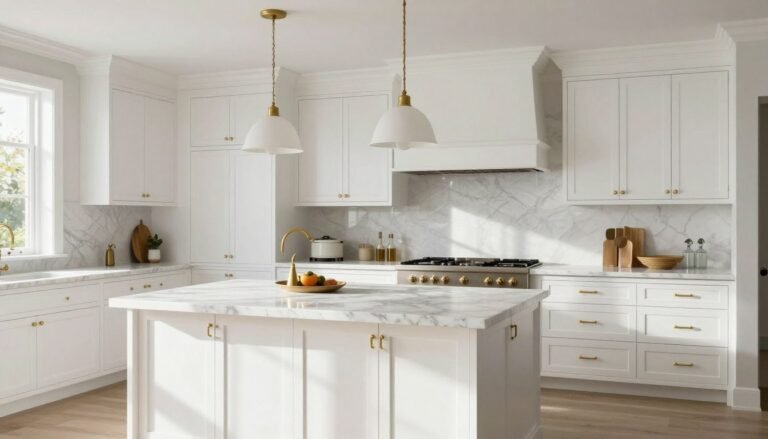
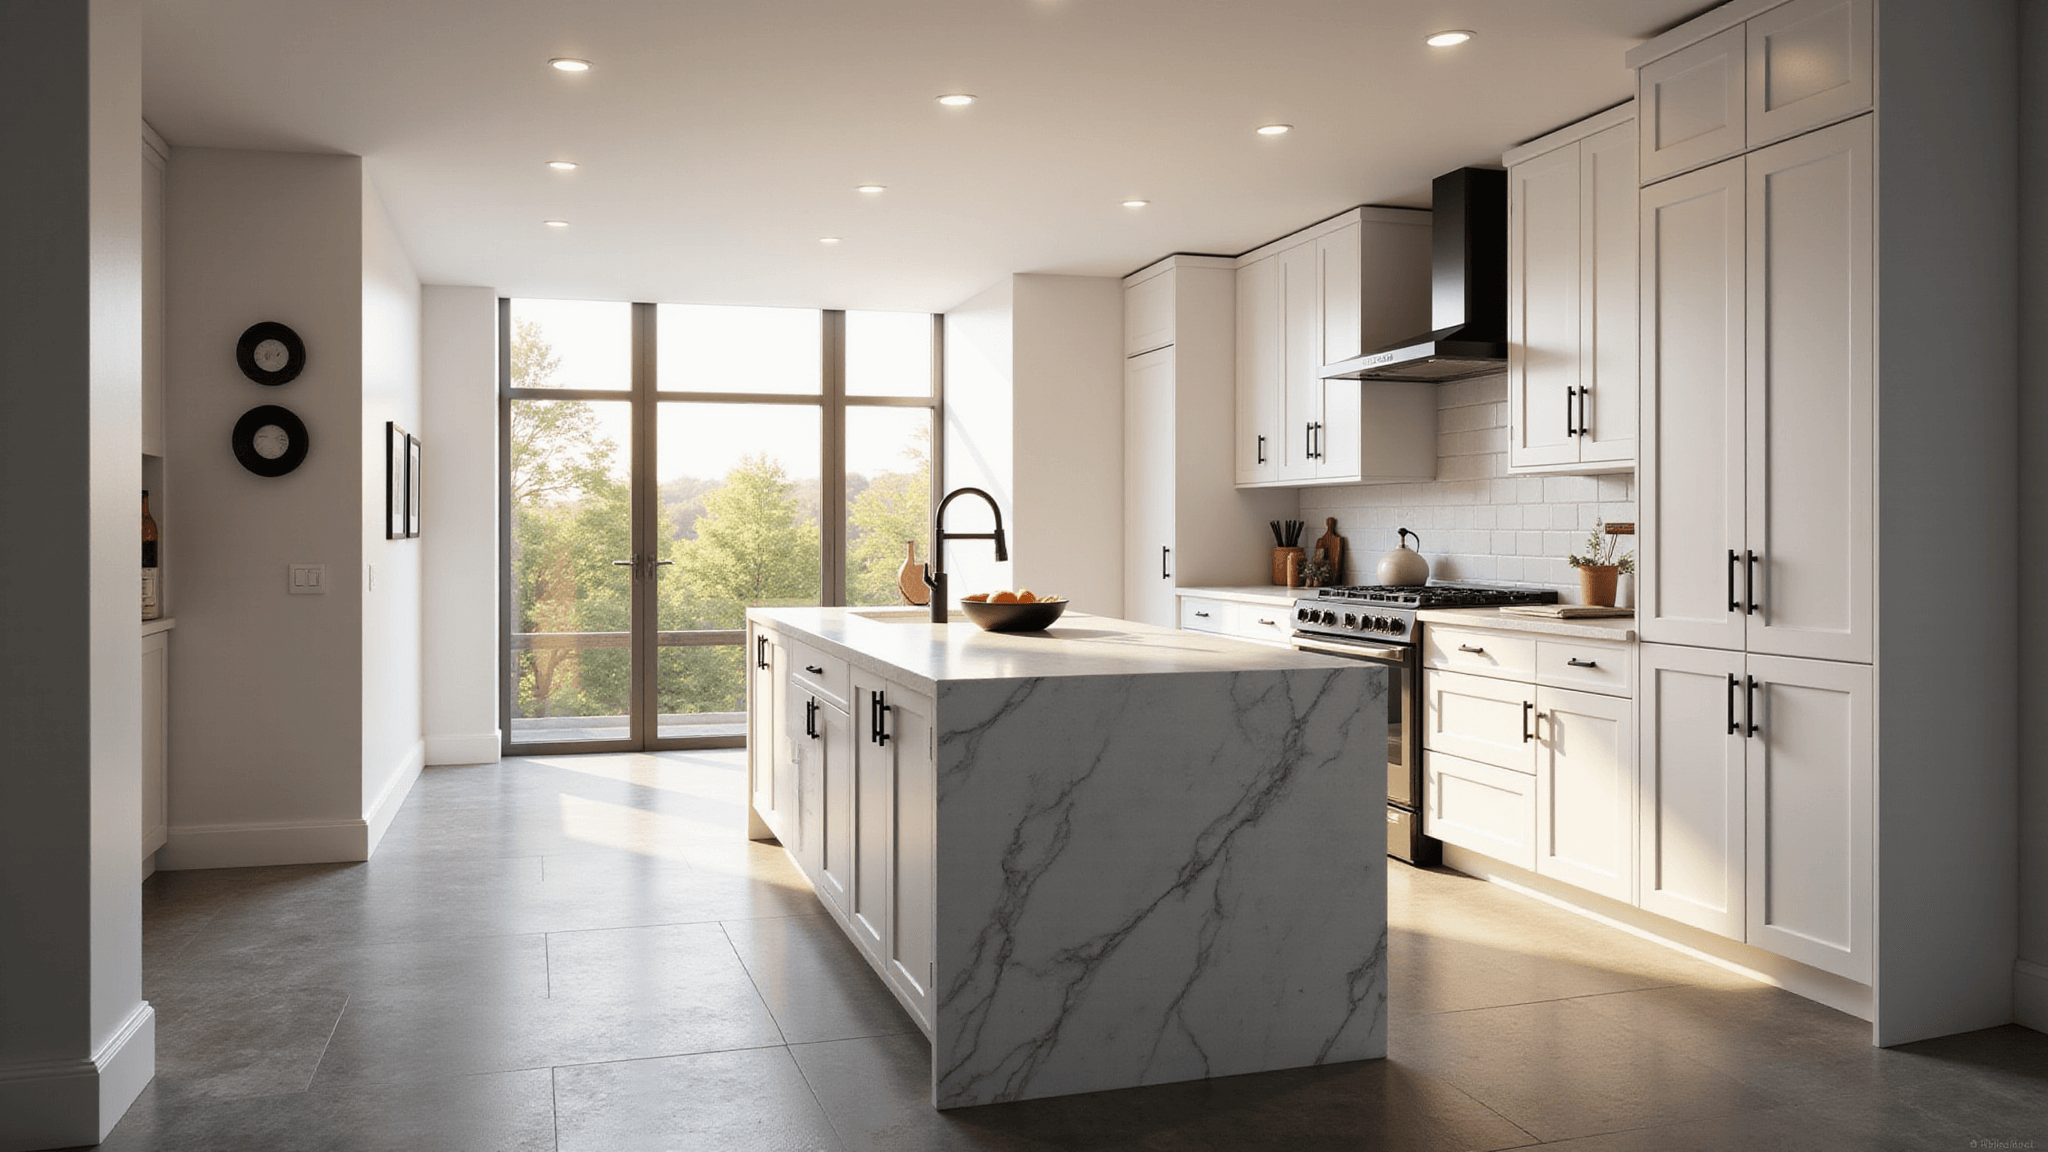
🎨 Steal This Look
- Paint Color: Farrow & Ball Hague Blue No. 30
- Furniture: Shaker-style base cabinets with slab drawer fronts, open shelving with brass brackets
- Lighting: Schoolhouse Electric Satellite 3 pendant cluster over island
- Materials: White oak rift-cut veneer, honed Carrara marble, unlacquered brass, hand-zellige tile
Kitchens are where we finally stop performing and start living—your cabinets should feel like they belong to the real you, not the version you think guests want to see.
👑 Get The Look
Essential Tools: Your DIY Arsenal
Must-Have Equipment
- High-quality camera or smartphone
- Soft box or LED lighting
- Basic woodworking tools
- Painting supplies
- Measuring tape
- Patience (most important tool!)
Step-by-Step Cabinet Makeover Guide
Option 1: Budget-Friendly Refresh
- Remove cabinet doors
- Clean thoroughly
- Sand surfaces
- Prime
- Paint with your dream color
- Add stunning new hardware
Option 2: Complete Cabinet Build
- Measure your kitchen space precisely
- Select plywood (1/4″ – 3/4″ thickness)
- Cut pieces for carcass and sides
- Use dado/rabbet joints for strength
- Install drawer slides and hinges
- Assemble face frames
- Mount cabinets

💡 Steal This Look
- Paint Color: Valspar Swiss Coffee 7002-16
- Furniture: open shelving units with black metal brackets to replace upper cabinets
- Lighting: LED under-cabinet puck lights with warm 2700K temperature
- Materials: matte painted MDF cabinet fronts, brushed brass pulls, butcher block contact paper for temporary countertops
There’s something deeply satisfying about opening a cabinet you built yourself—those dado joints you cut by hand become a quiet brag every time you reach for a coffee mug.
🛒 Get The Look
Pro Tips That Will Save Your Sanity
Insider Secrets:
- Always buy 10-15% extra materials (trust me)
- Invest in quality paint brushes
- Use painter’s tape for crisp lines
- Take your time – rushed work shows
Color Palette Magic
My favorite color combinations:
- Classic White + Brass Hardware
- Deep Navy Blue + Matte Black Pulls
- Natural Wood Tones + Minimal Hardware
- Sage Green + Copper Accents

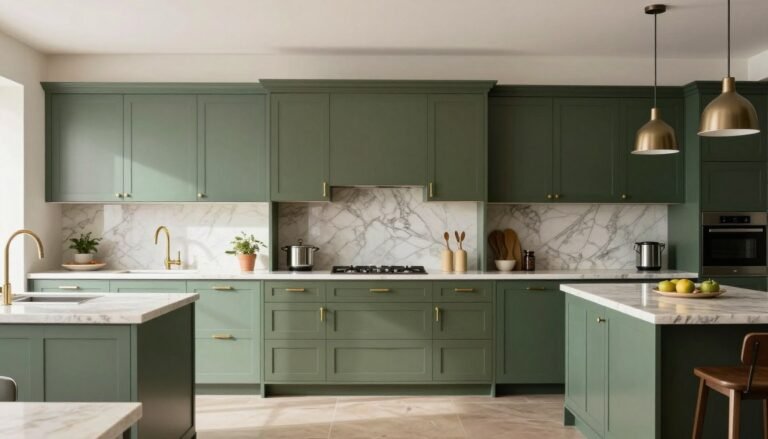
✎ Steal This Look
- Paint Color: use Dunn-Edwards brand. Match Classic White aesthetic: Dunn-Edwards Whisper White DEW380
- Furniture: shaker-style base cabinets with beadboard island paneling
- Lighting: brass schoolhouse pendant lights over the island
- Materials: quartz countertops with subtle veining, unlacquered brass hardware, white oak open shelving
I’ve walked through dozens of DIY kitchen reveals, and the ones that still look stunning five years later always started with someone willing to live with paint swatches taped to their cabinets for a full week before committing.
Common Mistakes to Avoid
❌ Rookie Errors:
- Skipping surface preparation
- Using cheap paint
- Forgetting to remove hardware before painting
- Rushing the drying process
Photography Tips for Showing Off Your Hard Work
Capture Your Masterpiece
- Shoot in natural morning light
- Use a tripod for crisp images
- Stage with minimal, elegant props
- Focus on details and overall composition

🌟 Steal This Look
- Paint Color: Fine Paints of Europe Hollandlac Brilliant White W1001
- Furniture: marble-topped kitchen island with turned legs for photo staging surface
- Lighting: oversized linen drum pendant over island for soft diffused fill light
- Materials: raw linen backdrops, reclaimed wood cutting boards, matte ceramic vessels
You’ve poured weekends into sanding and painting—these photos are your proof of what patience and skill can accomplish, so treat the shoot with the same care you gave the brushwork.
Budget-Friendly Hacks
Save Money Without Sacrificing Style:
- Check Habitat for Humanity ReStores for discounted materials
- Use contact paper for instant cabinet transformation
- Spray paint existing hardware instead of replacing
- Watch YouTube tutorials (free education!)
When to Call a Professional
Sometimes, DIY isn’t the answer. Consider professional help if:
- Structural damage exists
- You lack basic tool skills
- The project feels overwhelming

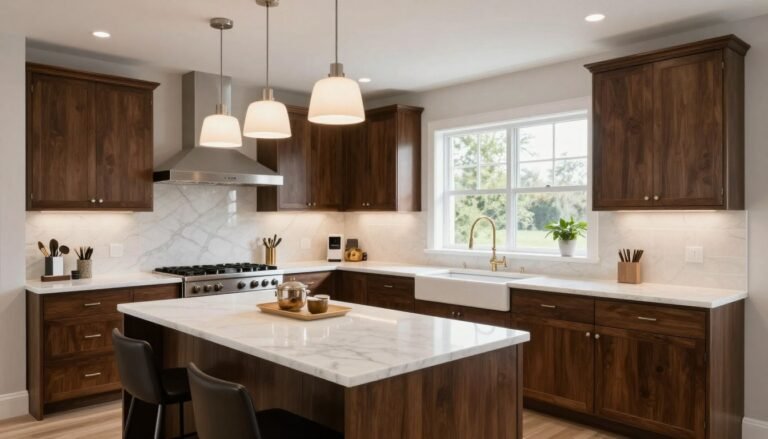
🏠 Steal This Look
- Paint Color: Sherwin-Williams Agreeable Gray SW 7029
- Furniture: custom-built shaker cabinet with soft-close hinges and under-cabinet storage organizers
- Lighting: LED under-cabinet puck lights with dimmer compatibility
- Materials: birch plywood cabinet boxes, solid maple face frames, brushed nickel hardware, quartz composite countertops
Kitchen cabinets carry the weight of daily life, and there’s no shame in recognizing when your skills or timeline can’t match the demands of the space you actually cook in.
Final Thoughts
Your dream kitchen is closer than you think. With some creativity, patience, and these strategies, you’ll have cabinets that make your friends ask, “Did you just renovate?”
Pro Tip: Document your journey! Share before and after shots on social media. Your transformation might inspire someone else.
Ready to transform your kitchen? Let’s do this! 🔨✨

🏠 Steal This Look
- Paint Color: Benjamin Moore Chantilly Lace OC-65
- Furniture: open-concept kitchen island with waterfall quartz countertop and brass barstools
- Lighting: schoolhouse glass pendant lights in aged brass finish over the island
- Materials: matte ceramic subway tile backsplash, natural white oak floating shelves, unlacquered brass hardware, honed Carrara marble accents
There’s something deeply satisfying about walking into a kitchen you rebuilt with your own hands—every time you reach for a drawer pull you installed yourself, you remember that you didn’t just decorate, you transformed.