

This post may contain affiliate links. Please see my disclosure policy for details.
How to Create an Elegant Christmas Tree That Looks Like a Designer’s Dream
Contents
- How to Create an Elegant Christmas Tree That Looks Like a Designer’s Dream
- Why Most Christmas Trees Look Chaotic (And Yours Doesn’t Have To)
- The Golden Rules of Elegant Christmas Tree Color Palettes
- Classic Metallics (My Personal Favorite)
- Rich and Moody
- The Four-Layer System That Never Fails
- Layer 1: Perfect Lighting
- Layer 2: Luxurious Garland and Ribbon
- Layer 3: Statement Ornaments
- Layer 4: Fill-in Magic
- The Ornament Selection Guide I Wish I’d Had Years Ago
- Textures That Work Together:
- Shapes That Create Harmony:
- Professional Styling Secrets That Make All the Difference
- The Triangle Rule
- The Depth Strategy
- The Negative Space Principle
Creating an elegant Christmas tree has been my obsession for over a decade, and I’ve learned that the difference between “pretty” and “absolutely stunning” comes down to three things: restraint, quality, and intention.
Let me tell you what happened last year when my sister-in-law walked into my living room. She stopped dead in her tracks, stared at my tree for a full ten seconds, then whispered, “This looks like it belongs in a magazine.” That’s the moment I knew I’d cracked the code.
Why Most Christmas Trees Look Chaotic (And Yours Doesn’t Have To)
Here’s the brutal truth: most of us treat our Christmas trees like we’re decorating for a garage sale. We throw on every ornament we’ve collected over the years, regardless of color, style, or size. The result? Visual chaos that screams “amateur hour.”
The biggest mistakes I see:
- Using every color of the rainbow
- Cramming ornaments without considering spacing
- Ignoring the tree’s natural shape
- Buying cheap decorations that look cheap
But here’s what I’ve discovered: elegance isn’t about spending a fortune. It’s about making smart choices and sticking to a plan.

The Golden Rules of Elegant Christmas Tree Color Palettes
I learned this lesson the hard way after years of creating trees that looked like a craft store exploded. The secret to sophistication? Stick to 2-3 colors maximum.
My go-to elegant color combinations:
Classic Metallics (My Personal Favorite)
- Gold, champagne, and ivory – timeless and warm
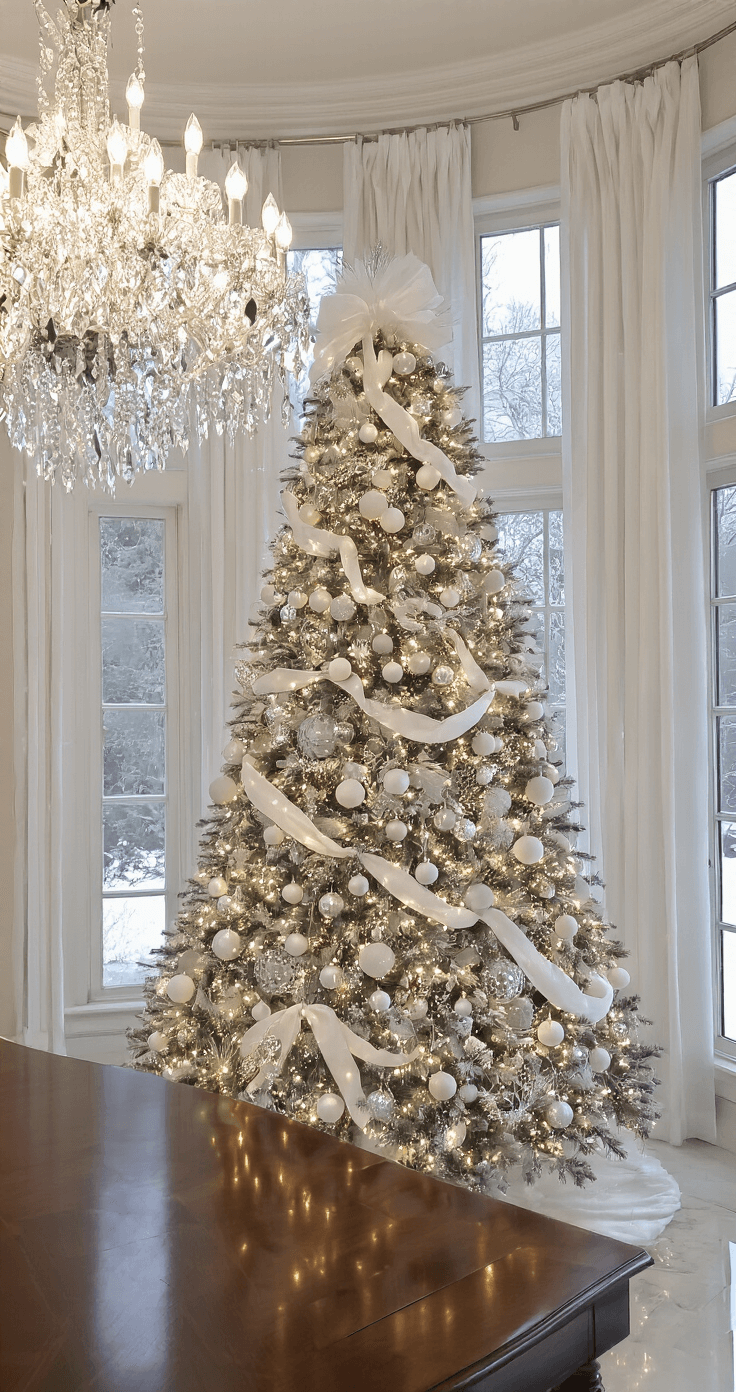
- Silver, white, and pearl – crisp and modern
- Bronze, cream, and blush – unexpected but gorgeous
Rich and Moody
- Deep navy, gold, and cream – sophisticated drama
- Burgundy, gold, and ivory – traditional with a twist
- Forest green, silver, and white – naturally elegant
I always choose elegant Christmas ornament sets in my selected palette first, then build everything else around them.

The Four-Layer System That Never Fails
This technique transformed my tree decorating game completely. I call it the “foundation-up approach,” and it works every single time.
Layer 1: Perfect Lighting
Start with warm white LED Christmas tree lights. Cold white lights make everything look harsh and cheap. Trust me on this one.
My lighting formula:
- 100 lights per foot of tree height
- Wrap lights deep into branches, not just on tips
- Test every strand before decorating (learned this the hard way)
Layer 2: Luxurious Garland and Ribbon
This is where the magic happens. I use wide satin or velvet ribbon and weave it deep into the branches.
The ribbon technique that changed everything:
- Cut 6-foot lengths of ribbon
- Tuck one end deep into the tree
- Let it cascade naturally, creating soft curves
- Push some sections deeper, pull others forward
- Never just drape it on the surface
Layer 3: Statement Ornaments
Here’s where size matters. Start with your largest ornaments and place them strategically.
My placement strategy:
- Largest ornaments go 1/3 up from the bottom
- Medium ornaments fill the middle section
- Smallest ornaments cluster near the top
- Always hang ornaments at varying depths
Layer 4: Fill-in Magic
This final layer includes crystal sprays and floral picks that add sparkle and fill gaps.
The Ornament Selection Guide I Wish I’d Had Years Ago
After making countless mistakes, I’ve developed a foolproof system for choosing ornaments that create elegance instead of chaos.
Textures That Work Together:
- Matte finish – provides visual rest areas
- Glossy – adds reflective sparkle
- Glittered – catches light beautifully
- Frosted – creates soft sophistication
Shapes That Create Harmony:
- Round balls – classic foundation (60% of ornaments)
- Teardrop shapes – elegant variation (25% of ornaments)
- Unique shapes – conversation starters (15% of ornaments)
The key is maintaining these ratios. Too many unique shapes create visual confusion.

Professional Styling Secrets That Make All the Difference
I learned these tricks from a decorator who charges $300 per tree, and they’re absolute game-changers.
The Triangle Rule
Never place three identical ornaments in a straight line. Instead, create triangles with similar ornaments for natural balance.
The Depth Strategy
This one technique separates amateur from professional:
- Push 1/3 of ornaments deep into the tree
- Hang 1/3 at medium depth
- Let 1/3 hang toward branch tips
The Negative Space Principle
Empty space isn’t wasted space – it’s sophisticated restraint. Let your tree breathe.


 Cry")


[…] pairing creates an elegant, almost regal atmosphere that works in any home style. Navy provides unexpected depth while gold […]
[…] forth and create your dream love nest! Your perfect bedroom is […]