

This post may contain affiliate links. Please see my disclosure policy for details.
Fall Window Boxes with Pumpkins: Your Complete Guide to Autumn Curb Appeal
Contents
- Fall Window Boxes with Pumpkins: Your Complete Guide to Autumn Curb Appeal
- Why Your Fall Window Box Keeps Looking Sad (And How to Fix It)
- The Foundation: Plants That Actually Survive Fall Weather
- The Thriller-Filler-Spiller Method (Sounds Fancy, Actually Simple)
- Let’s Talk About Those Pumpkins
- Creating Texture (The Difference Between “Nice” and “Wow”)
- My Exact Step-by-Step Process
Fall window boxes with pumpkins are the secret weapon I use every September to transform my home’s exterior from summer-weary to autumn-gorgeous.
Let me be honest with you.
The first time I tried creating a fall window box, I shoved three pumpkins into soil and called it done.
They rotted within days, leaked brown goop all over my white siding, and attracted flies.
Not my finest moment.
Since then, I’ve learned exactly how to create stunning fall displays that actually last through the season.

🌟 Steal This Look
- Paint Color: Sherwin-Williams Tricorn Black SW 6258
- Furniture: black metal window box planter with adjustable brackets for secure mounting
- Lighting: warm white LED window box spotlight with stake mount for ground illumination
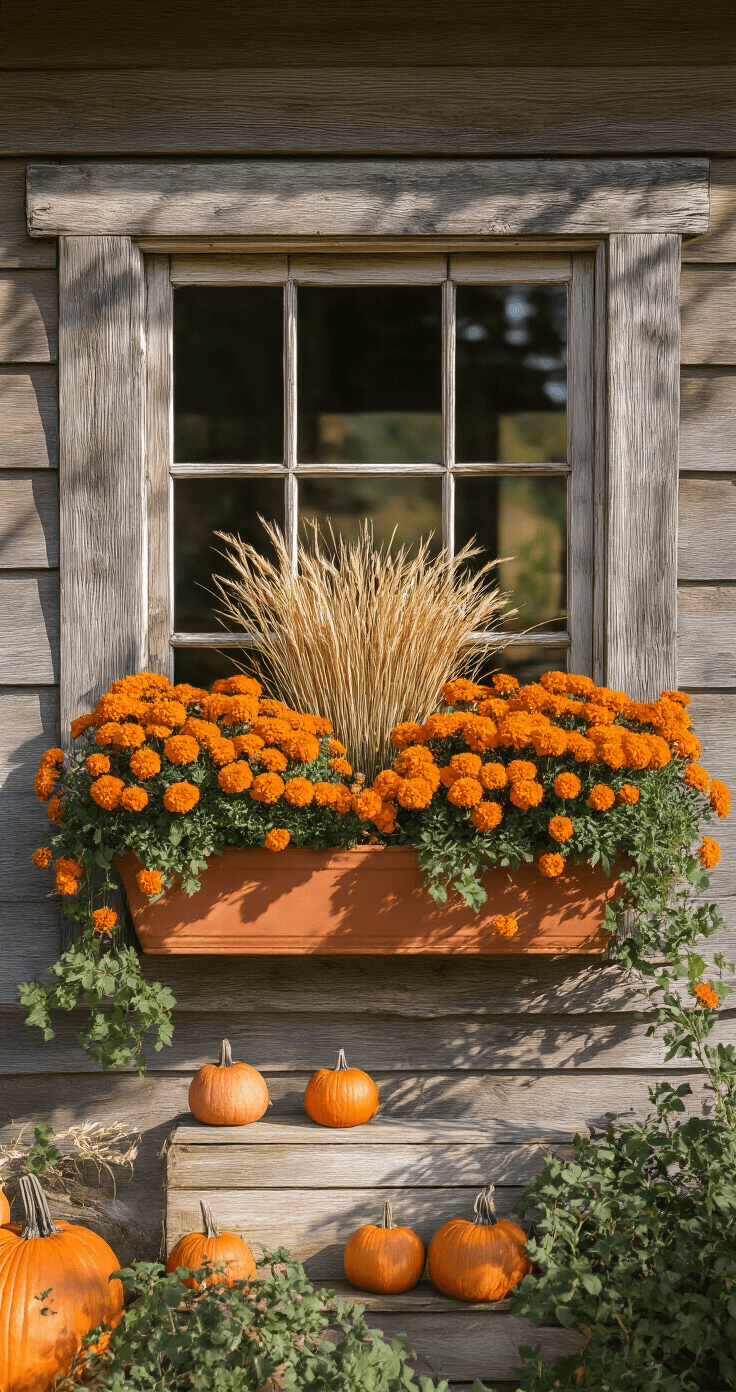
- Materials: weathered cedar mulch, preserved moss, faux velvet pumpkins, dried wheat stalks, copper wire accents
There’s something deeply satisfying about pulling into your driveway after a long day and seeing those warm amber and burnt orange tones glowing against your windows—it signals to the whole neighborhood that you’ve officially embraced the season.
Why Your Fall Window Box Keeps Looking Sad (And How to Fix It)
You know what drives me crazy?
Those window boxes that look amazing for about five minutes, then everything dies, flops over, or turns to mush.
Here’s what nobody tells you: most people kill their fall window boxes by treating them exactly like summer boxes.
Fall plants need different care.
The temperature swings are brutal.
And pumpkins? They’re not houseplants. They rot. Fast.
But when you get the formula right, your window boxes become the most photographed feature on your block.
Trust me on this.
The Foundation: Plants That Actually Survive Fall Weather
Forget those delicate petunias.
Fall demands tougher players.
I always start with what I call the “backbone plants” – these are the workhorses that handle frost, rain, and temperature drops without throwing a tantrum.
My go-to foundation plants:
- Ornamental grasses (especially fountain grass)
- Cold-hardy ivy that trails beautifully
- Heuchera with those gorgeous burgundy leaves
- Evergreen varieties like boxwood or dwarf conifers
- Hardy ferns that add softness
These plants keep your box looking full even when everything else fades.
I learned this lesson after watching my first attempt shrivel into brown sticks by mid-October.
The ornamental grasses add movement when the wind picks up, creating that lived-in, effortlessly elegant look that’s impossible to fake.
🖼 Steal This Look
- Paint Color: use Farrow & Ball brand. Match the ACTUAL wall color in the image. Format: Farrow & Ball ColorName CODE
- Furniture: weathered zinc window box with drainage holes, 36-inch length for standard double-hung windows
- Lighting: solar-powered copper string lights with warm 2700K bulbs for evening box illumination
- Materials: aged terracotta, galvanized metal, preserved moss, and natural fiber coconut coir liners
I still remember my neighbor’s pitying smile when she spotted my crispy window boxes that first October—now I plant for resilience first, beauty second, and the confidence of knowing they’ll survive whatever fall throws at them.
The Thriller-Filler-Spiller Method (Sounds Fancy, Actually Simple)
This is the framework that changed everything for me.
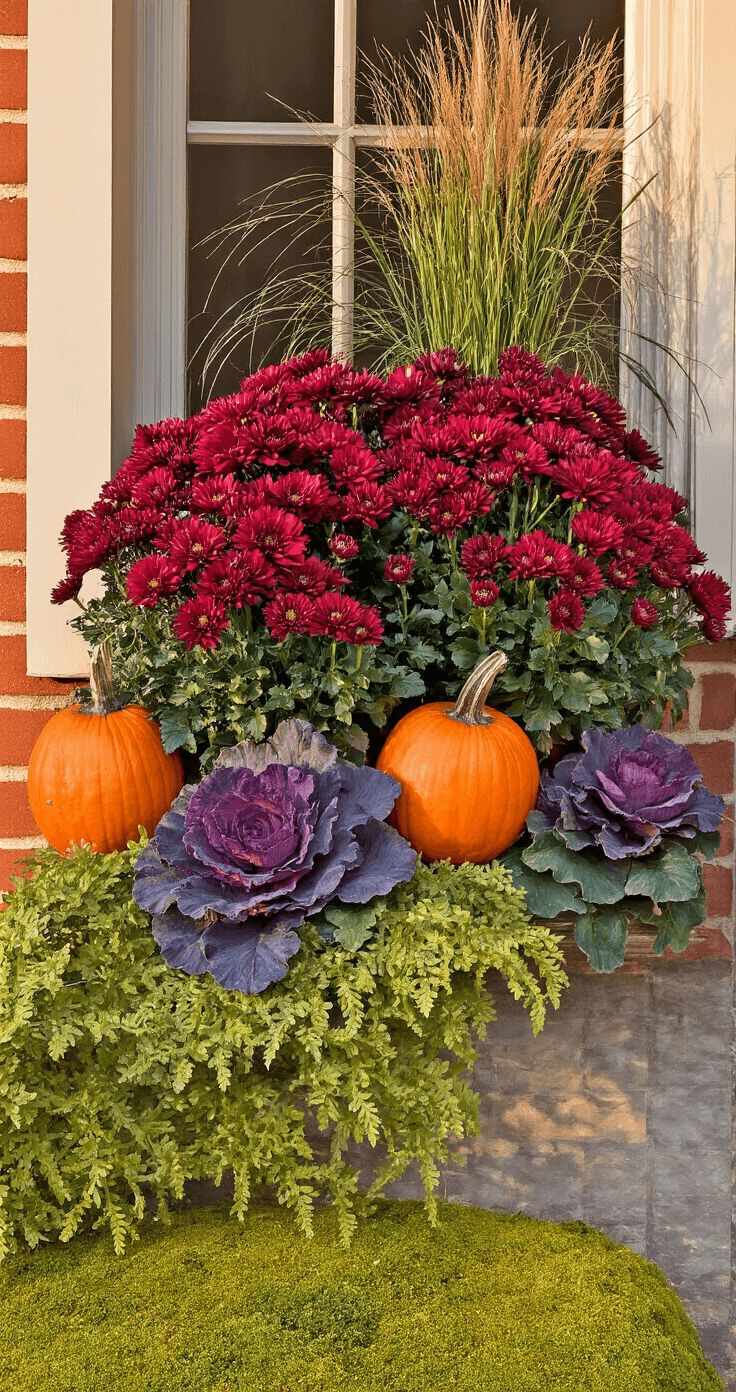
Thriller: Your tall, dramatic centerpiece that draws the eye up.
I use fountain grass, tall mums, or even decorative branches stuck into the soil.
Filler: The middle layer that creates bulk and color.
Think chrysanthemums, ornamental cabbage (those purple ruffled beauties), pansies, and asters.
Spiller: Plants that cascade over the edge.
Ivy works year-round, but I also love trailing pansies or sweet potato vine if temperatures haven’t dropped too much yet.
This three-layer approach creates depth instead of that flat, amateur look where everything sits at the same height.
Professional landscapers use this formula constantly.
Now you know their secret.

🏠 Steal This Look
- Paint Color: Behr Garden Wall MQ6-21
- Furniture: weathered zinc window box planters with built-in drainage
- Lighting: solar-powered copper fairy string lights with warm white bulbs
- Materials: aged terracotta pots, preserved moss, wrought iron brackets, burlap ribbon
I learned this method from a neighbor whose window boxes always looked magazine-worthy while mine looked like sad grocery store bouquets—turns out the secret was never about expensive plants, just intentional architecture.
Let’s Talk About Those Pumpkins
Here’s where most people mess up completely.
You cannot just plop pumpkins directly into soil and expect magic.
Moisture from watering + pumpkin skin = rot city, population: your window box.
The right way to use pumpkins:
- Get mini pumpkins – the small ones (3-5 inches) work better proportionally
- Use wooden floral picks – these genius little stakes let you position pumpkins anywhere without them sitting in wet soil
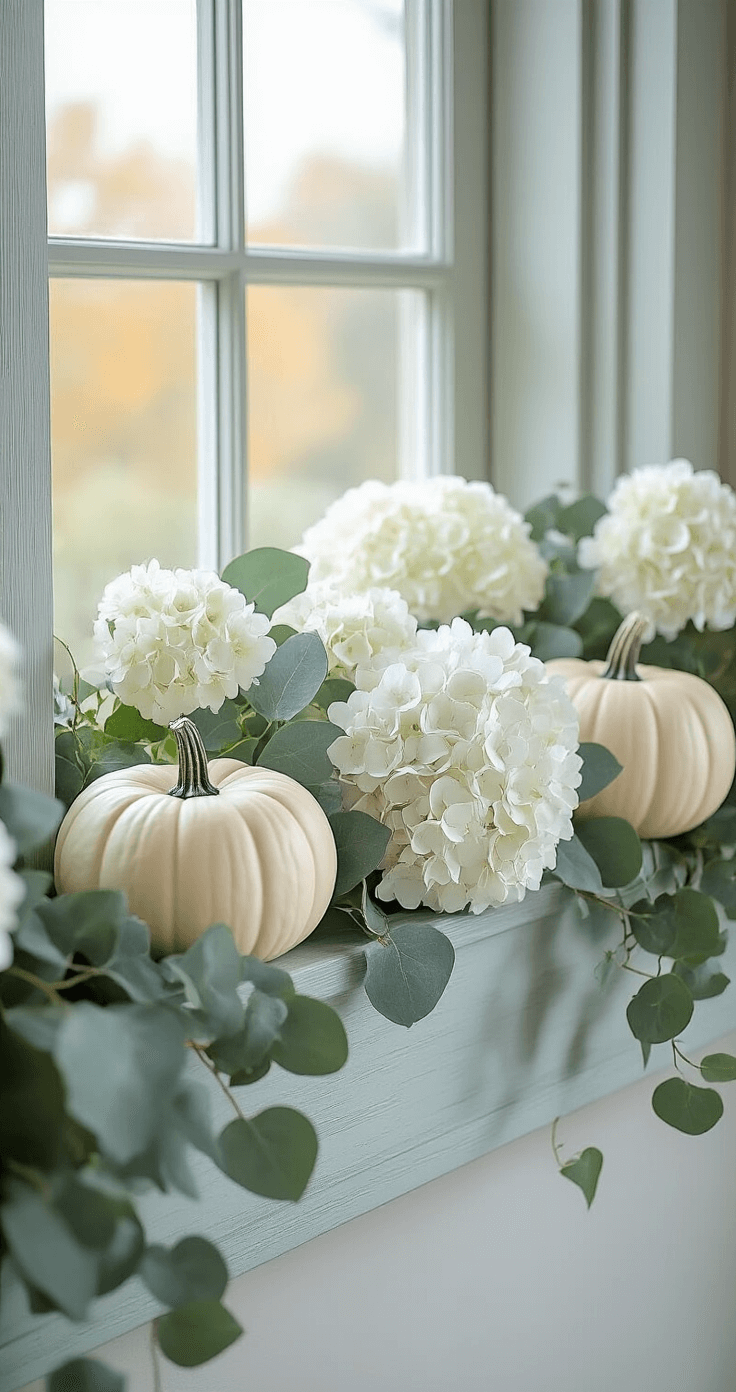
- Mix your colors – orange is obvious, but white pumpkins, pale green, and those gorgeous blue-grey varieties create sophistication
- Plan for replacement – fresh pumpkins last 2-3 weeks max, so grab extras
I keep a stash of backup pumpkins in my garage.
When one starts looking tired, I swap it out.
Takes thirty seconds.
The decorative mini pumpkins you can find work beautifully if you want zero-maintenance options that last the entire season.
Some look so realistic, even I have to touch them to check.
🖼 Steal This Look
- Paint Color: use Valspar brand. Match the ACTUAL wall color in the image. Format: Valspar Sienna Shade 2004-7B
- Furniture: wrought iron window box brackets with scroll detail, weathered cedar window box liner
- Lighting: solar-powered LED window box uplights with warm 2700K output
- Materials: aged terracotta, preserved moss, dried oat grass, copper floral picks, matte ceramic mini pumpkins
I learned the hard way after losing half my pumpkins to a surprise October rainstorm that soaked through the soil overnight—now I keep a rotation system and check weather apps like I’m forecasting for a wedding.
Creating Texture (The Difference Between “Nice” and “Wow”)
Smooth, glossy, ruffled, spiky – texture is what makes your eye want to linger.
I layer different textures deliberately:
- Soft moss or straw as base layer – gives that harvest feel immediately
- Feathery grasses – add movement and lightness
- Ruffled ornamental cabbage – provides weight and structure
- Rough pumpkin skin – adds organic, imperfect beauty
- Delicate berry stems – create tiny pops of detail
Here’s my favorite trick: add dried or faux elements that won’t die.
Berry stems, wheat bundles, dried hydrangeas, and eucalyptus branches all bring color and texture without needing water.
I tuck artificial berry stems throughout the arrangement to fill gaps and add those tiny visual surprises that make people stop and stare.
★ Steal This Look
- Paint Color: PPG Warm Stone PPG1079-4
- Furniture: weathered cedar window box liner with zinc trim
- Lighting: solar-powered copper fairy string lights with warm white bulbs
- Materials: preserved sheet moss, dried wheat stalks, faux berry stems, heirloom pumpkin gourds, ornamental kale with ruffled leaves
There’s something deeply satisfying about a window box that looks abundant even as the garden fades—this is the season when texture becomes your secret weapon against the gray skies, and I’ve learned that neighbors always comment on the arrangements that make them want to reach out and touch.
My Exact Step-by-Step Process
I do this every late September.
Takes about an hour per box.
Step 1: Empty and refresh
Pull out dead summer plants.
Add fresh potting mix to replace what’s compacted.
Wipe down the box exterior.
Step 2: Add slow-release fertilizer
Your fall plants still need nutrients.
I use a balanced fertilizer mixed into the top few inches of soil.


")
[…] Tudor homes transport you straight to the English countryside. Those steep gabled roofs, decorative half-timbering, and tall narrow windows create instant curb appeal. […]