
This post may contain affiliate links. Please see my disclosure policy for details.
Simple Porch Railing Ideas That Won’t Make You Want to Pull Your Hair Out
Contents
Simple porch railing ideas can transform your outdoor space without requiring a master’s degree in carpentry or draining your bank account.
I’ve watched too many homeowners freeze up when it’s time to pick or build a porch railing. They’re worried about picking the wrong style, spending too much money, or creating a safety hazard that’ll haunt them forever.
Let me tell you something straight: your porch railing doesn’t need to be complicated to look good and keep people safe.

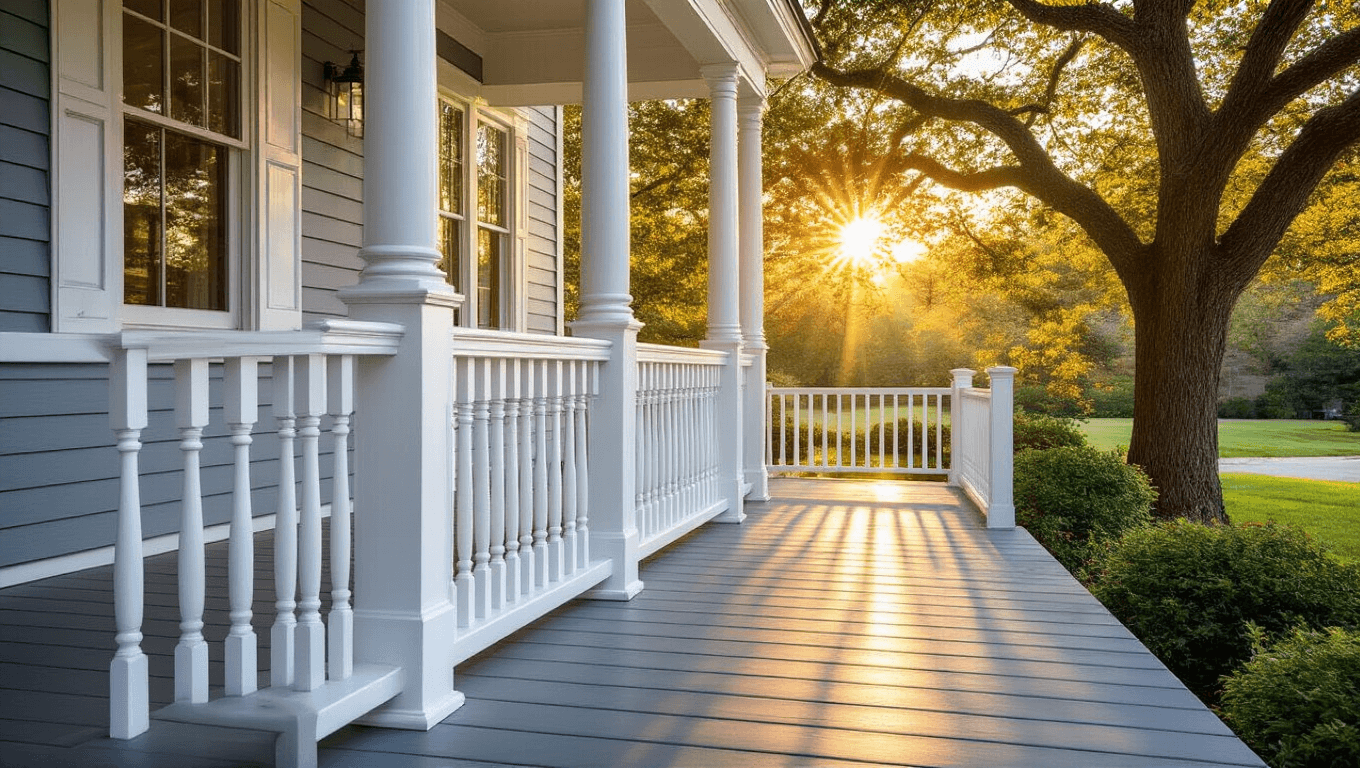
🏠 Steal This Look
- Paint Color: Sherwin-Williams Tricorn Black SW 6258
- Furniture: a pair of black metal rocking chairs with natural wood armrests
- Lighting: a matte black outdoor wall lantern with seeded glass panels
- Materials: powder-coated aluminum railing with clean horizontal bars, cedar post caps, matte black metal brackets
I’ve installed railings on three porches now, and the one I overthought looks dated while the simple black horizontal rail I threw together in a weekend still gets compliments from neighbors walking their dogs.
Why Simple Vertical Spindles Never Go Out of Style
Vertical spindles are the little black dress of porch railings.
They work with ranch houses, colonials, craftsman homes—basically everything except maybe an igloo.
I installed traditional vertical railings on my own front porch three years ago, and I still walk up those steps every day without a single regret.
Here’s what makes them foolproof:
- They match almost any architectural style
- Finding replacement pieces is ridiculously easy
- You can buy pre-made sections at any home improvement store
- They’re what building inspectors expect to see, so code compliance is straightforward
The color trick that changes everything: pick two complementary colors for your project.
Paint your top and bottom rails one color, then make your balusters a contrasting shade. I’ve seen white frames with black spindles that look like they belong in a magazine spread. Navy blue balusters against white rails? Chef’s kiss.
A quality paintbrush set will make this color application so much easier than fighting with a cheap brush that sheds bristles everywhere.

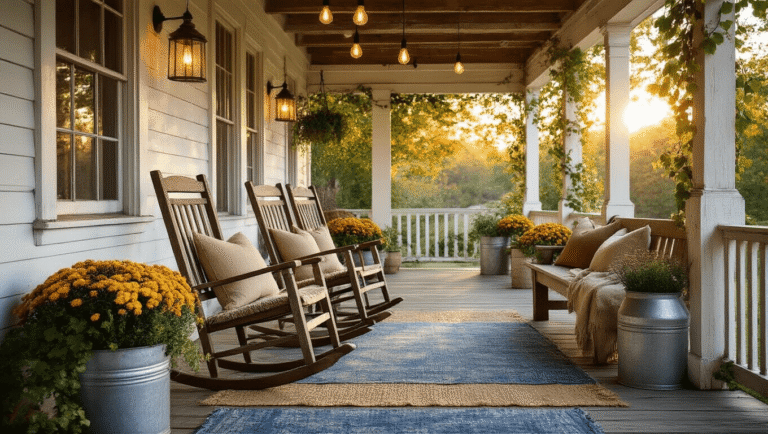
🏠 Steal This Look
- Paint Color: Benjamin Moore Black HC-190 for rails, Benjamin Moore Simply White OC-117 for spindles
- Furniture: black metal rocking chair with natural wood seat slats
- Lighting: exterior wall-mounted lantern with clear seeded glass and matte black finish
- Materials: smooth painted poplar spindles, pressure-treated pine top and bottom rails, matte black iron mounting brackets
There’s something quietly satisfying about the rhythm of vertical lines as you approach your front door—it’s the kind of classic choice you won’t need to explain to future buyers.
The Budget-Friendly DIY Route Using Pressure-Treated Lumber
Let’s talk money because that’s what stops most DIY projects dead in their tracks.
I built a railing section using pressure-treated lumber for my back deck, and the entire 8-foot section cost me less than $150.
Here’s the dead-simple construction method:
Start with your framework:
- Grab pressure-treated 2x4s for your horizontal bottom rail
- Secure them with metal railing brackets attached to your porch posts
- Leave a 4-inch gap between the bottom rail and the porch floor (this is code in most places, and inspectors will make you redo it if you skip this)
For the top rail:
- Use a 2×6 for sturdiness and comfort when people grab it
- Look for top rails with predrilled notches—they’re worth the extra few bucks
- These notches line up perfectly so your balusters don’t look drunk
The balusters themselves:
- Individual vertical pieces cost as little as 87 cents each at big-box stores
- Space them no more than 4 inches apart (again, this is code—a baby’s head shouldn’t fit through)
- Cut them all to the same length using a circular saw and a stop block for consistency
I screwed up my first section by eyeballing the spacing between balusters. What a disaster. They looked like crooked teeth.
The second time around, I made a simple spacer block from scrap wood exactly 3.5 inches wide. I’d place a baluster, drop in the spacer, place the next baluster, and so on. Perfectly consistent every single time.

🎨 Steal This Look
- Paint Color: Farrow & Ball Green Smoke 47
- Furniture: pressure-treated 2×6 top rail with predrilled notches
- Lighting: outdoor LED step lights mounted on porch posts
- Materials: pressure-treated 2x4s, metal railing brackets, exterior wood screws, Thompson’s WaterSeal stain
I learned the hard way that inspectors carry tape measures for that 4-inch gap rule, and redoing a finished section because you eyeballed it will cost triple the time and materials.
The Even Cheaper Fence Board Method
Want to go even more budget-friendly?
Pressure-treated fence boards are your secret weapon.
Buy standard 6-inch fence boards, then rip them in half lengthwise with a table saw or circular saw. Boom—you’ve got two balusters for the price of one fence board.
The breakdown:
- One 6-foot fence board costs around $3-4
- You get two 3-inch-wide balusters from each board
- Sand the cut edges with an orbital sander so they don’t look rough
- Assemble with deck screws or a nail gun
My neighbor used this method for his entire wraparound porch. Saved him probably $600 compared to buying pre-made sections.
Sure, it took him three weekends instead of one, but he was ridiculously proud of the result.

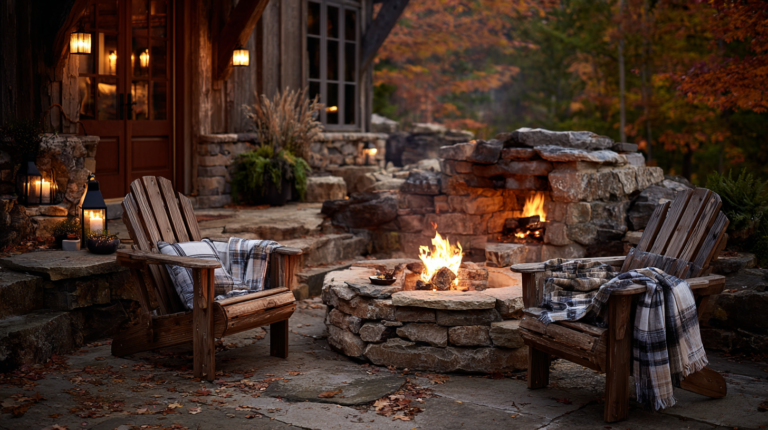
🌟 Steal This Look
- Paint Color: Behr DeckOver Slate Gray SC-365
- Furniture: weathered teak Adirondack chairs with navy Sunbrella cushions
- Lighting: black galvanized barn wall sconce with seeded glass
- Materials: pressure-treated pine fence boards, exterior deck screws, orbital-sanded edges, matte black metal post caps
There’s something deeply satisfying about walking past a porch you built with your own hands, especially when guests assume you paid a contractor—this method delivers that pride without the credit card hangover.
Horizontal Railings for a Modern Vibe
Horizontal railings create a completely different feel—more contemporary, more relaxed.
They make small porches look bigger because the horizontal lines trick your eye into seeing more width.
I installed horizontal railings on my sister’s deck last summer, and the transformation was stunning.
What makes them simple:
- Fewer individual pieces to cut and install
- You’re working with longer 2x4s or 2x6s running parallel to the ground
- No fussy spacing between dozens of vertical spindles
- They show off your yard view instead of chopping it up visually
The challenge: Building codes are pickier about horizontal railings because kids can climb them like ladders.
You need to:
- Keep spaces between horizontal boards to 4 inches maximum
- Make sure the design doesn’t create an obvious “ladder effect”
- Check your local codes—some jurisdictions don’t allow them at all for this reason
One builder I know offsets his horizontal boards slightly so they don’t create perfect ladder rungs. Smart guy.

✎ Steal This Look
- Paint Color: use Valspar brand. Match the ACTUAL wall color in the image. Format: Valspar ColorName CODE
- Furniture: low-profile teak loveseat with weathered gray finish
- Lighting: linear LED step lights recessed into railing posts
- Materials: smooth cedar 2x4s with matte black aluminum post caps, cable rail infill for upper section
Horizontal railings changed how I see my own porch—suddenly the space felt intentional, like an outdoor room rather than an afterthought, and I found myself actually sitting out there with coffee instead of just passing through.
Cable Railing for Clean, Modern Lines
Cable railing has exploded in popularity over the last five years.
It’s basically stainless steel cables running horizontally between posts, creating an almost invisible barrier.
I’ll be honest: I was skeptical before I installed a cable railing kit on my upper deck.
The view is unbeatable. You see straight through to the backyard without visual interruption.
Why it’s simpler than you think:


")
")
[…] having these things, it’s about organizing them in a way that doesn’t make you want to pull your hair out by […]