
This post may contain affiliate links. Please see my disclosure policy for details.
The Dirt-Cheap Champions: Vinyl and Steel
Contents
Let me be blunt here. If you want the absolute lowest price tag, vinyl ceiling panels win every single time.
I used vinyl on my first porch renovation because I had roughly $400 to work with. The material laughed at rain, ignored humidity, and still looks decent five years later.
Why vinyl makes sense:
- Lowest upfront cost of any option
- Zero maintenance (seriously, I’ve done nothing to it)
- Water damage? Doesn’t know her
- Installation is straightforward enough for beginners
But here’s the thing nobody tells you: vinyl looks like vinyl. It’s not fooling anyone into thinking it’s wood. If that bothers you, keep reading.

Steel soffit panels sit right next to vinyl in the budget category. They’re tougher than vinyl and resist mold like champions. My neighbor installed steel on his covered porch, and three years later, it still looks factory-fresh.
🌟 Steal This Look
- Paint Color: Sherwin-Williams Tricorn Black SW 6258
- Furniture: polywood Adirondack chair in slate grey
- Lighting: flush-mount outdoor LED disk light in matte black
- Materials: white vinyl beadboard panels, galvanized steel soffit, matte black metal trim
I still drive past that first vinyl porch project and feel zero regret—sometimes the smartest renovation is the one that leaves money in your pocket for the furniture you’ll actually use. These materials taught me that ‘cheap’ and ‘clever’ can absolutely coexist when you stop apologizing for practicality.
Pine Tongue and Groove: The Sweet Spot I Actually Recommend
Here’s where I spent my money on my second porch, and I’d do it again tomorrow.
Pine tongue and groove boards cost around $1,200 for a full project. That’s significantly less than cedar or other premium woods, but you still get actual wood overhead.
I installed mine over a weekend with my somewhat handy brother-in-law. We argued about measurements, drank too much beer, and somehow finished the job.
The pine advantage:
- Real wood warmth and texture
- Takes stain beautifully
- DIY-friendly with basic carpentry skills
- Costs half what cedar would run you
The catch? You’ll need to seal and maintain it. I reapply sealer every two years, which takes about three hours and one afternoon I’d rather spend doing literally anything else.

Three Wood Stain Options That Won’t Cost a Fortune
Once you’ve got wood up there, staining becomes your personality test.
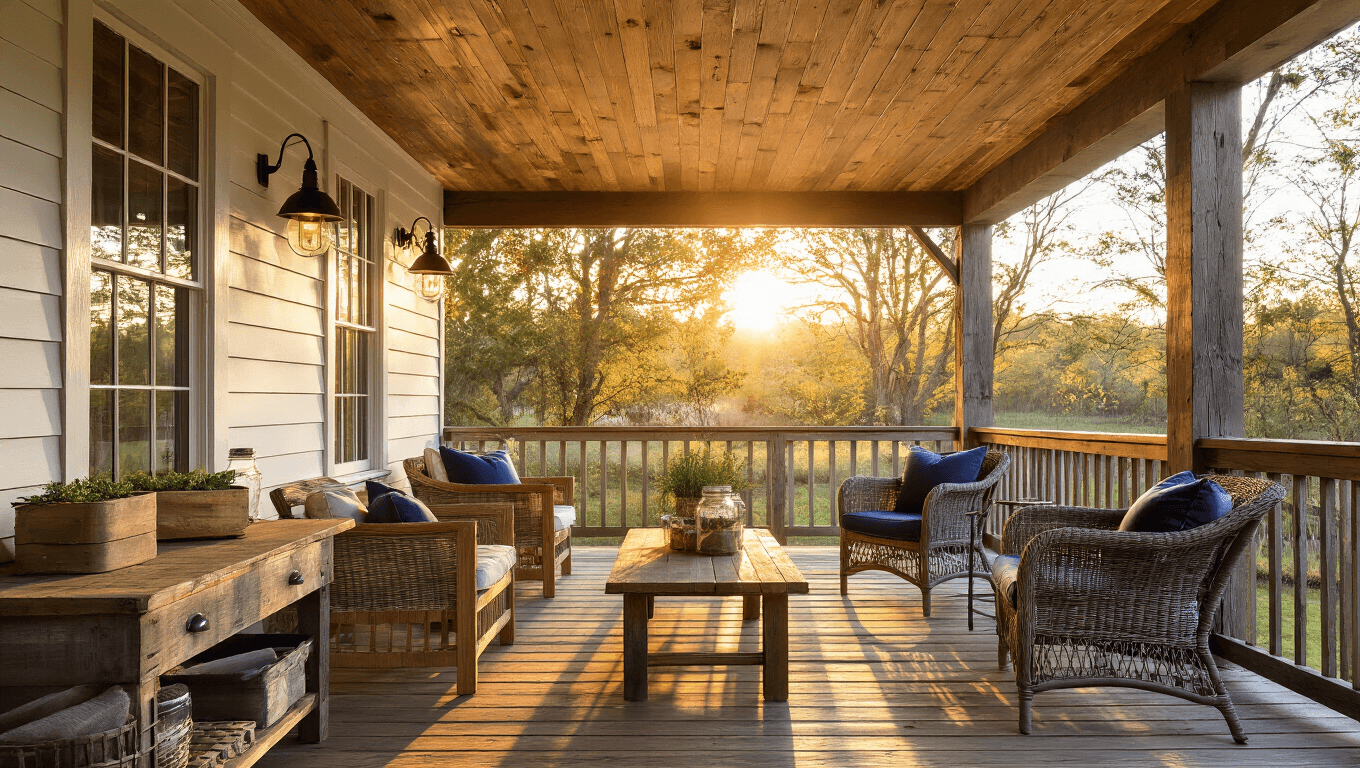
Warm-toned wood stain is what I chose for my main porch. Think honey, amber, golden oak—those mid-range tones that make the space feel like a hug. I used a wood stain in warm honey color, and every single person who visits comments on how cozy it feels. This works year-round and doesn’t argue with any season.
Light-toned wood stain makes small porches feel bigger. My friend Sarah has a tiny 6×8 porch, and she went with a weathered white stain. The ceiling practically doubled the perceived space. If you’re going coastal, farmhouse, or that minimal Scandinavian vibe, this is your move.

Dark-stained wood creates drama I wasn’t brave enough to try. But my across-the-street neighbor went full espresso-stained ceiling, and it looks sophisticated as hell. Works perfectly with modern or craftsman architecture. Bold choice, big payoff.
🏠 Steal This Look
- Paint Color: Benjamin Moore White Dove OC-17
- Furniture: Adirondack rocking chair in unfinished pine
- Lighting: Oil-rubbed bronze outdoor flush mount ceiling light
- Materials: Knotty pine tongue and groove boards, clear satin exterior wood sealer, galvanized finishing nails
There’s something deeply satisfying about looking up at real wood you cut and nailed yourself, even when you’re nursing the blisters and the occasional regret about that third beer.
Alternative Materials That Surprised Me
Fiber cement beadboard is the overachiever nobody talks about at parties.
I discovered this on my third porch project when I was sick of maintenance. It looks like classic cottage beadboard but doesn’t peel, chip, or whine about moisture. Costs more than vinyl but less than quality wood. Lasts longer than both.
Installation is heavier—literally, the panels weigh more—so I needed help. But once it’s up, it’s up for good.

Galvanized roofing panels give you that industrial-farmhouse look.
I’ll admit I was skeptical until I saw this in person at my cousin’s ranch. The corrugated metal ceiling looked intentional and cool, not cheap. She trimmed the edges with cedar to soften the look. Total material cost was under $300 for her 10×12 porch.
💡 Steal This Look
- Paint Color: Farrow & Ball Railings No. 31
- Furniture: weathered teak Adirondack chairs with canvas cushions
- Lighting: galvanized barn pendant with wire cage guard
- Materials: fiber cement beadboard, corrugated galvanized steel, cedar trim boards, matte black fasteners
I still remember the relief of watching rain bead off that fiber cement ceiling instead of soaking in—after years of wood rot anxiety, it felt like cheating.
The DIY Factor That Actually Saves Money
Here’s what nobody tells you about porch ceiling materials: installation labor often costs more than the materials themselves.
I paid $800 in labor for my first vinyl ceiling installation because I was intimidated. The materials cost $350.

When I did the pine tongue and groove myself, I saved roughly $1,000 in labor. Yes, my back hurt for three days. Yes, I watched seventeen YouTube videos first. But my wallet was significantly happier.
Materials ranked by DIY-friendliness:
- Vinyl panels (easiest—they practically snap together)
- Wood tongue and groove (moderate—you need a miter saw and patience)
- Metal panels (easy if pre-cut, annoying if you’re cutting onsite)
- Fiber cement (harder—heavier and requires specific tools)
My Actual Cost Breakdown From Real Projects
Let me give you real numbers from my own porch renovations:
Project 1: Vinyl ceiling (12×10 porch)
- Materials: $350
- Professional installation: $800
- Total: $1,150
Project 2: Pine tongue and groove (10×14 porch)
- Materials: $1,200
- Stain and sealer: $85
- DIY installation: $0 (plus sweat and cursing)
- Total: $1,285
Project 3: Fiber cement beadboard (8×12 porch)
- Materials: $750
- Paint: $40
- Helped by friend for pizza and beer: $45
- Total: $835
<img src=”https://evyvehomes.com/wp-content/uploads/2026/04/4158intimate-scandinavian-porch-white-weathered-ceiling.png” alt=”Intimate 6×8 porch featuring a light weathered white stained wood ceiling, soft morning light filtering through sheer curtains, cozy corner bench with cushions, folding bistro table, wall-mounted planters, minimalist coastal decor, and white
🎨 Steal This Look
- Paint Color: Behr Ultra Pure White PPU18-06
- Furniture: folding sawhorses with rubber tops for cutting station
- Lighting: LED work light with tripod stand
- Materials: pine tongue and groove boards, construction adhesive, pneumatic nailer, miter saw blades
There’s genuine pride in standing under a ceiling you installed yourself, coffee in hand, knowing every crooked nail and perfect joint came from your own two hands.


")
")
[…] talk: Throw pillows are an easy way to add pops of color without breaking the […]