
This post may contain affiliate links. Please see my disclosure policy for details.
DIY Stocking Holders That’ll Make Your Mantel Actually Look Good
Contents
DIY stocking holders saved my Christmas last year when I realized my flimsy store-bought ones couldn’t handle anything heavier than a candy cane.
I’m talking about real stockings here, the kind your grandmother stuffs with everything from oranges to those weirdly heavy bath sets that nobody asked for.

Why Bother Making Your Own Stocking Holders?
Store-bought holders fall into two camps: cheap plastic garbage that tips over if you breathe near it, or overpriced metal ones that cost more than the gifts inside the stockings.
I’ve watched a $30 stocking holder crash to the floor at 2 AM because my partner snuck an extra chocolate bar in there. Not fun.
Making your own means you get:
- Weight distribution you can control
- Personalization that doesn’t look like a Cricut threw up on it
- Something that actually holds a fully-stuffed stocking
- A project that costs less than a fancy coffee
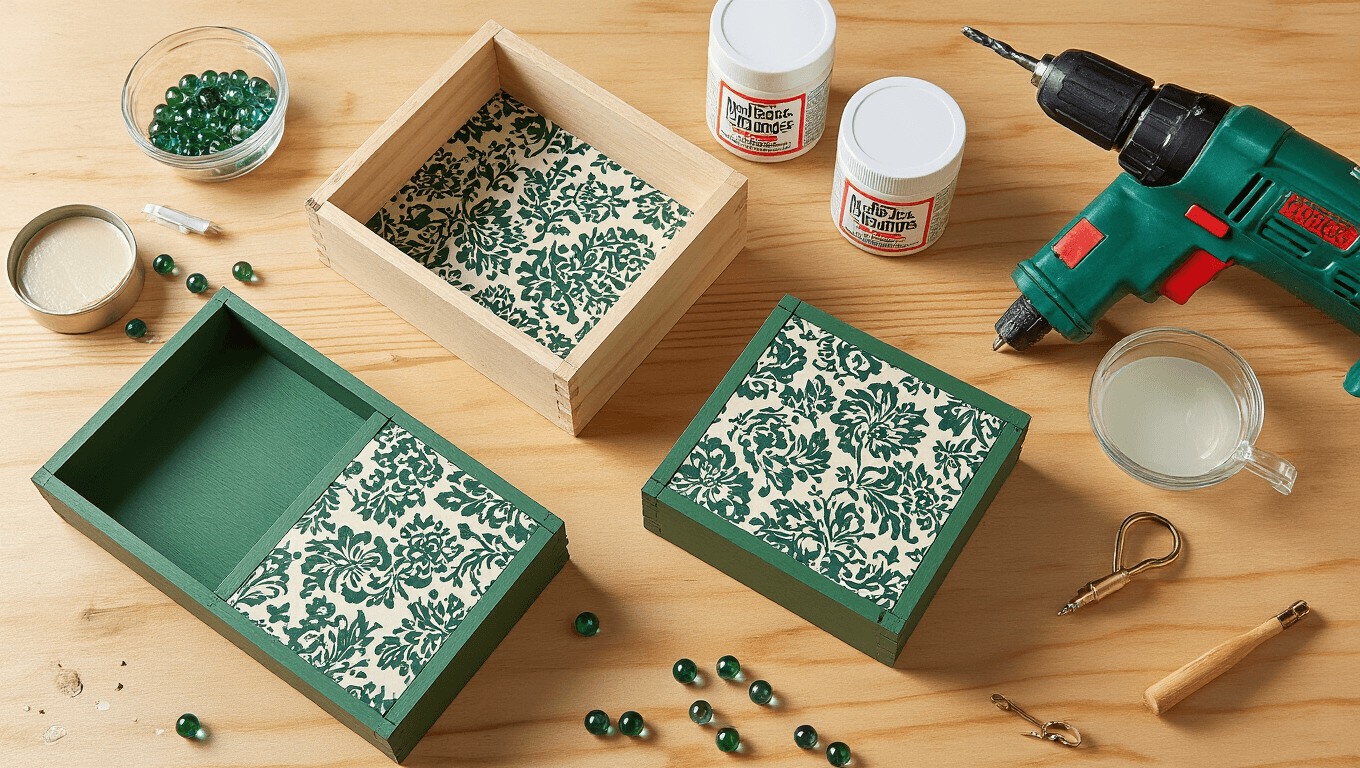
The Dollar Store Wooden Box Method (My Personal Favorite)
I stumbled onto this technique after wandering Dollar Tree looking for wrapping paper and leaving with seven wooden boxes.
These little boxes come with tiny drawers, which means you’re not just making a stocking holder—you’re creating a sneaky spot for small gifts.
Here’s what you need:
- Small wooden boxes with drawers from Dollar Tree (usually $1.25 each)
- Acrylic paint in your color scheme
- Scrapbook paper or holiday stickers
- Mod Podge
- Cup hooks (the kind you screw in)
- Flat-back glass marbles
- Clear epoxy resin (optional but worth it)
- Drill with a small bit
The process:
Paint the box edges and sides first. Let them dry completely—and I mean completely, not “feels dry when I poke it” dry.
Cut your scrapbook paper to fit each visible side of the box. Brush Mod Podge on the box surface, smooth the paper down, then seal with another layer of Mod Podge on top.
This is where it gets smart: drop those flat-back marbles into the bottom of the box. Mix up a small batch of epoxy resin and pour it over the marbles.
The resin does two things. It locks the marbles in place for serious weight (no tipping), and creates a smooth surface inside the drawer so you can actually put stuff in there.
Once everything’s dry and cured, drill a pilot hole in the front center of the box. Screw in your cup hook.
Done.
I made five of these in an afternoon while watching holiday movies, and they’ve held up for two years now. The little drawer is perfect for gift cards, jewelry, or those fancy chocolate truffles you don’t want your kids finding.

The Reindeer Stand Transformation
This one’s almost stupidly easy.
Dollar Tree sells these decorative reindeer stands during the holidays. They’re meant to just sit there looking cute, but with one modification, they become functional stocking holders.
What you’ll need:
- Dollar Tree reindeer stands (wooden base is key)
- Spray paint if you hate the original color
- Faux greenery or garland
- Cup hooks
- Hot glue gun
- Velcro command strips (the heavy-duty ones)
The steps:
Spray paint the wooden base if you’re feeling fancy. I did mine in metallic gold because apparently I have opinions about reindeer aesthetics now.
Let it dry outside because that stuff smells like a chemical factory.
Wrap faux greenery around the base and up the reindeer’s neck. Secure everything with hot glue.
Don’t be stingy here—you want it to stay put when your stocking is loaded with loot.
Screw a cup hook into the wooden base. This is where your stocking hangs.
Here’s the genius part: stick velcro command strips under the base and on your mantel. This prevents the whole thing from doing a nosedive when someone puts a 2-pound candle in their stocking.
I learned this the hard way after my first attempt ended with a reindeer on the floor and my cat having the time of his life batting ornaments around at 3 AM.

No Mantel? No Problem.
Not everyone has a fireplace mantel, and honestly, some mantels are so narrow you’d need stocking holders the size of shot glasses.
The DIY stealth shelf solution:
Grab a piece of wood from the hardware store (or that piece of reclaimed barn wood you’ve been hoarding). Sand it smooth.
Mount curtain rod holders to the underside using wood screws. Space them out based on how many stockings you need.
Install the shelf on your wall at the height you want. The curtain rod holders now face down, giving you perfect hooks for stockings.
From the front, it looks like a simple floating shelf. Sneaky and functional.
The IKEA budget hack:
IKEA’s Betydlig curtain rod holders cost about $0.99 each. Screw them directly into the bottom edge of an existing shelf or bookcase.
That’s it. You’ve got stocking holders for pocket change.
I used this method in my apartment where drilling into the brick fireplace would’ve required tools I don’t own and patience I definitely don’t have.

Making Them Look Less “I Made This at a Church Craft Fair”
The difference between “cute DIY” and “yikes” comes down to finishing touches.
Personalization that doesn’t look desperate:
Skip the glitter. Just trust me on this.
Use small wooden letters from the craft store and stain or paint them to match your box. Glue them on with wood glue, not hot glue that


[…] up the mantel with Pottery Barn candles, framed prints, and soft greenery. This creates a polished focal point […]