
This post may contain affiliate links. Please see my disclosure policy for details.
Creating Stunning Garden Pathways: Your Ultimate Design Guide
Contents
Garden pathways are more than just functional walkways – they’re the storytellers of your outdoor space, guiding visitors through a living canvas of nature and design.

Why Garden Pathways Matter
Every garden needs a heartbeat, and pathways are that rhythmic pulse that connects different areas, creates visual interest, and transforms mundane landscapes into magical journeys.
Key Benefits of Garden Pathways
- Improve Landscape Navigation: Provide clear, easy movement through your garden
- Enhance Visual Appeal: Create structure and design coherence
- Increase Property Value: Professional landscaping boosts home aesthetics
- Define Garden Zones: Separate different garden areas elegantly
✎ Steal This Look
- Paint Color: Sherwin-Williams Ripe Olive SW 6209
- Furniture: weathered teak garden bench with curved backrest positioned at pathway intersection as a contemplative pause point
- Lighting: low-voltage brass path lights with hammered copper shades spaced 6 feet apart along walkway edges
- Materials: reclaimed brick pavers, crushed limestone fines, aged cedar mulch, moss-covered fieldstone edging, corten steel risers for elevation changes
There’s something deeply satisfying about the crunch of gravel underfoot or the way morning light hits a well-worn stone path—garden pathways become the rituals we repeat, the routes that ground us in our own little wilderness.
Choosing the Perfect Pathway Material
Gravel Paths: Budget-Friendly Charm
Pros:
- Affordable
- Easy installation
- Natural, rustic look
- Excellent drainage
Cons:
- Requires regular maintenance
- Can scatter onto surrounding areas

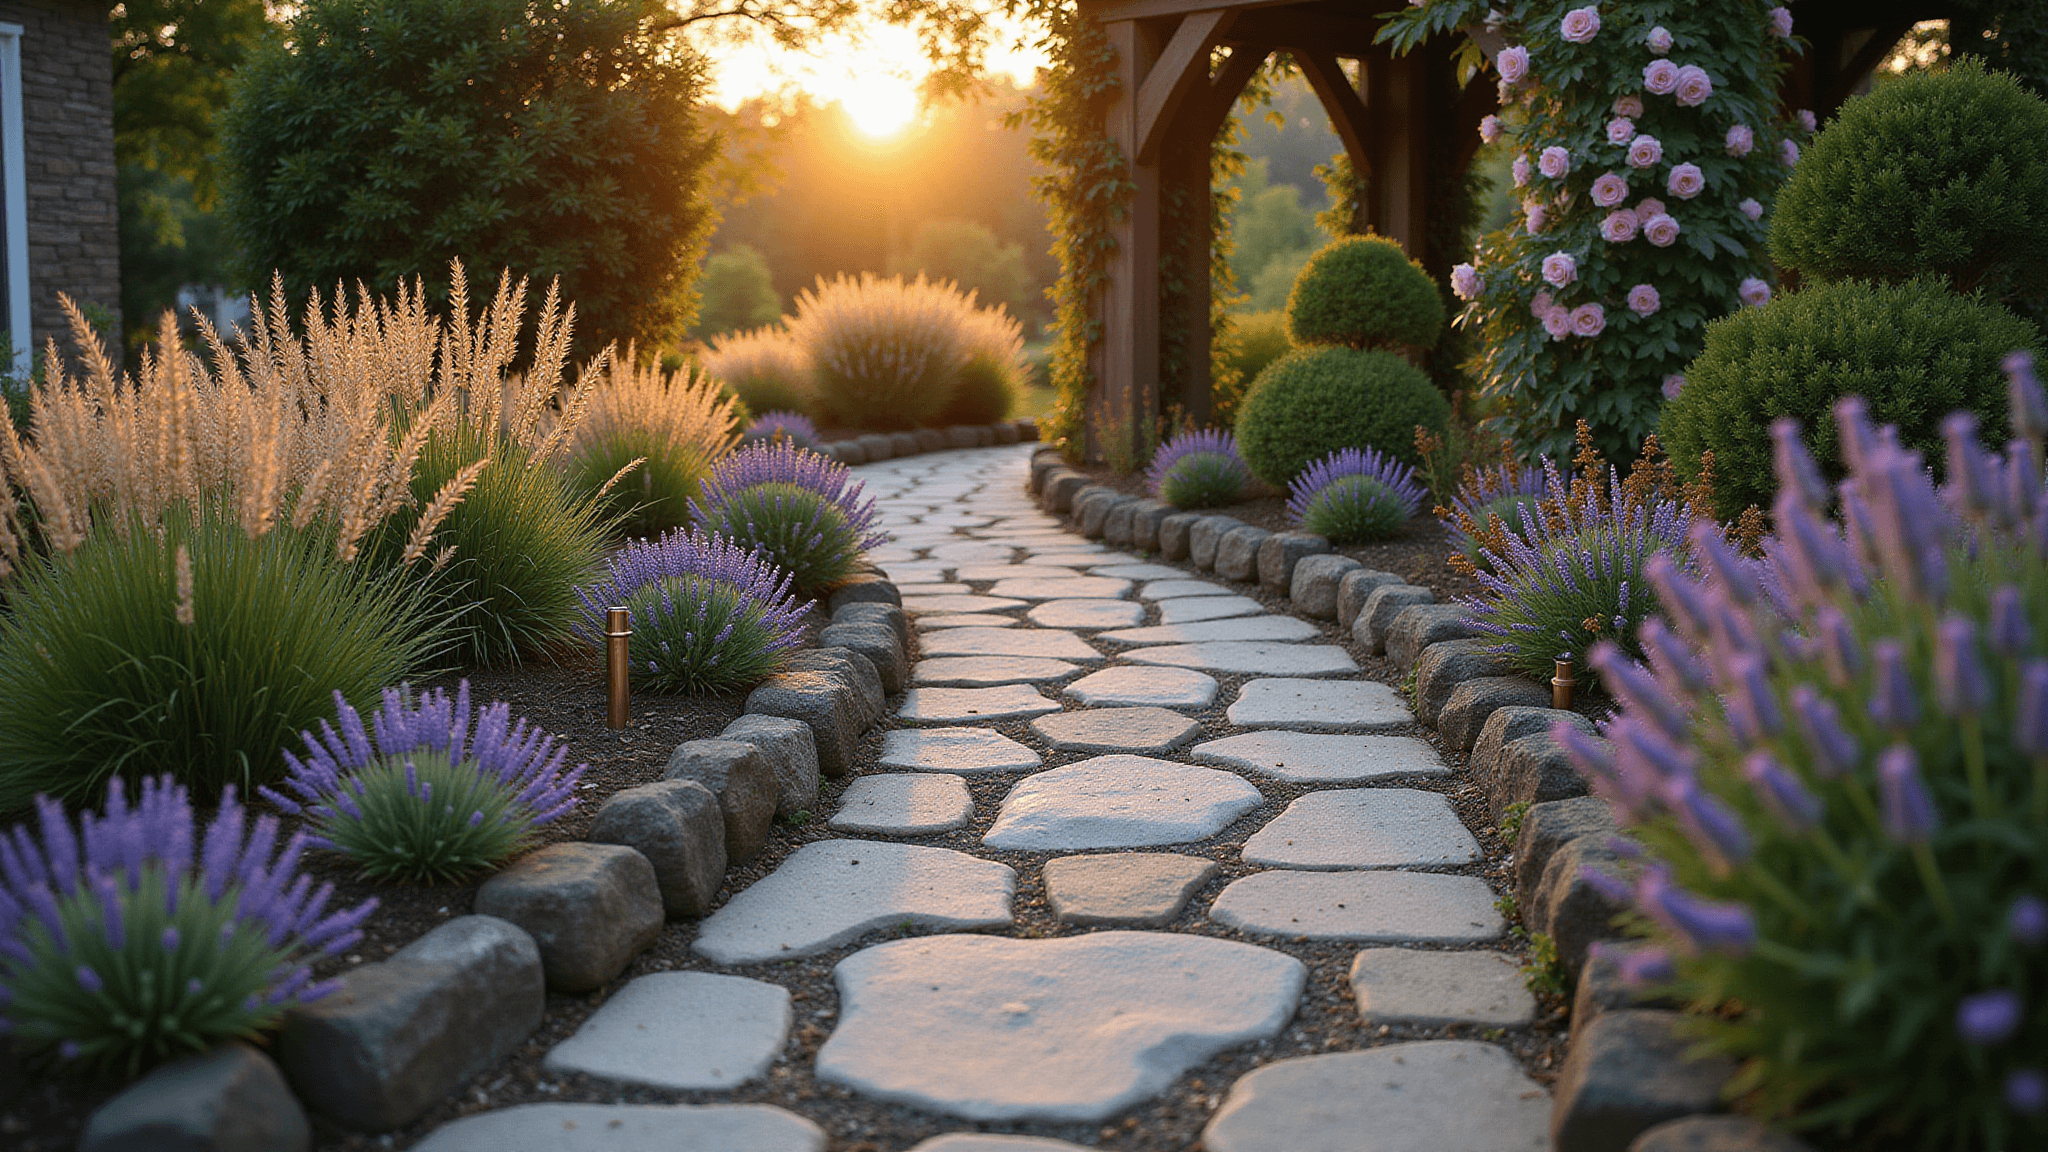
Flagstone Paths: Timeless Elegance
Pros:
- Extremely durable
- Unique, natural appearance
- Multiple color and pattern options
- Adds significant property value
Cons:
- Higher installation cost
- Labor-intensive
- Requires professional skills

Brick Pathways: Classic Sophistication
Pros:
- Traditional, warm aesthetic
- Multiple laying patterns
- Long-lasting
- Complements various architectural styles
Cons:
- Can be expensive
- Potential shifting over time
- Requires precise installation

💡 Steal This Look
- Paint Color: Benjamin Moore Garden Cucumber 644
- Furniture: weathered teak garden bench with curved backrest positioned as a pathway destination point
- Lighting: low-voltage brass path lights with hammered glass shades spaced every 6-8 feet along walkway edges
- Materials: crushed pea gravel with limestone dust binder, irregular Pennsylvania bluestone slabs, reclaimed brick with moss-filled joints, corten steel edging strips
I’ve walked thousands of garden paths over fifteen years in this industry, and the ones that age beautifully almost always mix at least two materials—it’s the material transition that creates those moments of pause and discovery that make a garden feel lived-in rather than installed.
Design Principles for Stunning Pathways
1. Follow Natural Movement
Design paths that feel intuitive – mimic how people naturally walk through spaces.
2. Consider Curves and Flow
- Gentle curves create visual interest
- Avoid sharp, unnatural angles
- Let the path feel like a natural extension of the landscape
3. Width Matters
- Main paths: 4-5 feet wide
- Secondary paths: 2-3 feet wide
- Ensure comfortable walking space

🌟 Steal This Look
- Paint Color: Farrow & Ball Green Smoke 47
- Furniture: weathered teak garden bench with curved backrest positioned at pathway curve for contemplative rest
- Lighting: low-voltage brass path lights with amber LED, spaced 6-8 feet apart along curve edges
- Materials: reclaimed Yorkstone pavers with wide joints filled with creeping thyme; aged corten steel edging strips
There’s something quietly satisfying about a path that slows your step without you noticing—the best gardens teach your body to linger.
Budget-Friendly Path Creation Tips
Low-Cost Options:
- Mulch paths
- Grass/clover walkways
- Recycled material stepping stones
- DIY gravel installation
Cost-Saving Strategies:
- Source materials locally
- Use reclaimed stones/bricks
- Do partial DIY, hire professionals for complex sections
- Plan and purchase materials during off-season sales

🏠 Steal This Look
- Paint Color: Behr Garden Path S-H-520
- Furniture: weathered teak garden bench with curved backrest
- Lighting: solar-powered copper finish path lights with warm 2700K output
- Materials: cedar mulch, crushed limestone gravel, reclaimed clay brick fragments, decomposed granite
There’s something deeply satisfying about building a garden path with your own hands—start small with a weekend mulch trail and let it evolve as your confidence grows.
Maintenance Considerations
Regular Care Checklist
- Remove weeds
- Replenish gravel/mulch
- Reset shifted stones
- Clean and repair edges
- Check for drainage issues

🎨 Steal This Look
- Paint Color: Valspar Garden Path V109-3
- Furniture: weathered teak garden bench with slatted seat
- Lighting: low-voltage brass path light with hammered glass shade
- Materials: crushed limestone gravel, reclaimed brick pavers, cedar mulch, galvanized steel edging
There’s something deeply satisfying about a well-tended garden path—it’s the difference between a space that feels abandoned versus one that invites you to slow down and notice what’s blooming.
🎁 Get The Look
Common Pathway Mistakes to Avoid
- Ignoring natural landscape contours
- Choosing style over functionality
- Neglecting proper base preparation
- Forgetting about drainage
- Overcrowding with unnecessary decorations
Final Pathway Design Inspiration
Transform your garden from ordinary to extraordinary by treating pathways as artistic expressions, not just functional necessities.
Remember: A well-designed path doesn’t just connect points – it tells a story, invites exploration, and turns your garden into a living, breathing masterpiece.
Pro Tip: Take inspiration from your home’s architectural style and surrounding landscape. The most stunning pathways feel like natural extensions of their environment.
Happy path designing!


—Here's How You Can Too")
")
[…] Create clear exit pathways […]