This post may contain affiliate links. Please see my disclosure policy for details.
How to Paint Kitchen Cabinets Like a Pro: Transform Your Space on a Budget
Contents
Tired of staring at outdated kitchen cabinets but dreading the cost of replacement? I’ve been there. Painting your kitchen cabinets is the ultimate budget-friendly makeover that can completely transform your space without breaking the bank.
Why Paint Your Kitchen Cabinets?
Let’s cut to the chase. Painting kitchen cabinets can:
- Save thousands compared to full cabinet replacement
- Completely refresh your kitchen’s look
- Give you a custom design without custom prices
- Increase your home’s value with a professional-looking upgrade

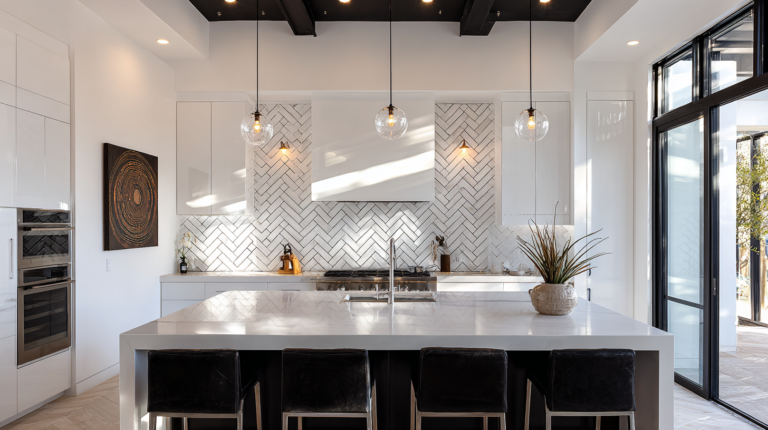
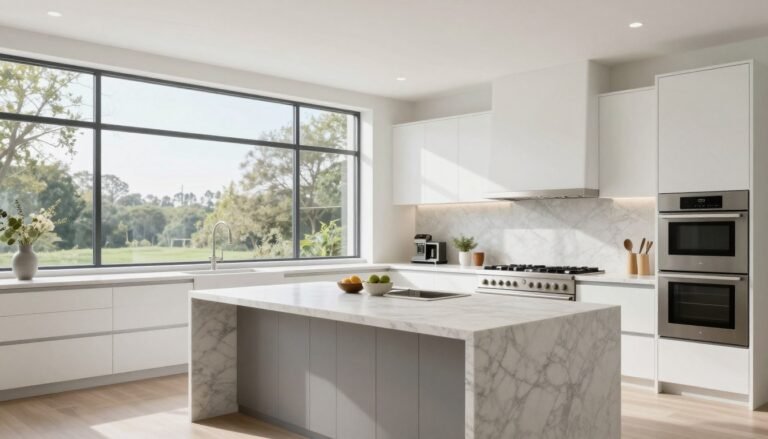
🌟 Steal This Look
- Paint Color: Benjamin Moore Advance Kitchen & Bath 2X CC-20 Linen White
- Furniture: Shaker-style kitchen cabinets with clean lines, suitable for repainting
- Lighting: Recessed LED downlights or pendant lights above kitchen island for task lighting
- Materials: Cabinet-grade primer, semi-gloss or satin finish paint, brushed nickel or matte black cabinet hardware
Cabinet painting is the smart homeowner’s shortcut to a kitchen that looks designer-fresh without the designer price tag. It’s the single highest-ROI kitchen upgrade you can tackle yourself or hire out.
What You’ll Need: Your Cabinet Painting Survival Kit
Essential Tools and Materials:
- Screwdriver
- Sandpaper (120-220 grit)
- Primer
- High-quality cabinet paint
- Paint brushes and foam rollers
- Degreaser
- Drop cloths
- Safety gear (gloves, mask, eye protection)
The Step-by-Step Cabinet Transformation
Prep Work: The Make-or-Break Stage
Cleaning is Everything
Kitchen cabinets are grease magnets. Before anything else:
- Remove all hardware
- Deep clean with a heavy-duty degreaser
- Sand surfaces lightly to create paint grip
- Wipe down with a tack cloth to remove dust
Pro Tip: Label your cabinet doors and hardware! Trust me, you’ll thank yourself later when reassembling.

Priming: Your Paint’s Best Friend
- Choose a primer specific to your cabinet material
- Apply thin, even coats
- Let each coat dry completely
- Lightly sand between primer coats for ultimate smoothness
Painting: Where the Magic Happens
Technique is Key
- Use high-quality enamel paint designed for cabinets
- Apply multiple thin coats instead of one thick coat
- Use an angled brush for details, foam roller for flat surfaces
- Allow proper drying time between coats
Paint Finish Recommendations:
- Semi-gloss: Easy to clean, subtle shine
- Satin: Soft, modern look
- Avoid flat finishes – they’re a cleaning nightmare in kitchens

Final Touches
- Let paint fully cure (7-10 days)
- Reattach hardware carefully
- Step back and admire your work!
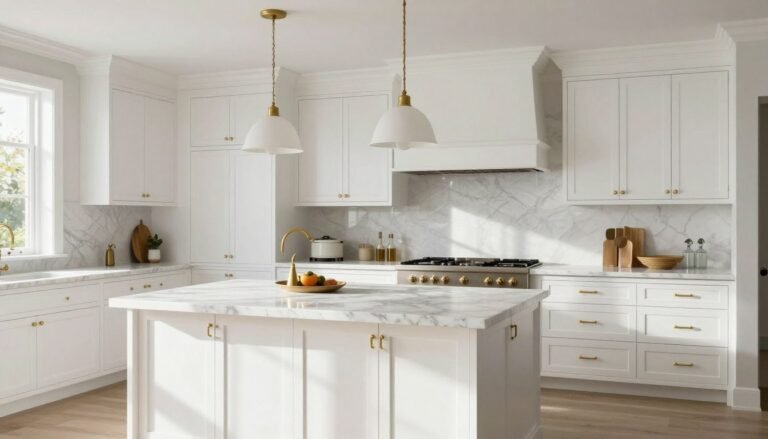
★ Steal This Look
- Paint Color: Behr Pro Classic Semi-Gloss CLASSIC WHITE 50
- Furniture: Kitchen cabinet doors and frames (wood or laminate construction)
- Lighting: Under-cabinet LED strip lighting for task visibility during prep and painting
- Materials: Wood grain cabinet substrate, semi-gloss enamel finish for durability and cleanability
Kitchen cabinet painting is the highest-ROI DIY project you can tackle—the prep work feels tedious but transforms a tired kitchen into something custom-designed without the custom price tag. Getting the degreasing and primer stages right separates a paint job that looks handmade from one that looks professionally refinished.
Common Mistakes to Avoid
- 🚫 Don’t rush the process
- 🚫 Skip proper cleaning and sanding
- 🚫 Use cheap paint or tools
- 🚫 Forget to ventilate your workspace

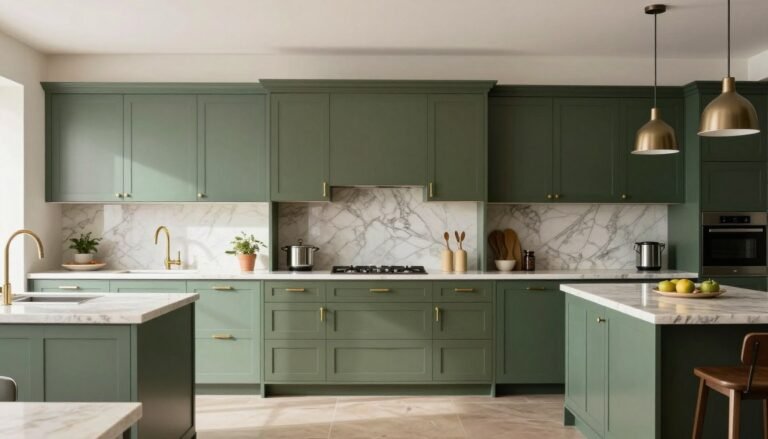
✎ Steal This Look
- Paint Color: Valspar Cabinet & Trim Paint #4006-2C (semi-gloss finish recommended for kitchen cabinets)
- Furniture: Kitchen cabinets (existing cabinetry being refinished)
- Lighting: Under-cabinet LED lighting to inspect work during painting process
- Materials: High-quality cabinet paint, sanded surfaces, primer, semi-gloss or satin finish
Cabinet painting is a marathon, not a sprint. Rushing leads to dust in wet paint, uneven strokes, and regret. Take your time with prep work—the actual painting is the easy part.
Cost Breakdown
Estimated Costs:
- Professional cabinet painting: $2,000 – $5,000
- DIY cabinet painting: $200 – $600
- Potential home value increase: 5-10%
Time Investment
- Preparation: 1-2 days
- Priming: 1 day
- Painting: 2-3 days
- Curing: 7-10 days

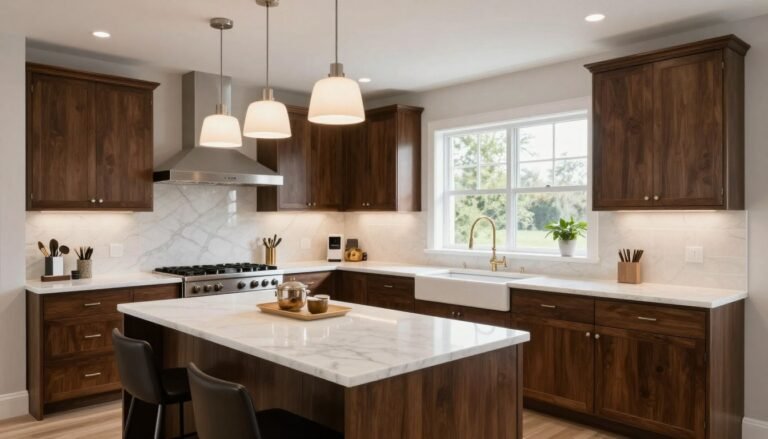
✎ Steal This Look
- Paint Color: Dunn-Edwards Eggshell finish for kitchen cabinets – provides durability and wipeable surface. Recommend DE6307 Swiss Coffee for classic neutral kitchen cabinetry or DE6321 Crisp Linen for fresh, clean aesthetic
- Furniture: Not applicable to cabinet painting project
- Lighting: Task lighting or under-cabinet LED strips to illuminate workspace during multi-day painting project
- Materials: Cabinet-grade primer, high-quality paintbrush set, paint tray liners, tack cloth, sandpaper (120-150 grit), drop cloths
Cabinet painting is deceptively time-intensive, but breaking it into manageable daily chunks makes it achievable for most DIYers. The waiting pays off—properly cured cabinets will last 5-7 years before needing touch-ups.
When to Call a Professional
Consider hiring a pro if:
- You have complex cabinet designs
- Limited time or DIY skills
- Cabinets require extensive repair
Final Thoughts
Painting kitchen cabinets isn’t just a home improvement project – it’s a transformation. With patience, the right tools, and attention to detail, you can achieve a magazine-worthy kitchen without the hefty price tag.

Remember: The difference between a DIY disaster and a professional-looking finish is in the preparation and technique.
Ready to breathe new life into your kitchen? Let’s do this!