
This post may contain affiliate links. Please see my disclosure policy for details.
Creating the Perfect Pea Gravel Fire Pit Area: Your Ultimate DIY Guide
Contents
Hey there, outdoor enthusiasts! Ready to transform your backyard into a cozy gathering spot? Let’s dive into the world of pea gravel fire pit areas – the secret weapon for creating an amazing outdoor space without breaking the bank.

💡 Steal This Look
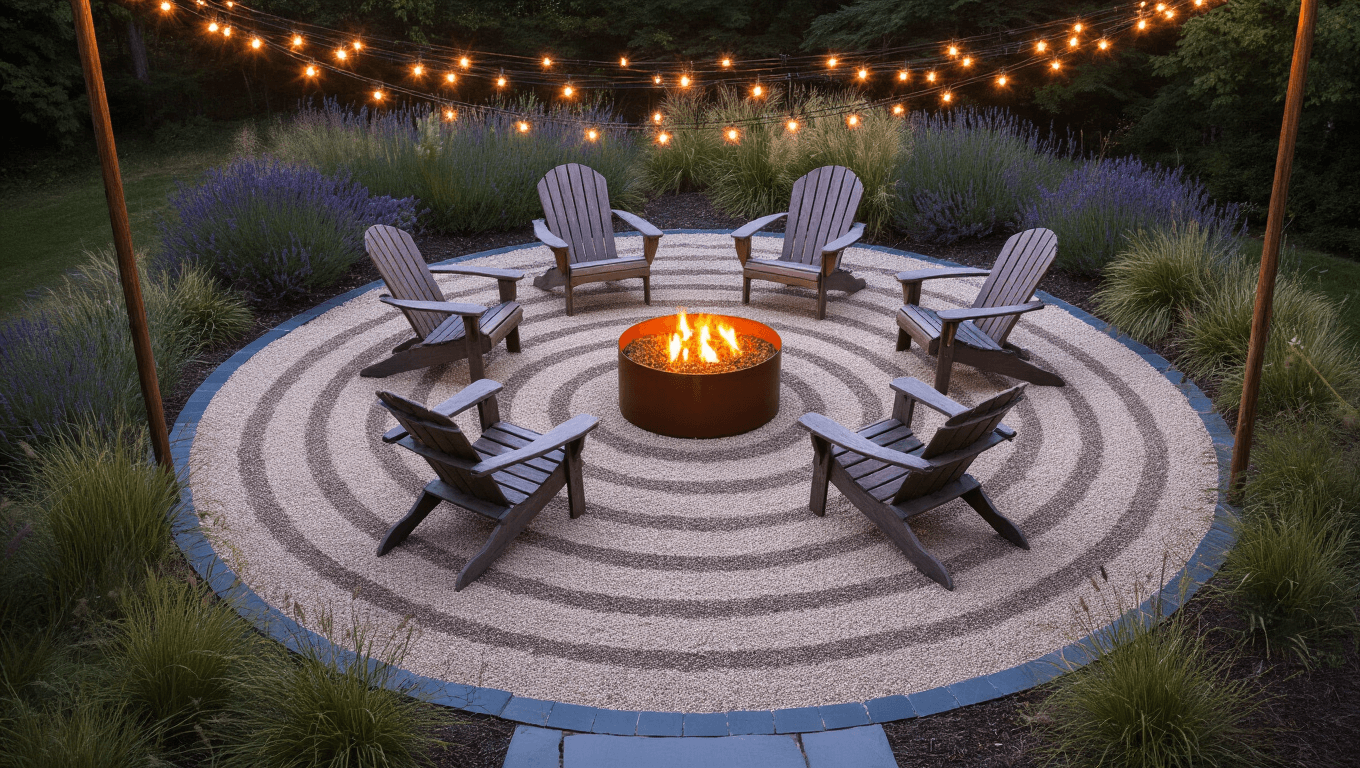
- Paint Color: Sherwin-Williams Urbane Bronze SW 7048
- Furniture: Adirondack chairs in weathered gray teak or poly lumber, low-slung rope lounge chairs with rust-resistant aluminum frames
- Lighting: String lights with Edison bulbs suspended on galvanized steel guide wire between posts, solar-powered pathway lights with warm 2700K output embedded in gravel perimeter
- Materials: 3/8-inch natural river rock pea gravel in mixed gray-tan blend, steel retaining edging with powder-coated black finish, heat-resistant lava rock for fire pit interior, cedar or corten steel fire pit ring
This is the backyard project that finally gets everyone off their phones—there’s something primal about gathering around a fire that turns neighbors into friends and Tuesday nights into memories.
✅ Get The Look
Why Pea Gravel is Your Backyard’s Best Friend
Picture this: A beautiful outdoor space that’s affordable, low-maintenance, and drop-dead gorgeous. That’s exactly what a pea gravel fire pit area offers you.
The Magic of Pea Gravel: Benefits That’ll Blow Your Mind
- Looks Like a Million Bucks: Soft, natural appearance that makes your yard Instagram-worthy
- Wallet-Friendly: Costs way less than concrete or fancy pavers
- Easy Peasy Maintenance: Just a quick rake now and then keeps it looking fresh
- Safety First: Non-flammable surface that prevents fire spread

✎ Steal This Look
- Paint Color: Benjamin Moore Kendall Charcoal HC-166
- Furniture: weathered teak Adirondack chairs with wide arms for drink resting
- Lighting: string lights with Edison bulbs suspended between two wooden posts
- Materials: smooth multitone pea gravel in gray-blue tones, corten steel fire ring, unfinished cedar post caps
There’s something deeply satisfying about the crunch underfoot when friends arrive; it signals that work is done and the evening is officially yours.
Your Step-by-Step DIY Fire Pit Paradise
1. Location, Location, Location
- Keep it at least 10 feet from buildings
- Avoid overhanging trees
- Check local fire safety regulations
2. Prep Work: The Foundation of Greatness
- Clear the area completely
- Level the ground
- Dig down 2-3 inches

3. Weed Block Magic
Install landscape fabric to keep those pesky weeds at bay. Pro tip: Use sturdy staples to secure it.
4. Border Patrol
Create a defined edge using:
- Natural stone
- Brick
- Metal edging

5. Gravel Time!
- Pour pea gravel 2-3 inches deep
- Rake for a smooth, even surface
- Pro hack: Consider a crushed limestone base for extra stability
6. Fire Pit Installation
- Center your fire pit
- Ensure it’s completely level
- Double-check safety distances

★ Steal This Look
- Paint Color: Farrow & Ball Green Smoke 47
- Furniture: weathered teak Adirondack chairs with wide arms for drink resting
- Lighting: string lights with Edison bulbs suspended between galvanized steel poles
- Materials: rustic limestone boulders, galvanized steel edging, natural cedar logs, woven outdoor jute rugs
There’s something deeply satisfying about building this space with your own hands; the gravel crunch underfoot becomes a sensory reminder of summer nights that stretch past midnight with people you love.
✅ Get The Look
Critical Safety Warning ⚠️
NEVER put pea gravel INSIDE the fire pit. Moisture can cause stones to crack or even explode when heated!
Maintenance Made Simple
- Rake occasionally to keep surfaces even
- Top up gravel as needed
- Remove debris regularly

🖼 Steal This Look
- Paint Color: Valspar Garden Party 6002-9A
- Furniture: weathered teak Adirondack chairs with wide arms for drink resting
- Lighting: solar-powered copper path lights with warm 2700K output
- Materials: natural pea stone, crushed granite edging, cedar mulch beds
There’s something deeply satisfying about the ritual of raking your fire pit area on a crisp Saturday morning—it’s meditative, purposeful, and keeps your outdoor room looking intentionally designed rather than neglected.
👑 Get The Look
Style It Like a Pro
Dress up your space with:
- Wooden seating
- Metal accent pieces
- Landscape lighting
- Cozy outdoor throw pillows

✎ Steal This Look
- Paint Color: PPG Stonehenge Greige PPG1001-4
- Furniture: low-slung acacia wood Adirondack chairs with wide arms
- Lighting: black powder-coated steel bollard path lights with warm 2700K LED
- Materials: raw cedar planks, weathered corten steel, loose 3/8-inch river stone pea gravel, chunky knit acrylic throws
This is the backyard setup where you’ll actually want to linger past sunset, gravel crunching underfoot as the fire dies down to embers.
Gravel Quantities: Math Made Easy
- 20-foot round area (2.5 inches deep): About 2.5 cubic yards of gravel
- 16×16 foot area (4 inches deep): Roughly 4.5 tons of gravel
The Bottom Line
A pea gravel fire pit area is your ticket to backyard bliss. It’s affordable, beautiful, and something you can totally tackle in a weekend.
Pro Tip: Grab some marshmallows, invite your friends, and enjoy your stunning new outdoor space!


—Here's How You Can Too")
[…] Create seating areas […]
For a pea gravel fire pit area, the depth and edging notes matter more than people expect. I would estimate the seating area and walking edge separately before ordering so a small depth change does not throw off the cubic-yard total.